Ice levels are a staple of videogame culture. Like the classic fire levels and water temples of the gaming world, ice mechanics are universally loved by gamers everywhere. But there are many ways to render ice, and today, we’re going to see a cheap - but effective - way to fake ice refraction using simple trickery.
This tutorial is aimed at people who have at least some experience with Shader Graph. We are using Unity 2019.4 and URP 7.3.1.
Setting Up
As with many of these tutorials, make sure you are using URP by starting a fresh project with the URP template, or by adding it and Shader Graph to your project via the Package Manager. For this effect, we will primarily be making use of a node called Scene Color. We’ll need to allow Shader Graph to use the scene color texture, so before we do anything else, locate your render pipeline asset (which is most easily accessible through Project Settings -> Graphics -> Scriptable Render Pipeline Settings) and check the boxes labelled Opaque Texture and Depth Texture.
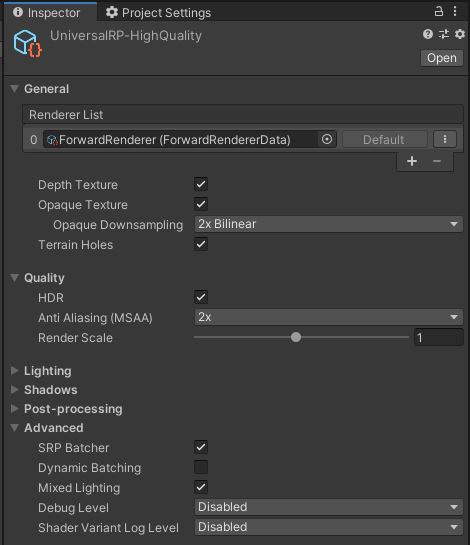 Here are the settings I’m using. Just ensure the Depth/Opaque textures are enabled.
I’m using an ice texture from CC0Textures.com for this effect. This website is a great resource for textures if you need one for your projects, so I’d highly recommend it, especially since all textures on the site use a Creative Commons CC0 License - they are free to use in your commercial projects. I end up using the displacement map from this texture bundle.
 CC0Textures is a treasure trove of incredible textures, freely available for commercial use.
And of course, we’ll need to create the new shader by right-clicking in the Project window and selecting Create -> Shader - > PBR Graph, and naming it “Ice”. With setup out of the way, let’s start making the shader.
The Ice Refraction Shader
The first thing we’ll do is read the ice texture and convert its colors into normal vector data, which will determine how strongly the ice refracts the light at each point. Start off by adding a Texture2D property named Ice Normals, with its Mode set to Bump and the default texture set to the displacement texture we downloaded. To control how many times the texture gets tiled across the mesh, also add a Vector2 property called Ice Tiling, with its default value set to (1, 1).
 The Ice Normals texture detemines how strong the light refraction is at each point.
Now we can drag the Ice Normals texture onto the graph, and from that, drag out a Normal From Texture node, which generates a normal map from our greyscale texture. To use the Ice Tiling property, we’ll add a Tiling and Offset node and plug that into the UV slot, then plug Ice Tiling into the Tiling slot. We can leave everything else alone, and we now have a group of nodes that output a displacement vector based on the texture.
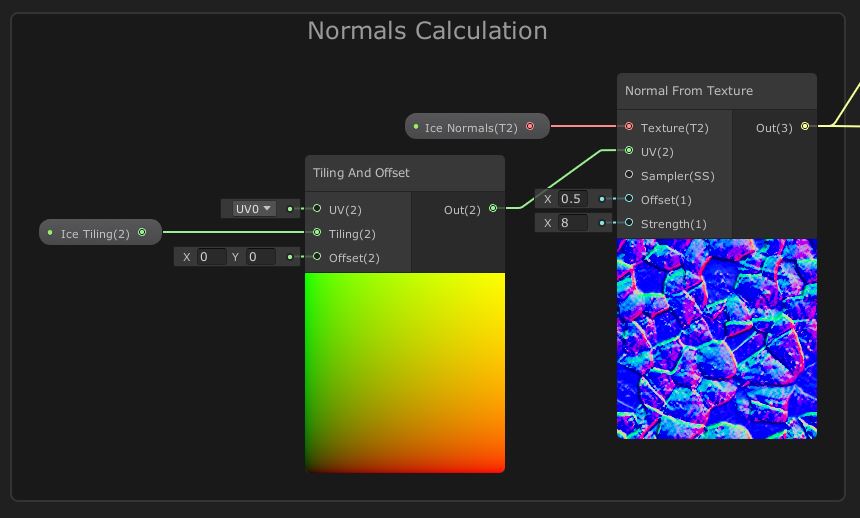 This group of nodes will let us offset based on the ice texture.
Now we will use those normals to approximate light refraction through the ice mesh. Add a new Vector1 property called Refract Strength to define how strongly the light refraction is, and make it a slider between -1 and 1. When the value is negative, it’ll make the refraction happen in the other direction, so you could set the range to between 0 and 1 if you don’t care about that. We will base the refraction on whatever’s already been rendered behind the ice, and for that, we will use a Scene Color node, so add one to your graph. The Scene Color node takes UVs in screen space, so we will use a Screen Position node, then we will Multiply the normal vectors we calculated previously by Refract Strength, and add those to the Screen Position. Use the output of the multiplication for the Scene Color node.
 The output so far should give us the distorted scene color.
So far, the output should return the pixels rendered behind the ice, distorted slightly. However, even if we were to plug this into Albedo on the PBR Master node, we’d just see black right now. That’s because we’re using opaque rendering, which means the scene texture - which Scene Color reads from - doesn’t contain anything so far. Click the cog drop-down menu on PBR Master and change the Surface option to Transparent; all transparent materials are drawn after all opaque ones, so the scene texture will now contain whatever opaque objects were drawn behind the ice.
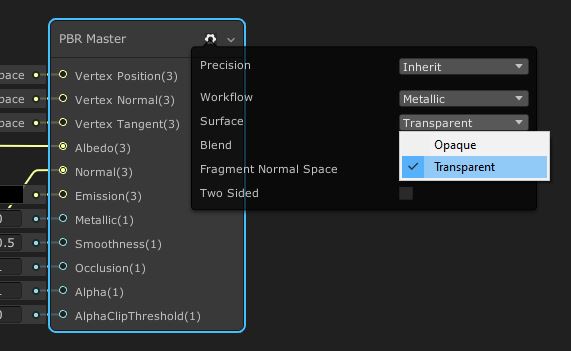 With this option set to transparent, our refraction code will work properly.
Now we’ll work on selling the ice aesthetic more effectively by tinting it blue. Create a Color property called Ice Color, and set it to HDR mode so we can boost the intensity.
 Setting the Ice Color to HDR lets us artifically boost its luminance to make the ice extra reflective.
We’ll insert a Multiply node between Scene Color and Albedo to multiply everything we’ve added so far by Ice Color.
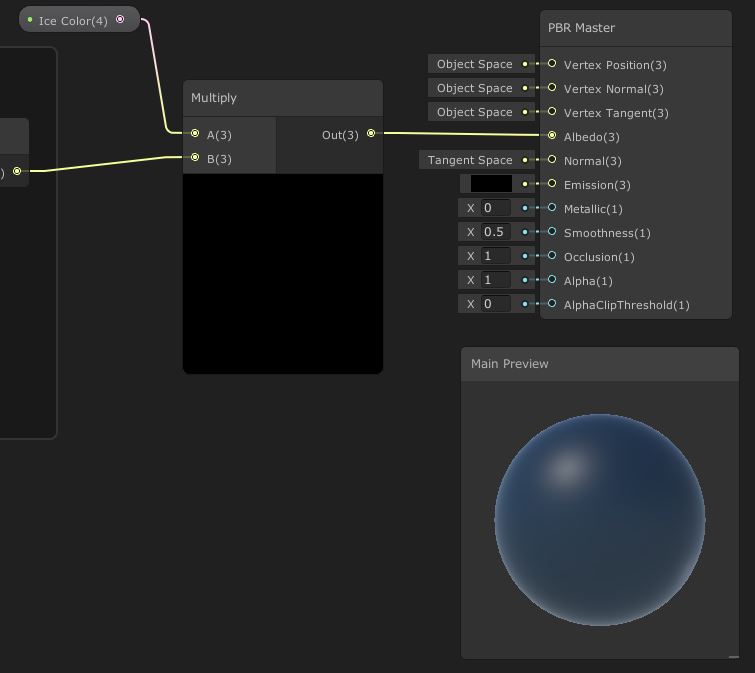 Now the ice has a blue tint.
Finally, ice has a very reflective appearence when viewed from a shallow angle. When we want to introduce this kind of effect, we’re thinking of fresnel lighting. Add a new Vector1 property called Fresnel Strength, and make it a slider between 0.0001 and 1, with a default of around 0.2 (the way we’ll build this shader would break if this property equals zero). Unity provides a Fresnel Effect node already, so we’re going to add one to the graph, then we’re going to take the Reciprocal of the Fresnel Strength property and use that for the Power pin. Once we’ve connected all of those, we can Add the fresnel to the output from the Multiply just before the Albedo pin on PBR Master.
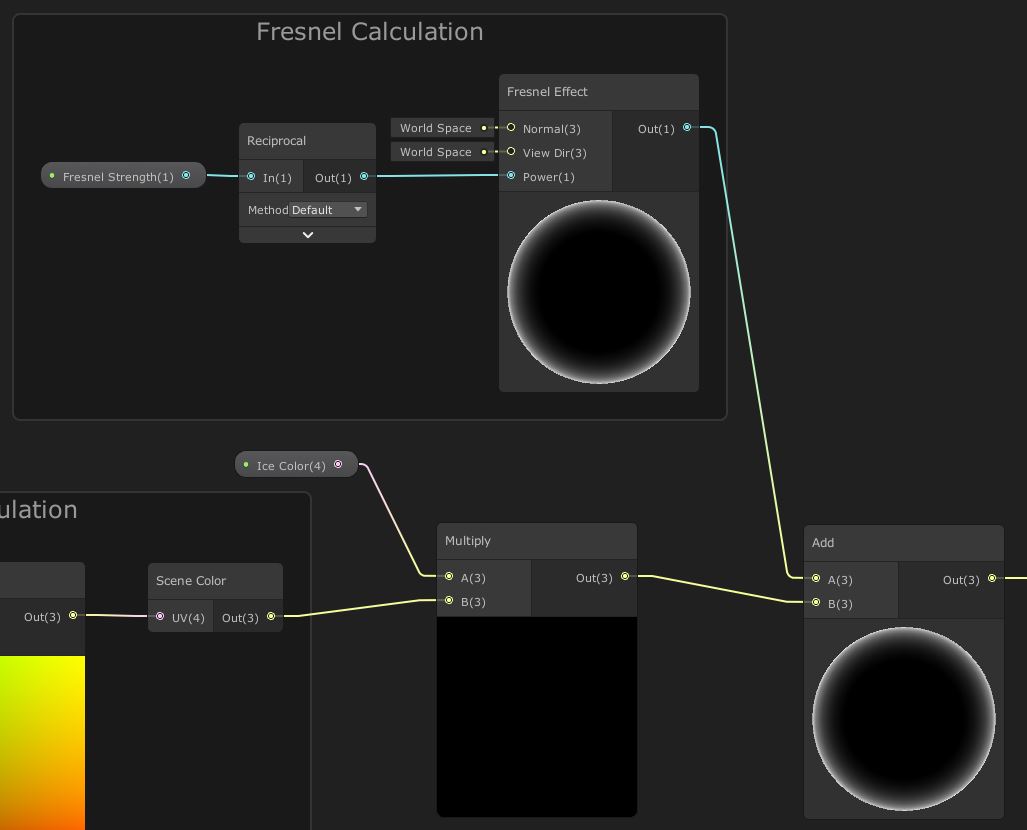 Fresnel is a powerful effect for making your shaders slightly more effective.
Finally, we can take the output from the Normal From Texture node we added right near the start and connect it to the PBR Master node’s Normal pin. This might look a bit messy with wires crossing over the entire graph, so a trick I like to use is to add an extra Preview node to redirect the wires; Preview just shows you what the shader looks like up until that point.
 We can use Preview nodes in our graph to see what everything looks like at that point.
Back in our game, if we apply this shader to a material, place that on an object, and very slightly raise the Refraction Strength, we will start to see the objects behind the ice distort, just like we want them to.
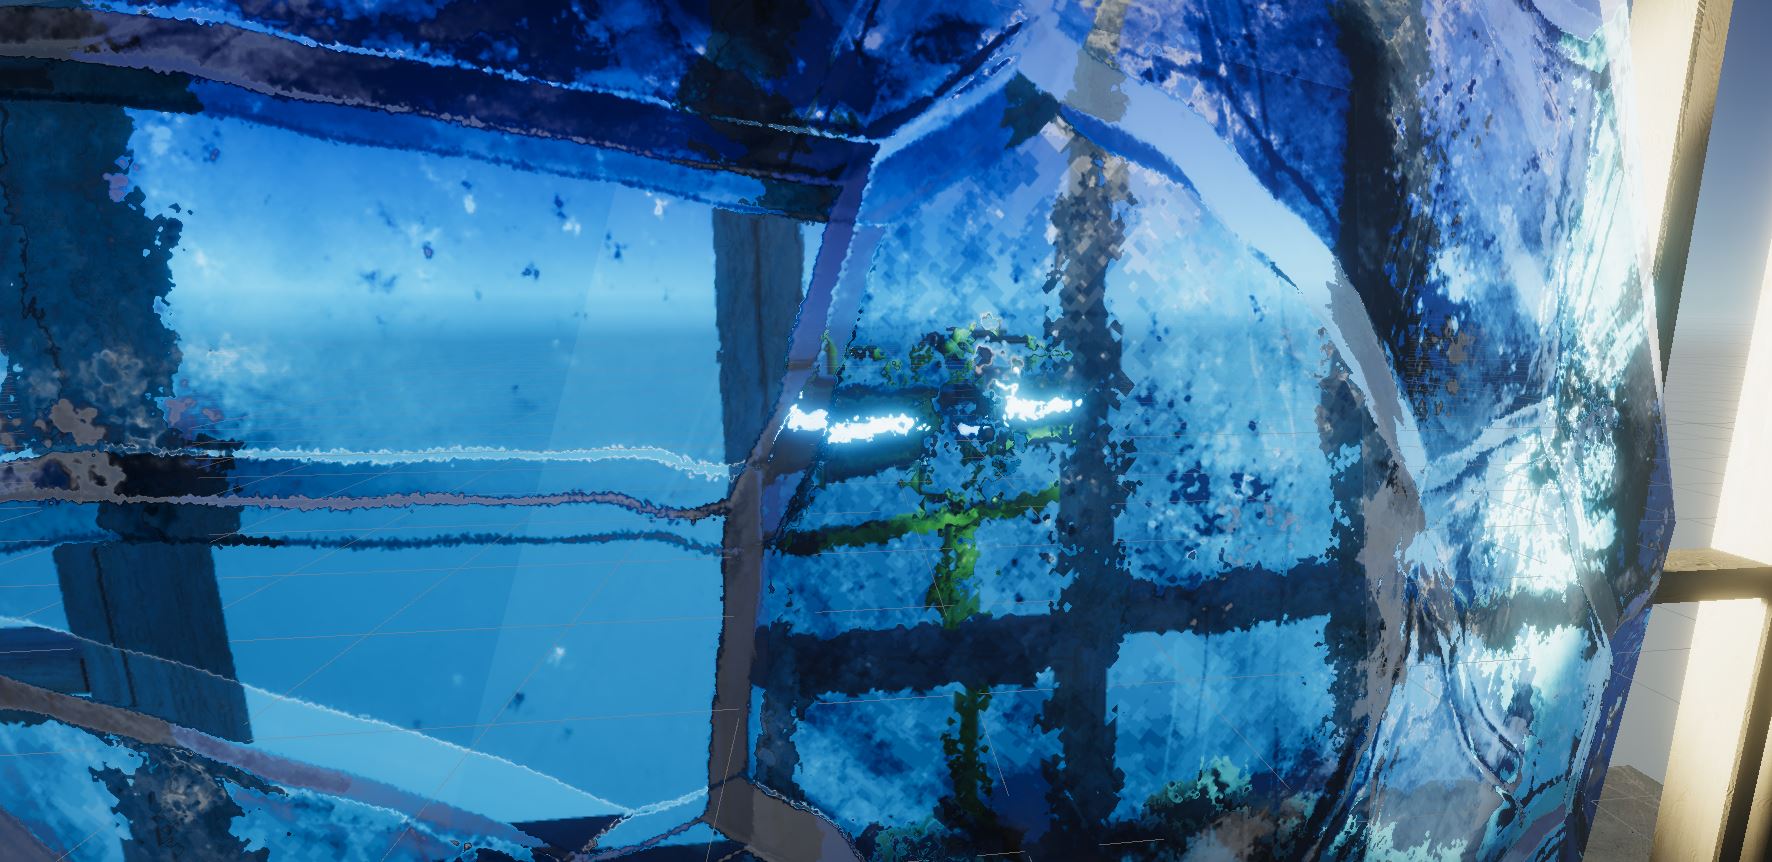 The strength of the refraction at each point is based on the color of the ice texture.
Conclusions
There’s no need to accurately model the path light takes as it refracts through the ice when an approximation is convincing enough, and far cheaper to render. By playing with the scene texture partway through the rendering process, we can obtain a great-looking ice effect which is appropriate for use on a wide range of devices.