In real life, glitter gets everywhere, and you’ll be fighting to get it out of your carpets for ages. Sometimes, we want objects in our games to look glittery and sparkly - in this tutorial, we’ll be using Shader Graph to do just that. And, luckily, our virtual carpets will stay glitter-free.
This tutorial is aimed at people who have a bit of experience with Shader Graph. We are using Unity 2020.3.2f1 and URP/Shader Graph 10.4.0.
Glittery Objects
The approach we’ll take is to generate a random direction at every point on the surface of our object. Depending on the angle between the camera’s view direction and those random surface directions, that point on the surface might shine - and if we generated a good noise pattern to begin with, then the object will look glittery! We’ll stick some Fresnel light around the edges, add a soft color gradient within the object, and that’s our glitter shader done.
I started off by right-clicking in the Project View and selecting Create -> Shader -> Universal Render Pipeline -> Lit Shader Graph - as usual, different versions of URP will put this roughly in the same place, but it might be called PBR Graph. I also generated a noise cloud texture ahead of time in GIMP for the random directions. Most image programs will have this kind of functionality, but in GIMP, go to Filters -> Noise -> Hurl, set the Repeat option to about 50, and hit OK. The main thing is to generate colorful noise rather than greyscale, and make it a reasonable size - mine was 256x256.
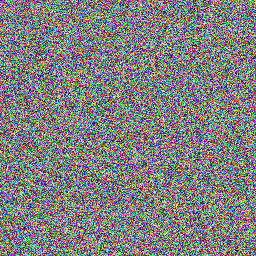 Throwing some noise your way.
In the graph, we’ll add a few properties to get started. The first is called Noise Texture, which will reference the texture we just generated. Then, we’ll have a Vector2 called Noise Scale which lets us control the tiling of the noise across the mesh.
 Let’s make some noise.
Use a Sample Texture 2D node to sample Noise Texture. In the UV slot, we will want a Tiling and Offset node with the Noise Scale property in the Tiling pin - that lets us adjust the material so that the glitter particles get bigger or smaller.
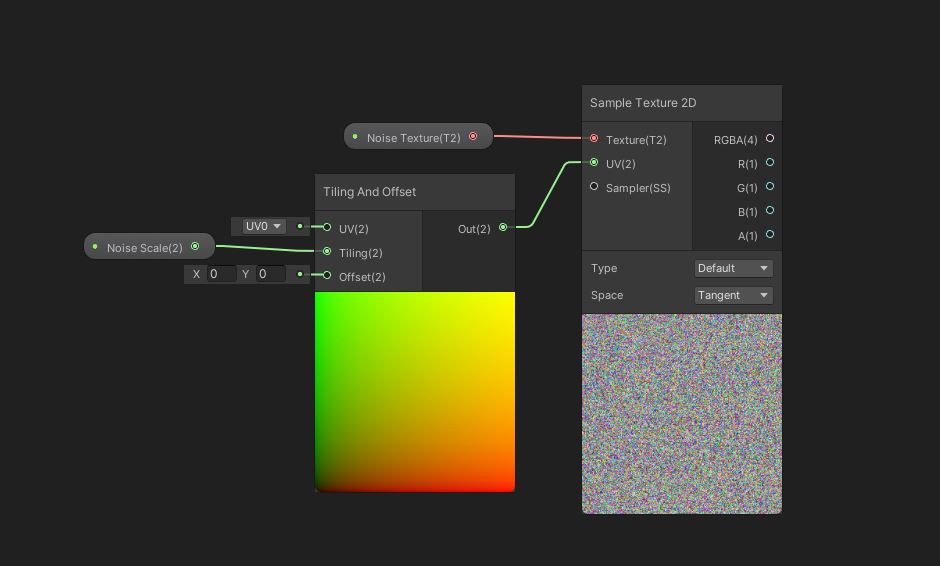 Getting the noise values onto the graph is pretty easy.
Each of these colors will be used as directions. Remember that colors are made up of red, green and blue components, which we can very easily treat as the X, Y and Z components of a direction vector instead. There are two modifications I’ll make to these directions: firstly, I will add the ability to shift the directions over time; and secondly, I’ll set up a threshold so that we don’t have too many reflective particles. For that, add two Float properties called Noise Rotation Speed and Glitter Offset respectively.
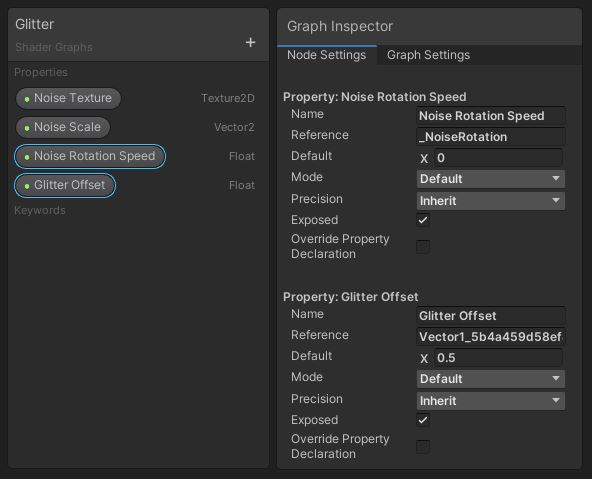 Hippity hoppity, this graph needs more properties.
We’ll shift the colors with a Hue node to cycle through red, then orange, then yellow, then green, and so on. This preserves the saturation and lightness in the color. The result for us is a direction that rotates over time - to do this, multiply Noise Rotation Speed by Time and plug it into the Offset pin. To add a threshold, subtract Glitter Offset from the output of the Hue node. This makes some of the directions point inwards towards the centre of the object, and therefore they will end up hidden later. Normalize the result to make the direction vector’s length 1.
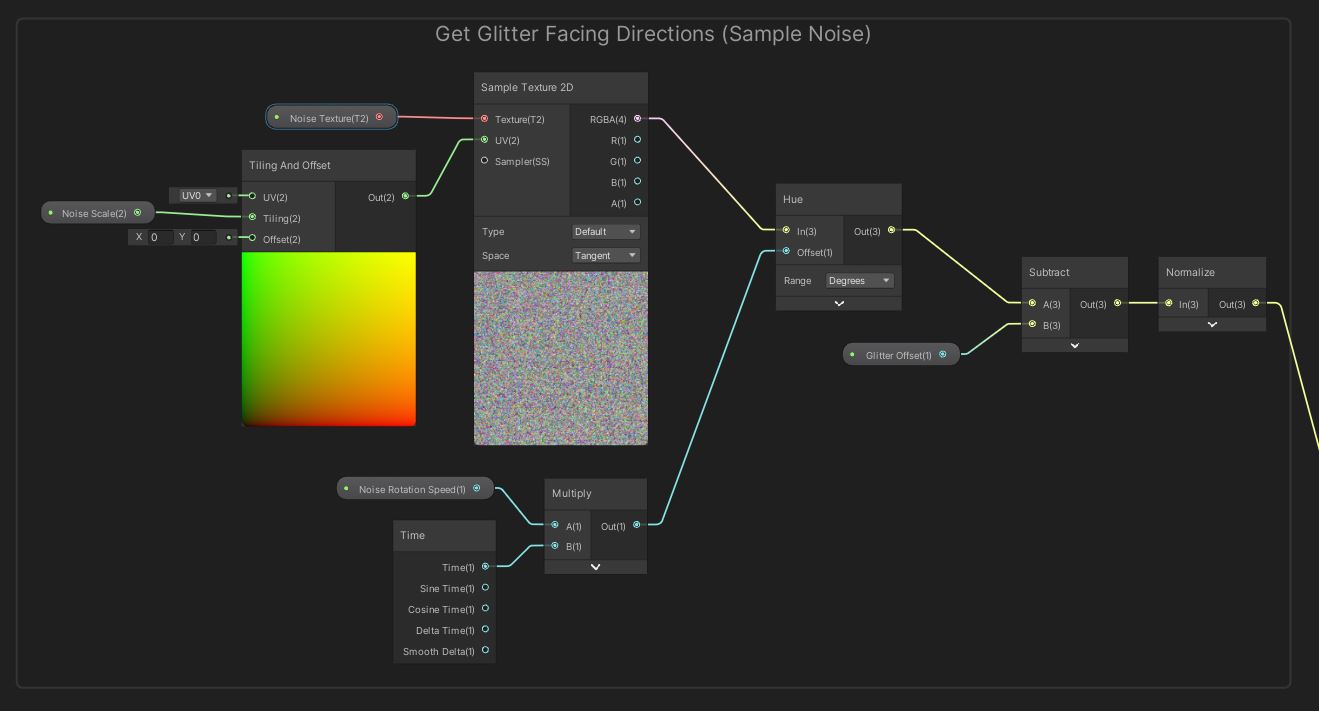 This gives us a direction vector at every point.
Now that we have random vectors on the surface of the object, we need to calculate the view vector. Unity provides a View Direction node, which we’ll use in World Space. We’ll need to take One Minus the result and Normalize it, because it’s currently pointing in the opposite direction than we need. With both (normalized) vectors at the ready, we can take the Dot Product between them, because it returns 1 when the vectors point in the same direction, and 0 when they are perpendicular. We’ll Saturate the result because those vectors pointing inwards will have dot product values below 0, which will break things.
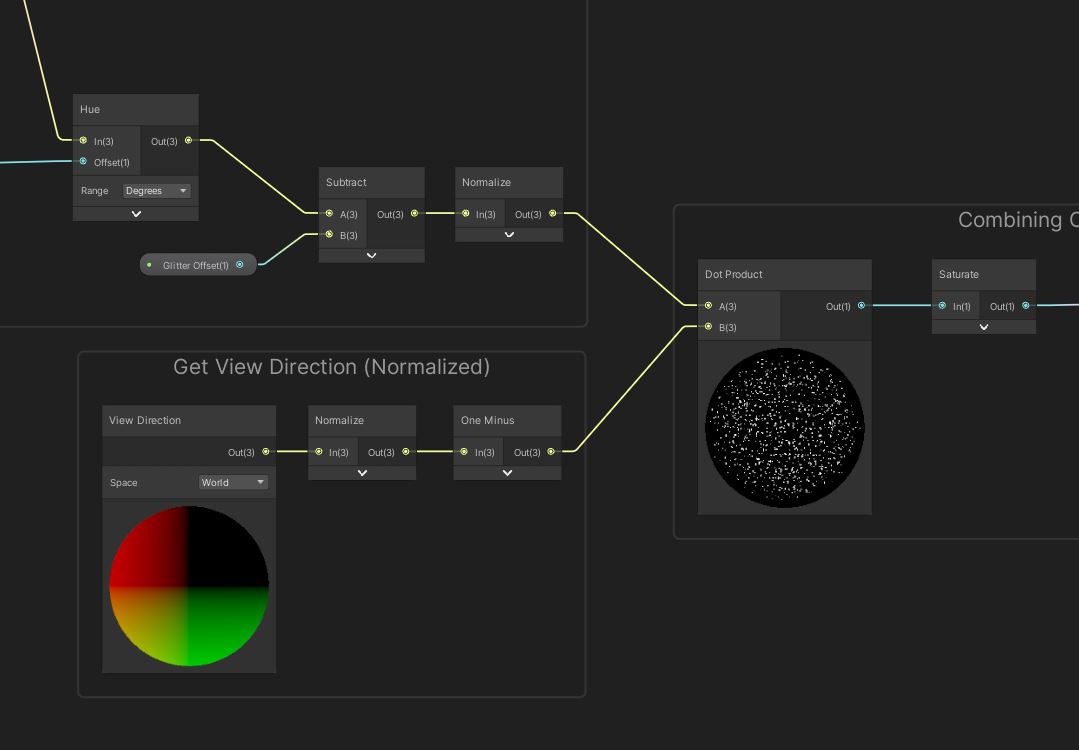 This gives us our glitter particles.
Let’s start to add real color to the object and make the glittery parts actually glow. We’ll need another property called Glitter Color - this time, it’s an HDR color so that we can ramp up the emission to mimic high-intensity light reflections. The output from the dot product calculation is just a greyscale value, so we can multiply by Glitter Color to get the final glitter color.
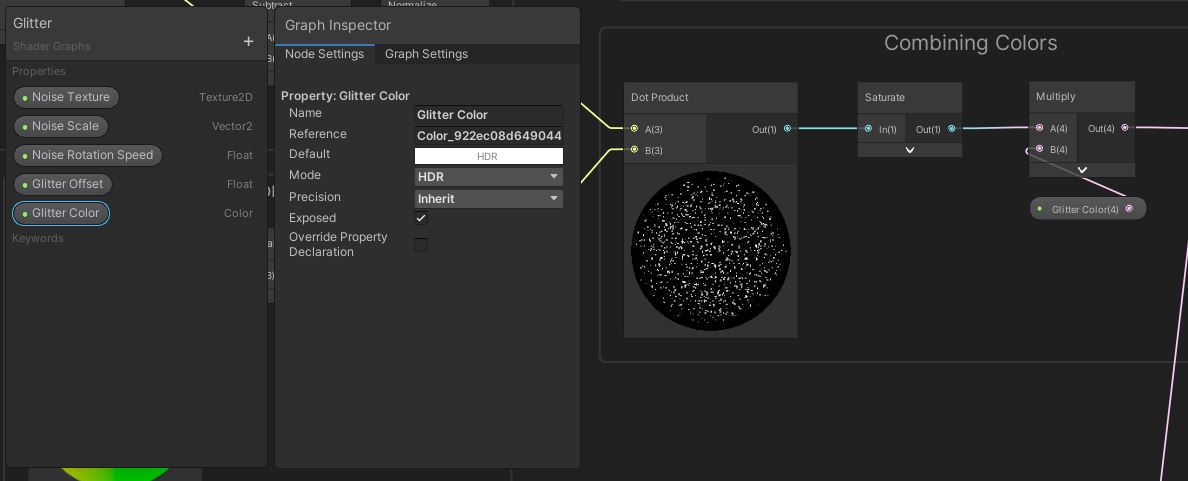 And this gives us prettier glitter.
Of course, we are not quite done with the shader, because we still wanted to add a Fresnel Effect. For its Power pin, we will plug in yet another new property called Fresnel Power, a Float which we will use to control the strength of the Fresnel glow on the edges. Since this node generates values between 0 and 1, increasing the power will pull the effect away from the center. Then, we’ll create another Color property called Fresnel Color (which is also HDR-enabled) and multiply it with the Fresnel. Add this to the glitter color result and then output the combined color to the Emission pin on the output stack.
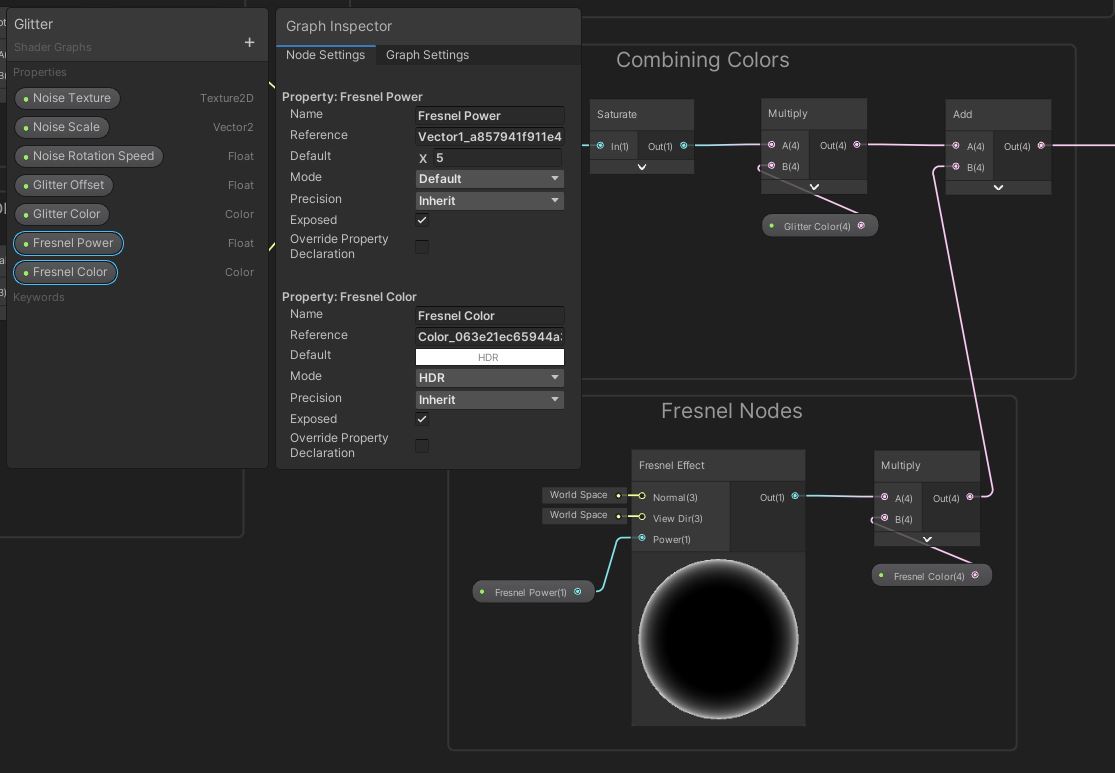 Fresnel gives objects a slight outer glow.
Now we will add a color gradient running down the object. We’ll base the gradient on the UV coordinates of the object - we’ll need to Split them and use the G component, which corresponds to the vertical component of the UVs. You could choose to use a Position node in Object space instead if you want to, but just be wary of the min and max values when using object space, because you’ll need to modify your gradient calculations to account for that. Either way, we’ll need three properties - Base Color 1 and Base Color 2 (inventive, I know) will control the top and bottom gradient colors, and a Float called Base Gradient Power controls how quickly the transition between the two occurs.
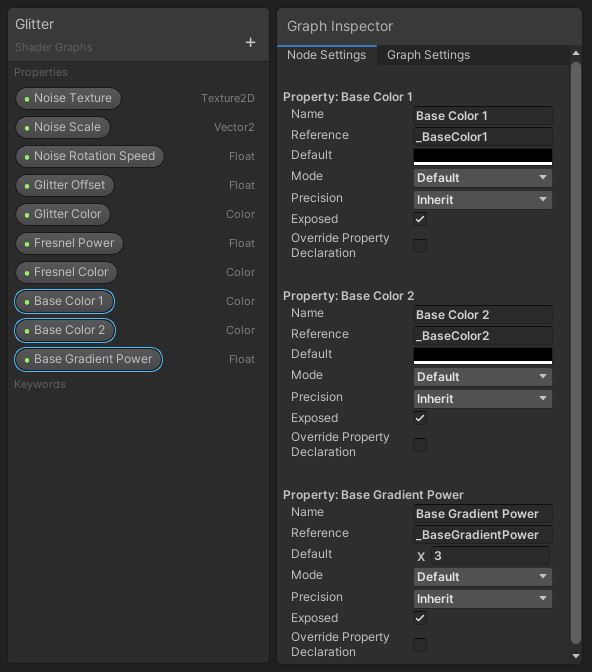 Even more properties.
We want to interpolate between the two colors, and I’m going to do that by raising the vertical UV component to the power of Base Gradient Power, the use the result in a Lerp node in the T slot - this represents the interpolation factor, or how far we are between the A and B inputs. Base Color 1 and Base Color 2 go in those A and B slots, and the result goes into the Base Color pin on the output stack.
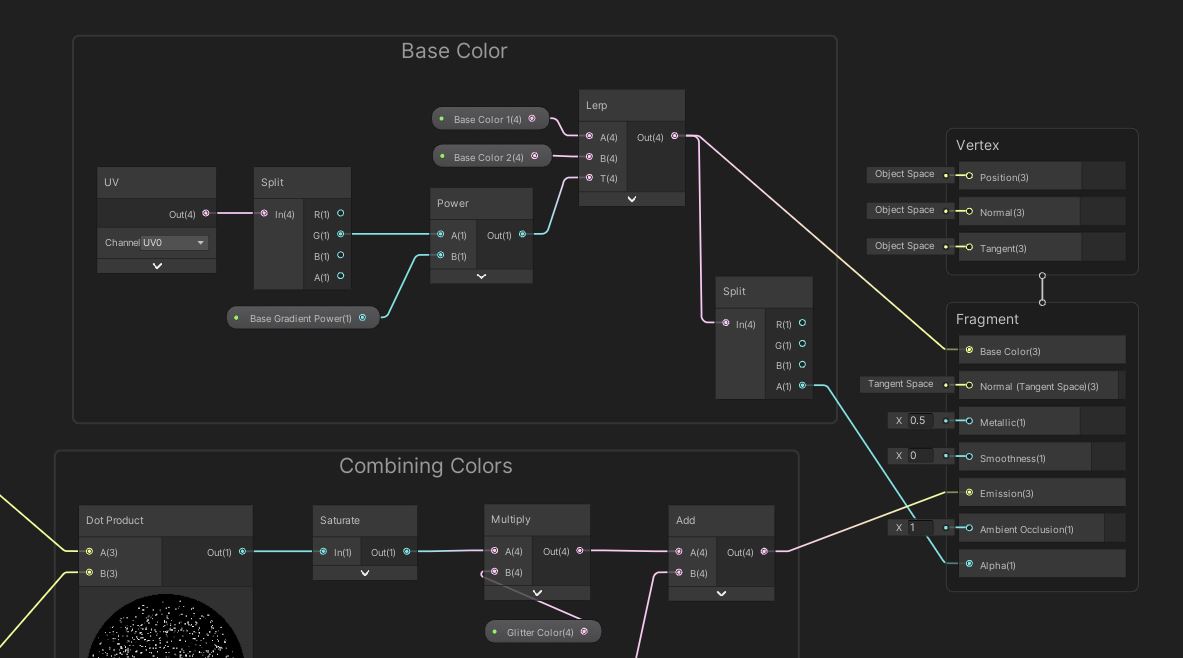 We’ll end with a smooth color gradient for the base color.
Go ahead and tweak the material values and change the threshold and noise texture however you want, and you should see a glistening, glowing glitter effect! If you want something to take on an enchanted or magical appearance, or if you need to emulate tiny chunks of metal inside a rock, then this is the shader for you. You could modify the shader to use a texture for the base colors or remove the gradient if you want.
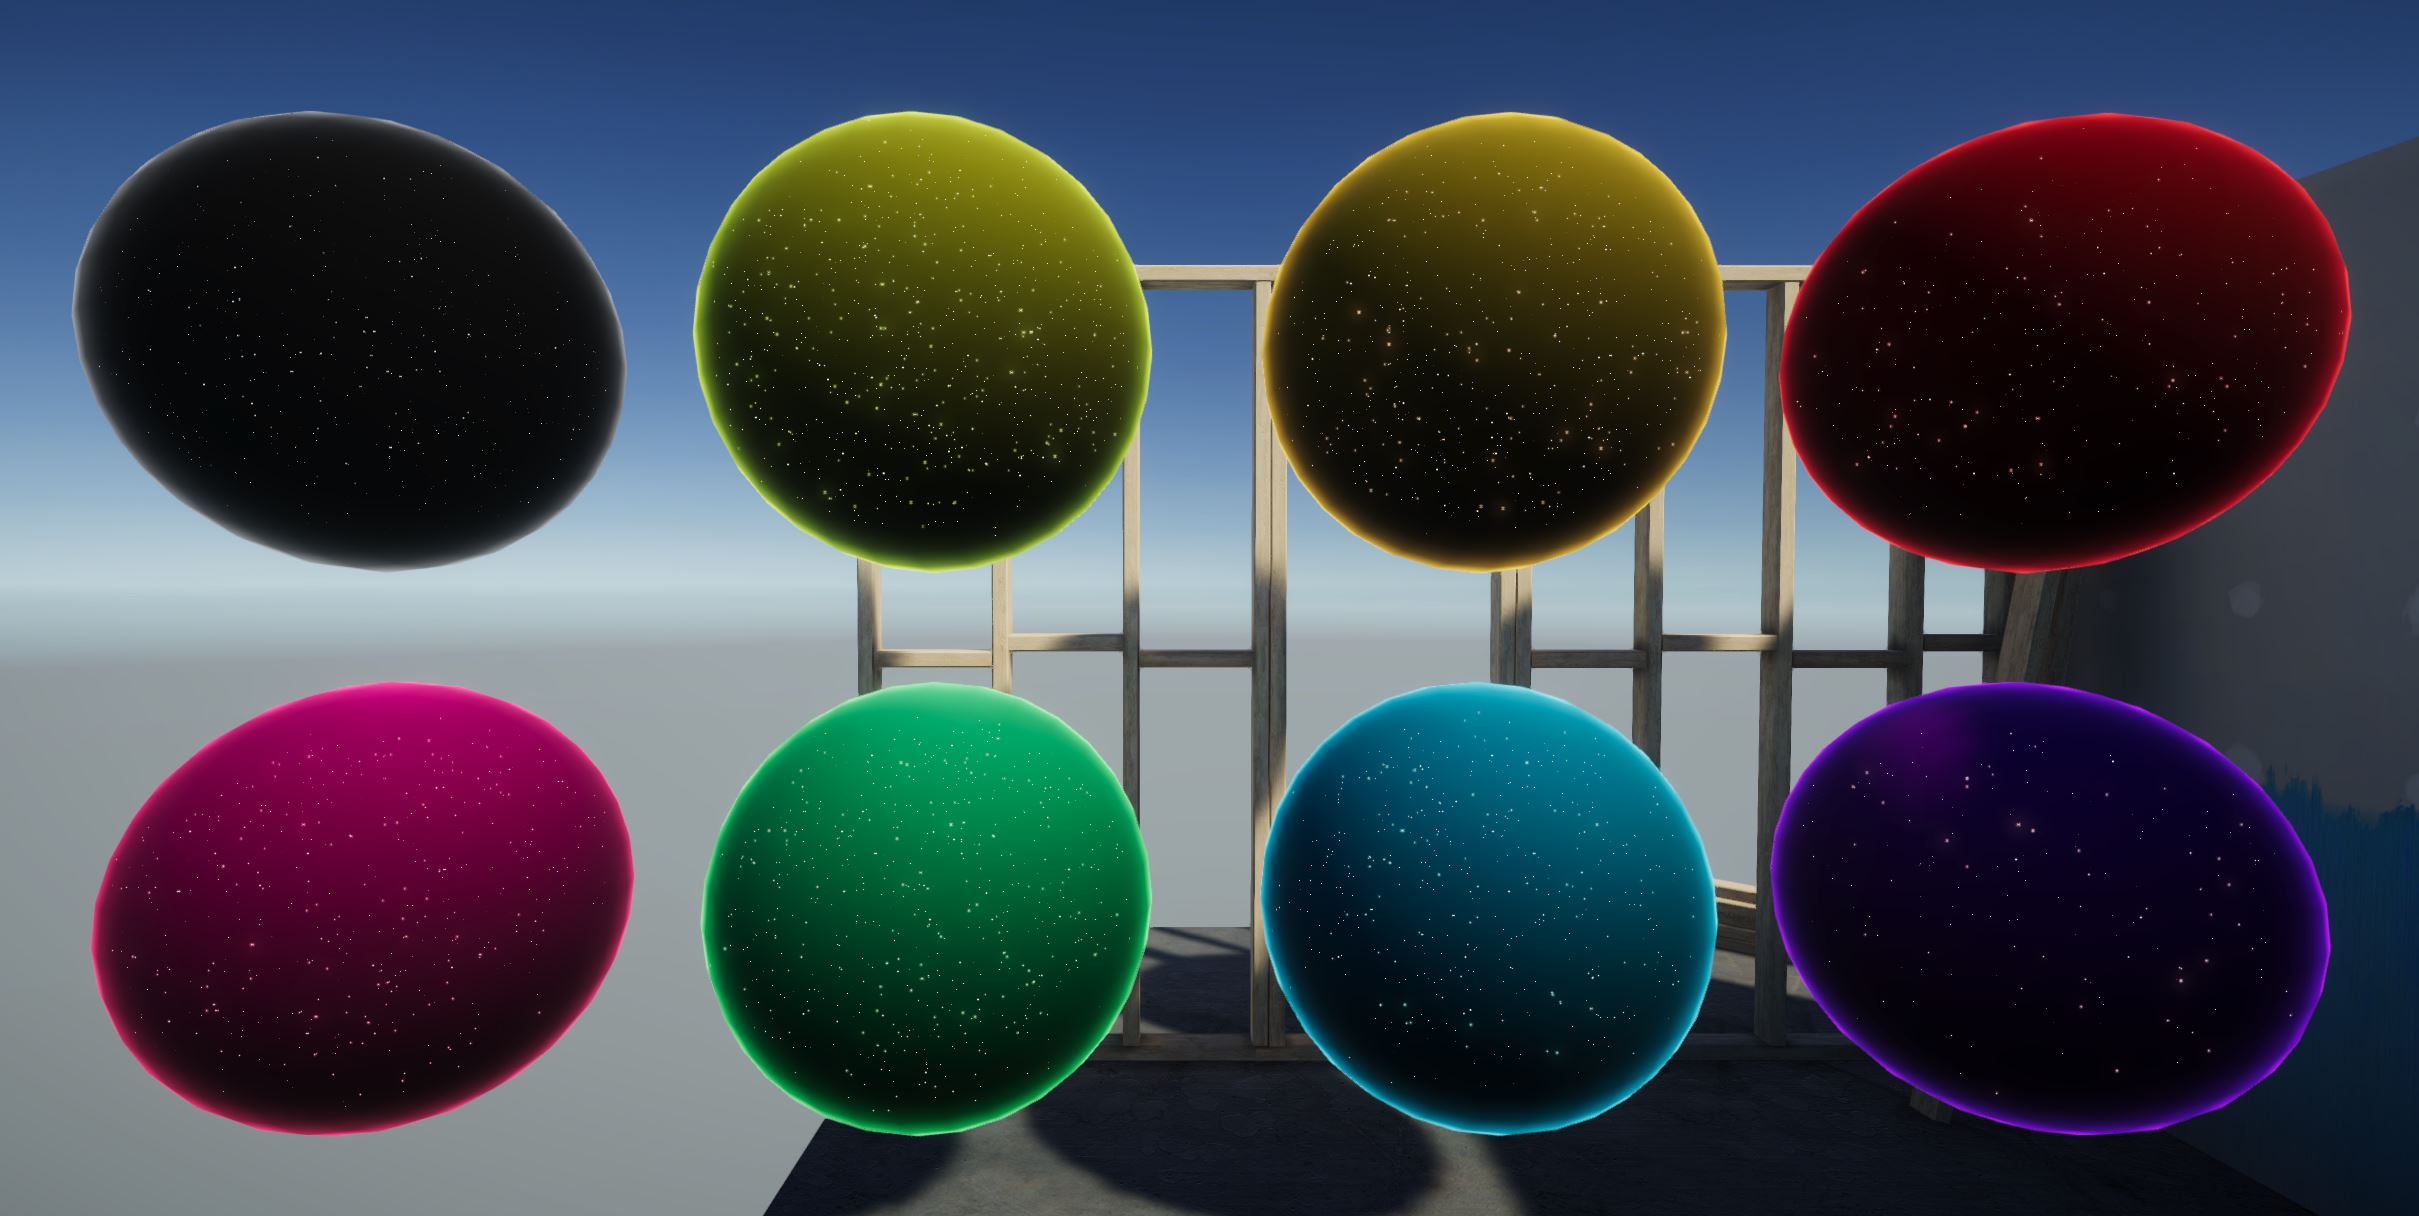 We’ve got sparkling glitter in the end.
Starry Skies
It’s fairly easy to modify this shader to look like a night sky instead. Let’s duplicate the shader, then go to the Graph Settings and pick Unlit, Opaque and Two Sided instead, then remove any Fresnel nodes and properties. Instead of using the Emission output - which doesn’t do anything on Unlit graphs - we will add the glitter color and base color together and output those to the Base Color output.
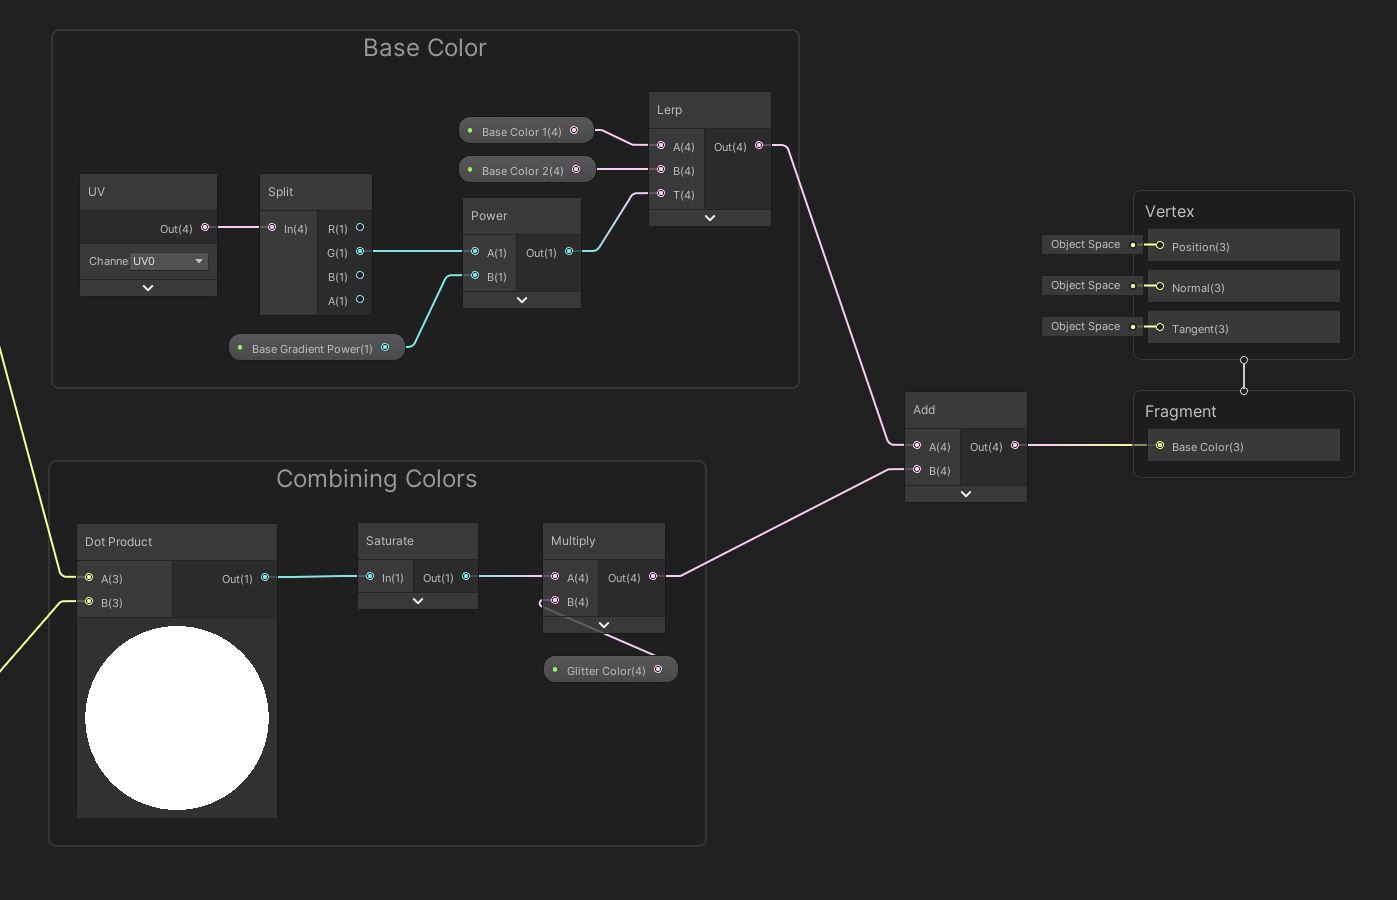 The end of the night sky shader is much simpler.
In the Scene View, we can add this material to a huge sphere and make it the child of the camera, and you’ve got yourself a starry night sky (after a few material tweaks, at least).
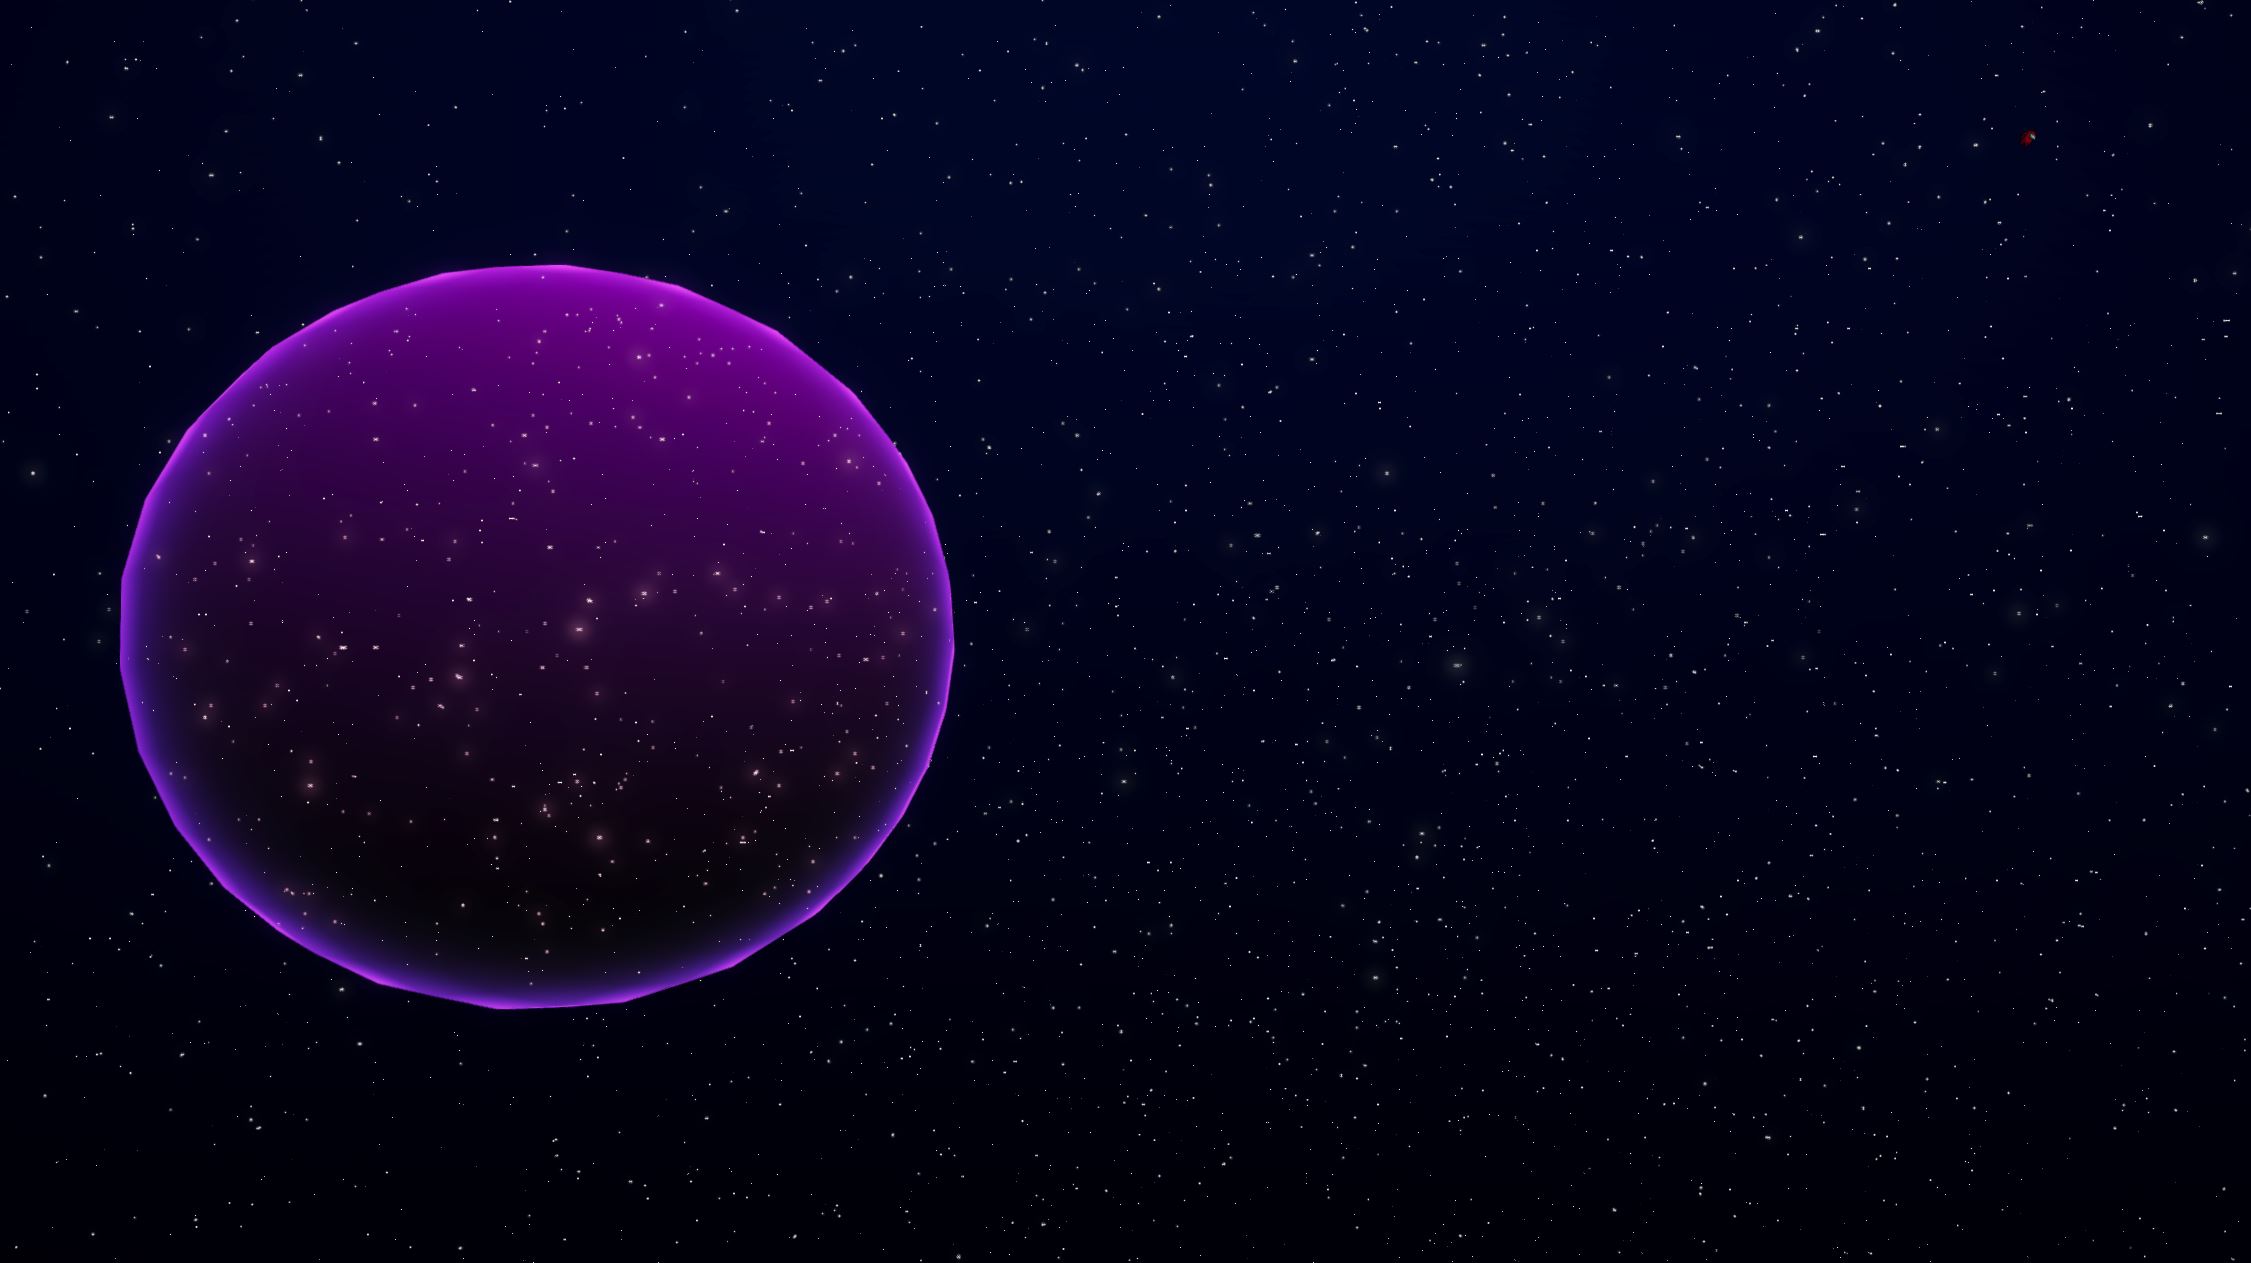 The end of the night sky shader is much simpler.