3D films have always felt like a technical novelty to me. The fun factor of slapping on a pair of cheap red-blue 3D glasses to make stuff pop out of the screen has captured the minds of inventors, printers and filmmakers throughout the 19th and 20th centuries. Anaglyph 3D, the kind you need red-blue glasses for, is an outdated technology - but the novelty aesthetic makes it perfect for a shader effect!
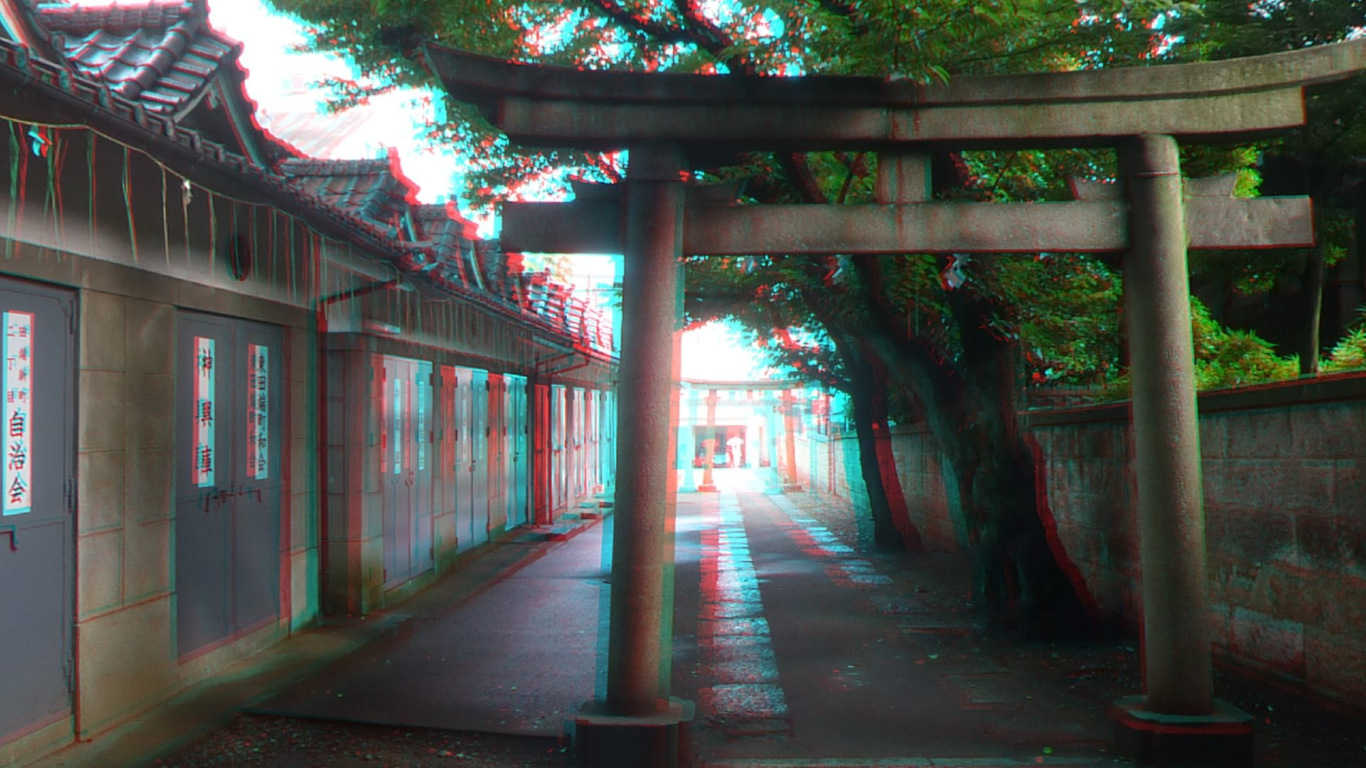
Photo by Nesnad on Wikimedia Commons
An Extra Dimension
Many animals, including humans, are able to perceive depth through stereopsis - essentially, different information is received by each of two eyes and combined in the brain to detect depth. Anaglyph 3D exploits this by controlling which information from a 2D image will be seen by each eye, resulting in the brain perceiving depth where it doesn’t truly exist. Out of the multitude of techniques for faking 3D - the Nintendo 3DS, for example, angles alternating columns of pixels towards each eye for true stereoscopic vision without glasses - anaglyph 3D is one of the easiest and cheapest to recreate because the only equipment required is a pair of cheap 3D glasses.
There are several ways of recreating the effect in Unity, and all of them involve separating two images and tinting them different colours. We’ll look at two approaches.
Please download the project repository from GitHub if you’d like to follow along!
Depth Sampling
The first approach is to render the scene once and send the image texture to a shader. The shader will then sample the depth texture once to figure out how far away a pixel is from the camera, then will sample the image texture twice, moving the sample UVs horizontally based on the depth - the further away the pixel, the further the UVs move. The two samples are tinted red or blue accordingly and then combined to obtain an anaglyphed image.
Let’s look at the script first. It can be found at Scripts/Image Effects/AnaglyphEffect.cs. This script only needs to pass a strength parameter to the shader inside OnCreate - the rest of the class is our boilerplate Render function and the CreateAssetMenu attribute.
using UnityEngine;

[CreateAssetMenu(menuName = "Image Effects Ultra/Anaglyph 3D", order = 1)]
public class AnaglyphEffect : BaseEffect
{
    [SerializeField]
    private float strength = 0.01f;

    // Find the Anaglyph shader source.
    public override void OnCreate()
    {
        baseMaterial = new Material(Resources.Load<Shader>("Shaders/Anaglyph3D"));

        baseMaterial.SetFloat("_Strength", strength);
    }

    public override void Render(RenderTexture src, RenderTexture dst)
    {
        Graphics.Blit(src, dst, baseMaterial);
    }
}
For this approach, the interesting bit is inside the shader. Let’s look at Resources/Shaders/Anaglyph3D.shader. We’ll start off including the strength property that we sent to the shader in AnaglyphEffect.cs.
// In Properties.
_Strength("Strength", Float) = 0.1

// In shader code.
uniform float _Strength;
Now we need to figure out a strategy for separating two images using UVs. In Part 2 of this series, when we created the underwater fog effect, we sampled the depth texture in order to determine how far pixels were from the screen - we’ll do the same here inside the fragment shader. First, we must include the depth texture variable above the fragment shader.
uniform sampler2D _CameraDepthTexture;
Then we’ll use the SAMPLE_DEPTH_TEXTURE and Linear01Depth functions we’re familiar with. Remember that the first will retrieve depth values from the texture sample and the second will normalise the value between 0 and 1.
fixed4 frag (v2f i) : SV_Target
{
    float depth = SAMPLE_DEPTH_TEXTURE(_CameraDepthTexture, i.uv);
    depth = Linear01Depth(depth);
    ...
    return col;
}
Once we have a depth value, we will calculate the offset we’ll use for our UVs. We’re going to sample _MainTex twice - once using a set of UVs offset to the left, and once with UVs offset to the right. The ‘red texture’ shifts the image to the right and the ‘blue texture’ shifts it to the left.
float2 offset = float2(depth * _Strength, 0.0f);

float2 redUV = i.uv - offset;
float2 blueUV = i.uv + offset;

fixed4 redCol = tex2D(_MainTex, redUV);
fixed4 blueCol = tex2D(_MainTex, blueUV);
We have two texture samples. Now all we need to do is combine them - the final pixel colour takes its red component from redCol and its green and blue components from blueCol.
float4 col;
col.r = redCol.r;
col.gb = blueCol.gb;
col.a = 1.0f;

return col;
Our shader is complete! If we create an Anaglyph effect asset and give it a strength of 0.5, you’ll get an output similar to this:
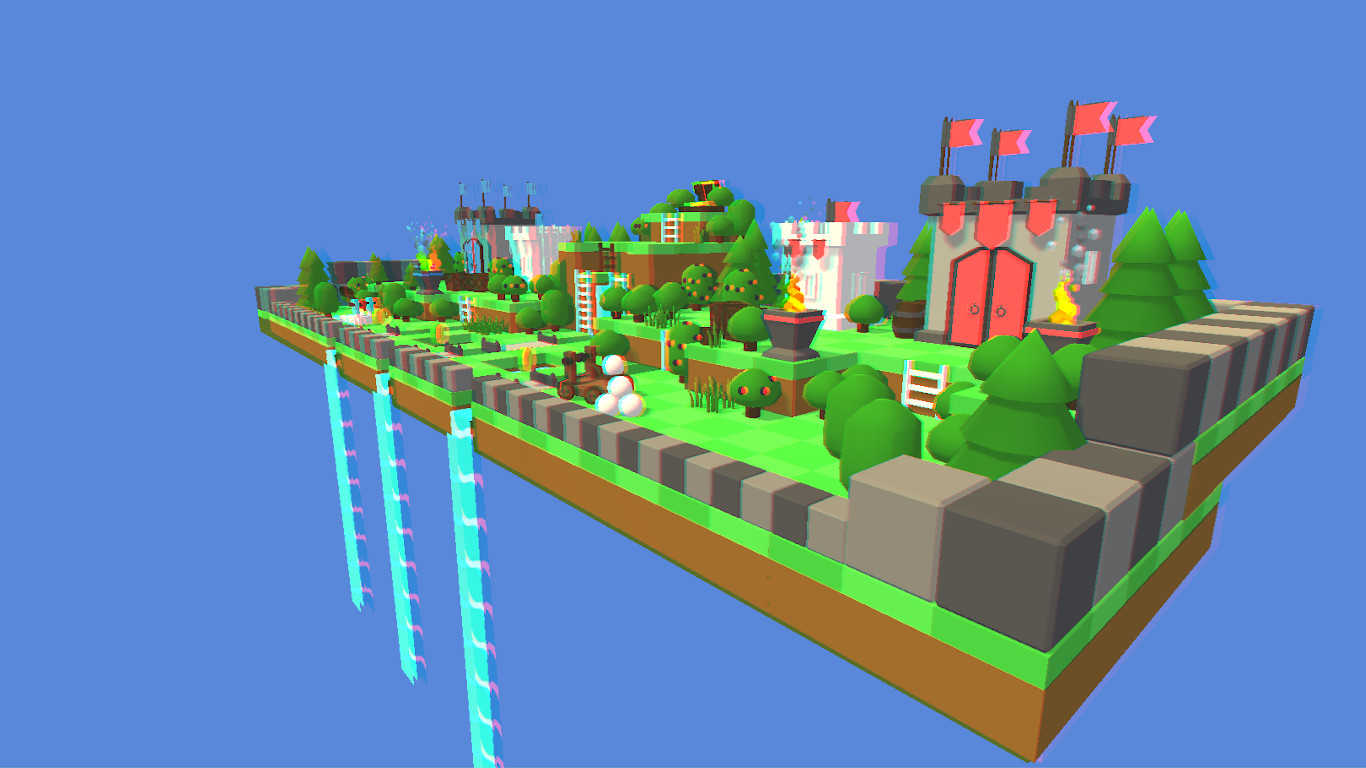
The effect works, although there are some problems involving colours bleeding between each eye. Since we’re just moving image UVs horizontally, the effect is more like an approximation than a true anaglyph - the real thing relies on angling two viewpoints so this version will always be slightly incorrect, although it is efficient since the screen only needs to be rendered once. Results may vary depending on the glasses you’re using - but this effect can be improved a little.

Multiple Exposure
The second approach involves angling two cameras in world space horizontally and rendering the scene twice. As with the first approach, each image is tinted red or blue and combined inside a shader - although there is a lot less work going on inside the shader here and a lot more work going on inside a script.
So let’s look at the shader first. It can be found at Resources/Shaders/Anaglyph3DPro.shader. We’ll look at the Properties first - the one major thing we’ll do differently is to not include _MainTex - we’ll pass in two textures called _LeftTex and _RightTex instead.
// In Properties.
_LeftTex ("Left Eye Image", 2D) = "white" {}
_RightTex ("Right Eye Image", 2D) = "white" {}

// In shader code.
uniform sampler2D _LeftTex;
uniform sampler2D _RightTex;
It might be confusing why we’re not including _MainTex - but that will be explained when we look at the script. Now let’s look at the fragment shader. It’s much shorter than the previous one.
fixed4 frag (v2f i) : SV_Target
{
    float4 col;
    float4 leftCol = tex2D(_LeftTex, i.uv);
    float4 rightCol = tex2D(_RightTex, i.uv);

    col.r = rightCol.r;
    col.gb = leftCol.gb;
    col.a = 1.0f;

    return col;
}
Since we don’t need to do any processing within the fragment shader to separate out two coloured textures, it’s as easy as just sampling both _LeftTex and _RightTex, then outputting a pixel colour based on different colour channels in those images like we did for the UV separation approach.
We’ll move onto the script that goes with this shader. Open up Scripts/Image Effects/AnaglyphProEffect.cs. Inside the Render function, we’ll take a secondary camera with the same parameters as our main camera, angle it slightly to the left and take a snapshot - the resulting image belongs to our right eye. We’ll then angle the camera slightly to the right, take a snapshot and send the output to the left eye. The heavy lifting here is done outside of the shader and both of those textures will be sent to the shader - _LeftTex and _RightTex as we discussed before.
In order to achieve this, we need a rotation member variable to denote how far the camera rotates. Also, since we won’t be able to take snapshot using the main camera on Render because it is already rendering the scene, we will include a camera prefab and Instantiate a new camera during OnCreate. The prefab is a GameObject containing only a Transform and a Camera script, and it is set inactive - this allows us to position it and call Camera.Render to take a snapshot without interfering with the main image.
[SerializeField]
private float rotation = 1.0f;

[SerializeField]
private Camera cameraPrefab;

private Camera camera;

// Find the Anaglyph Pro shader source.
public override void OnCreate()
{
    baseMaterial = new Material(Resources.Load<Shader>("Shaders/Anaglyph3DPro"));

    camera = Instantiate(cameraPrefab);
}
Now we have a camera and an amount to rotate it by. The heavy lifting is done inside Render. The first step is to copy the main camera’s transform, aspect ratio, field of view and so on to the temporary camera - Unity provides the CopyFrom method for this purpose. Then, we’ll rotate it to the right by the amount specified by the rotation variable.
public override void Render(RenderTexture src, RenderTexture dst)
{
    // Render camera at pos 1.
    camera.CopyFrom(Camera.main);
    camera.transform.Rotate(camera.transform.up, rotation);
    ...
}
Next, we’ll need to set up a location for the camera to render to. A temporary render texture seems like a good choice - we’ll copy the format of the src texture to create the new one. Then, we’ll assign the new texture as the camera’s render target.
var leftTexture = RenderTexture.GetTemporary(src.descriptor);
camera.targetTexture = leftTexture;
Now we’ll render the camera. The render target is set to a texture - if it had been null, the output would get displayed on screen instead of sent to the texture. The final step is to send the image to the shader.
camera.Render();
baseMaterial.SetTexture("_LeftTex", leftTexture);
That’s one texture handled! We’ll repeat that process exactly for the right-eye texture, except we’ll rotate to the left and send the image data to the shader under the _RightTex name.
// Render camera at pos 2.
camera.CopyFrom(Camera.main);
camera.transform.Rotate(camera.transform.up, -rotation);
var rightTexture = RenderTexture.GetTemporary(src.descriptor);
camera.targetTexture = rightTexture;
camera.Render();
baseMaterial.SetTexture("_RightTex", rightTexture);
The shader has all the data it needs! We’ll use Graphics.Blit to finish up the processing, then release both those temporary images we used.
Graphics.Blit(src, dst, baseMaterial);

// Release images.
RenderTexture.ReleaseTemporary(leftTexture);
RenderTexture.ReleaseTemporary(rightTexture);
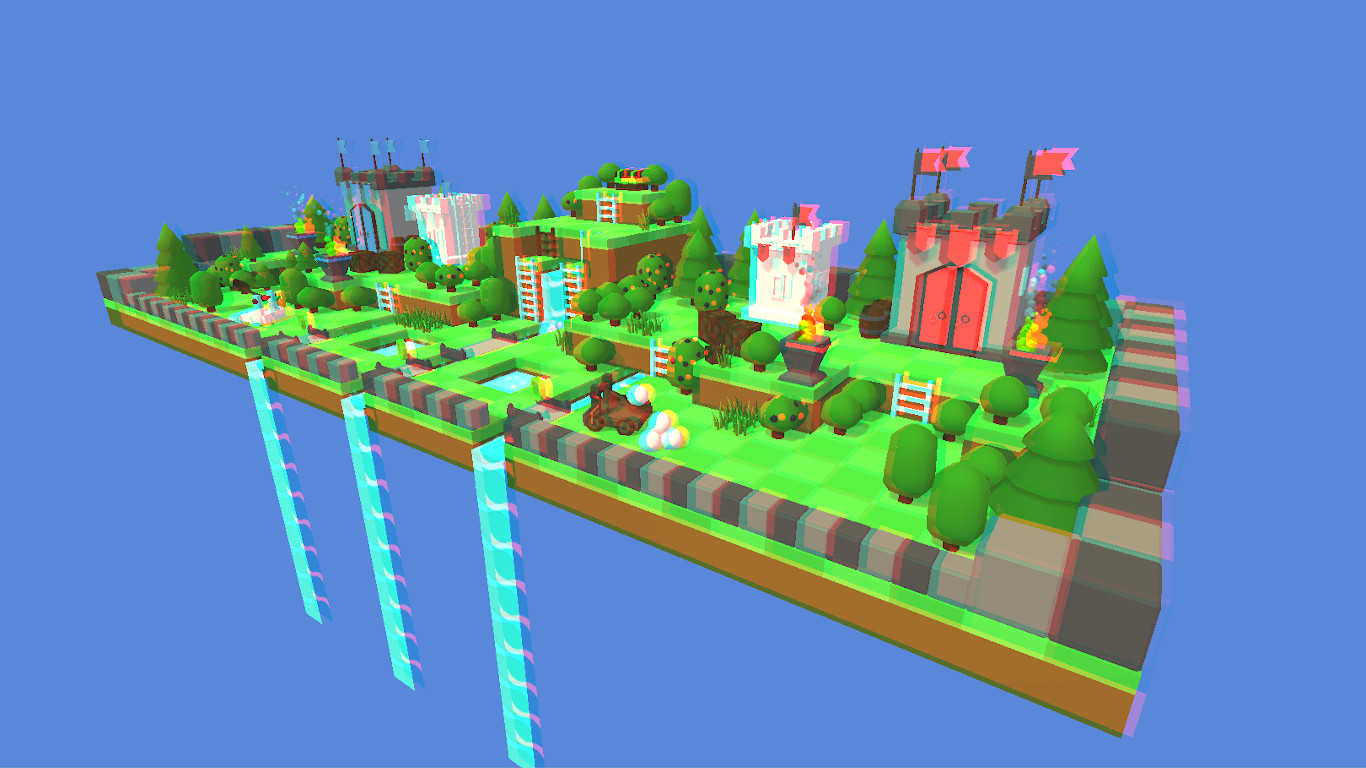
Our effect should be complete now! Let’s see what it looks like.
Conclusion
We’ve seen how to create an anaglyph 3D effect using two approaches. Depending on whether you’d like to prioritise efficiency or accuracy, you could pick one or the other. In the next tutorial, we’ll be looking at a cinematic shader aiming to recreate a ‘filmic’ look!
Acknowledgements
This tutorial series uses the following asset packs - available on the Unity Asset Store:
| Forest - Low Poly Toon Battle Arena / Tower Defense Pack | AurynSky |