Several games could be described as ‘cinematic’. Usually, that means heavy application of film techniques to deliver the story or narrative of the game, although interpretations of the term differ - it’s very subjective. It could mean throwing a film grain effect over the screen and using black bars to force the viewport into a wider aspect ratio. It might mean lots of cutscenes. And in this tutorial, we’ll take it to mean the first - film grain and black bars! Many of these effects emulate the imperfections of cameras or photographic film, so today we’re going to use a noise function to recreate the film grain effect.

Photo by Donald Tong on Pexels
Imperfect Film
Before the age of digital film, each frame of a motion picture was captured on sections of a physical photographic film strip. The strip was coated with a thin emulsion containing silver halide crystals, which, alongside special dyes, react to light and form the image to be projected. It is those crystals and their varying sizes and distribution across the emulsion layer that cause film grain - the appearance of noise and texture on the base image. They also influence the image resolution. In digital photography, these artefacts no longer appear, although they can be digitally recreated and simulated - for some, a generated film grain effect is preferable to a “sterile” digital image.
In this tutorial, we’ll create our own noise to overlay on our images. While we could slap any noise function on the image and call it a day, we’ll pay special attention to Perlin noise.
Please download the project repository from GitHub if you’d like to follow along!
Perlin Noise
When Ken Perlin was tasked with procedurally generating textures for the sci-fi movie Tron, he came up with a noise algorithm that would lead to him winning an Academy Award for contributions to CGI - that algorithm was Perlin Noise. The algorithm generates a grid of random vectors and then does some fancy stuff to end up with a smooth cloud-like texture. We’ll step through the algorithm in detail while implementing it inside a shader.
Let’s kick off straight away with the shader, found at Resources/Shaders/Cinematic.shader. We’ll need a handful of properties for the effect.
_MainTex ("Texture", 2D) = "white" {}
_Strength("Noise Strength", Float) = 0.1
_Aspect("Aspect Ratio", Float) = 1.778
As with all image effects, we’ll need _MainTex. On top of that, we’ll have a _Strength property to control the amount of film grain, plus an _Aspect property to control the desired aspect ratio of the screen - we’ll add black film bars above and below the screen to make the image fit this aspect ratio. It’s represented as a decimal - here, the widescreen standard 16:9 aspect ratio is roughly equal to 1.778 as a decimal. We’ll revisit these properties much later in the shader.
The next thing we’ll need is a function to generate random numbers. There’s no point in reinventing the wheel here - there’s a pseudorandom function commonly used in shaders with a handful of variations, so we’ll use that. This function collapses a 2D value into a single number between 0 and 1 - that’s ideal for us. We also need the function to return the same output when the same input is used - that’s why we picked a pseudorandom function rather than a truly random one.
The one change I’m making to this function is to implement a time-sensitive component, as we’ll need our film grain to change each frame. Unity provides a built-in _Time variable, a 4D vector containing the time since the game started in four different formats: t/20, t, 2t and 3t. _Time.y will give us unscaled time and the function will still return an identical value when the same input is used, provided it’s within the same frame.
// Generate time-sensitive random numbers between 0 and 1.
float rand(float2 pos)
{
    return frac(sin(dot(pos + _Time.y,
        float2(12.9898f, 78.233f))) * 43758.5453123f);
}
Now we’ll talk about the Perlin noise algorithm. For an n-dimensional Perlin noise algorithm, we start off by generating an n-dimensional grid - in our case, a 2D grid. The resolution of the grid could be less than the resolution of our image texture, but we shall make them equal. On each of the points of the grid, a pseudorandom gradient value is generated, then for each continuous point (or in our case, pixel) between the gridlines, we calculate four dot products - one for each corner of the grid square the pixel is in. Those dot products are between the gradient vector at the corner, and the distance vector between the pixel and that corner. Finally, we interpolate in the x- and y-directions using those four dot products to obtain a final Perlin value for that pixel.
That’s a lot to unpack, so we shall deconstruct the process bit-by bit! Let’s add a function called perlin2D which takes in the position of the pixel.
// Perlin gradient noise generator.
float perlin2D(float2 pixel)
{
    ...
}
The first thing we’ll do is calculate the positions of the four corners of the grid that the pixel is in. The floor function will get us the lower-left position easily, then we can use that to calculate the positions of the other four vertices.
float2 pos00 = floor(pixel);
float2 pos10 = pos00 + float2(1.0f, 0.0f);
float2 pos01 = pos00 + float2(0.0f, 1.0f);
float2 pos11 = pos00 + float2(1.0f, 1.0f);
Next, we will generate the gradient vectors for those four points. To do this, we’ll use the rand function we defined earlier. However, we want to generate a direction rather than a scalar value, so we’re going to define another function called randUnitCircle - it’ll take in a 2D vector, use that to receive a scalar from the rand function, then use it as an angle to return a vector on the unit circle (i.e. a vector of length 1). I’ve defined this above perlin2D.
// Generate a random vector on the unit circle.
float2 randUnitCircle(float2 pos)
{
    const float PI = 3.14159265f;
    float randVal = rand(pos);
    float theta = 2.0f * PI * randVal;

    return float2(cos(theta), sin(theta));
}
Let’s return to perlin2D. We’ll generate the four pseudorandom vectors.
float2 rand00 = randUnitCircle(pos00);
float2 rand10 = randUnitCircle(pos10);
float2 rand01 = randUnitCircle(pos01);
float2 rand11 = randUnitCircle(pos11);
Then, we need to calculate the four dot products. We’ve just calculated the four random gradient vectors, so let’s calculate the distance vectors - the vectors between the pixel and the four corner positions of the grid square.
float dot00 = dot(rand00, pos00 - pixel);
float dot10 = dot(rand10, pos10 - pixel);
float dot01 = dot(rand01, pos01 - pixel);
float dot11 = dot(rand11, pos11 - pixel);
The next step was to interpolate between these four values. I’ve written a guide to interpolation in Unity in the past, so for a refresher I’d recommend checking that out. Since we have two dimensions, we’ll need to interpolate in each dimension separately, so we start off by interpolating between dot00 and dot10 - the bottom two dot products - in the x-direction using the pixel’s x-position as the interpolation factor, then we interpolate dot01 and dot11 using the same interpolation factor. Using both those results, we finally interpolate in the y-direction using the pixel’s y-position as the interpolation factor to obtain the final Perlin value.
The classic Perlin noise function interpolates using a cubic Hermite curve. However, in order to ensure a smoother transition from one cell to the next, we’ll need to change the polynomial we use to one that has a second derivative of 0 at the start and endpoints of the interpolation - a quintic curve is required. If that’s all a bit too mathsy, the only takeaway you’ll need is that the new interpolation function will have fewer direction artefacts than the old one! You can read in more detail about it in Improving Noise, Ken Perlin’s follow-up to the original noise implementation. I’ll name our new interpolation function quinterp, short for “quintic interpolation”.
// Quintic interpolation curve.
float quinterp(float2 f)
{
    return f*f*f * (f * (f * 6.0f - 15.0f) + 10.0f);
}
Now we can interpolate. Whew, it’s taken a while to get to this point! We’ll make use of the frac function, which returns the part of a decimal number after the decimal point, to obtain the x- and y-direction interpolation factors. Then, we’ll use the lerp function in order to perform the interpolation, but instead of using the raw interpolation factors, we’ll pass them through the quinterp function we just defined. The final value after interpolation is the final Perlin noise value for this pixel, which we’ll return.
float2 d = frac(pixel);

float x1 = lerp(dot00, dot10, quinterp(d.x));
float x2 = lerp(dot01, dot11, quinterp(d.x));
float y  = lerp(x1, x2, quinterp(d.y));

return y;
We’re almost there. In the fragment shader, we’re going to calculate the appropriate value to pass into the perlin2D function. In our case, we want to pass in the image UVs, but we also want to multiply them by the screen resolution so that the resolution of the Perlin grid is the same as the resolution of the image. For that, we can use the _ScreenParams variable built into Unity shaders by default; its xy components return the x- and y-resolutions respectively.
fixed4 frag (v2f i) : SV_Target
{
    // Calculate Perlin noise.
    float4 col = tex2D(_MainTex, i.uv);
    float2 pos = i.uv * _ScreenParams.xy;
    float n = perlin2D(pos);

    return col - _Strength * n;
}
That’s the shader code complete. Each pixel now has its own grain value, which we subtract from the sampled image texture colour. Now, we’ll take a very quick look at the script we’ll use to control it - it’s a similar format to most of the other basic scripts. You can find this script inside Scripts/Image Effects/CinematicEffect.cs.
using UnityEngine;

[CreateAssetMenu(menuName = "Image Effects Ultra/Cinematic", order = 1)]
public class CinematicEffect : BaseEffect
{
    [SerializeField]
    private float strength = 0.1f;

    [SerializeField]
    private float aspectRatio = 1.777f;

    // Find the Cinematic shader source.
    public override void OnCreate()
    {
        baseMaterial = new Material(Resources.Load<Shader>("Shaders/Cinematic"));

        baseMaterial.SetFloat("_Strength", strength);
        baseMaterial.SetFloat("_Aspect", aspectRatio);
    }

    public override void Render(RenderTexture src, RenderTexture dst)
    {
        Graphics.Blit(src, dst, baseMaterial);
    }
}
As with many of the previous scripts, it just plugs in the values we’ll need for the shader properties and performs a basic Graphics.Blit using the shader. Let’s see it animated with a strength value of roughly 0.2. The GIF compression will make the effect look a little grainier than running it on your own.
Film Bars
Aside from film grain, the other notable effect that ‘cinematic’ games like to add is black bars at the top and bottom of the screen to force the viewport into a different aspect ratio. It was widely used back when screens had an aspect ratio of 4:3 to force cutscenes into a widescreen aspect ratio such as 16:9, but now that almost every screen is now widescreen it’s mostly fallen out of use. We’ll still add the functionality in case someone wants a ridiculous aspect ratio of 32:9 or something.
We’ll calculate the actual aspect ratio of the screen and compare with the desired aspect passed in via the _Aspect property, returning 0 or 1 depending on whether the pixel would end up inside the black region (0 if it is inside, 1 if the original image should be retained). This value is used to multiply the returned colour value. Let’s return to the fragment shader - after calculating the Perlin value we will modify it:
// Calculate cinematic bars.
float aspect = _ScreenParams.x / _ScreenParams.y;
float bars = step(abs(0.5f - i.uv.y) * 2.0f, aspect / _Aspect);

return (col - _Strength * n) * bars;
The real aspect ratio, aspect, is just the x-resolution of the screen divided by the y-resolution. Stepping through the calculation of the bars variable, we’re dividing the real (aspect) and desired (_Aspect) values, then using that as a ‘threshold’. If the v-parameter of the pixel’s UV coordinates crosses the threshold, then the value of bars becomes 0. Using the step function means that bars will take the value of 0 when its first parameter is greater than the other, and 1 otherwise, with no other return values in between. The output of the shader with an aspect ratio of 2.5 (or 5:2) looks like this:
Remember than an aspect ratio of 1.777… is the same as an aspect ratio of 16:9 (with an imperceptible loss of accuracy due to floating-point errors).
Old-timey Film
We’ve implemented a film grain and black bars effect to full-colour images. If we really wanted to make our effects feel retro, we could go one step further and include the option to turn the image greyscale or sepia-tone. I’ve created these effects in the past, so we’ll just paste their fragment shaders here and create two scripts to control them.
You can find the Greyscale shader in Resources/Shaders/Greyscale.shader. The effect works by calculating the luminance of each pixel, which is based on the relative sensitivities of the human eye to the red, green and blue coloured light coming from the pixel. That luminance value is used for the red, green and blue components of the output.
fixed4 frag (v2f i) : SV_Target
{
    fixed4 col = tex2D(_MainTex, i.uv);

    float lum = dot(col, float3(0.3f, 0.59f, 0.11f));
    return lum;
}
The script to control the effect is simple too - since there are no properties to modify, it only needs to create a material using the shader and perform a Graphics.Blit using the material each frame.
[CreateAssetMenu(menuName = "Image Effects Ultra/Greyscale", order = 1)]
public class GreyscaleEffect : BaseEffect
{
    // Find the Greyscale shader source.
    public override void OnCreate()
    {
        baseMaterial = new Material(Resources.Load<Shader>("Shaders/Greyscale"));
    }

    public override void Render(RenderTexture src, RenderTexture dst)
    {
        Graphics.Blit(src, dst, baseMaterial);
    }
}
I’ve created a composite effect in the Effects folder called Old Filmic, which applies the Greyscale or Sepia effect, followed by the Cinematic effect. When combined, it looks like this:

Let’s also look at the Sepia-tone effect. The script is almost identical, so I won’t paste it here. The shader does something slightly different to the Greyscale effect - it still uses the relative sensitivity of the eye to each colour component in its calculation, but they don’t all feed into a single value - the output red is influenced by different degrees by the input RGB than the output green, and so on. That means we’ll have a 3x3 matrix of values rather than a 3-element vector.
fixed4 frag (v2f i) : SV_Target
{
    fixed4 col = tex2D(_MainTex, i.uv);

    float3x3 sepiaMatrix = float3x3
    (
        0.393, 0.349, 0.272,	// Red.
        0.769, 0.686, 0.534,	// Green.
        0.189, 0.168, 0.131     // Blue.
    );

    float4 sepia = float4(mul(col.rgb, sepiaMatrix), 1.0f);

    return sepia;
}
When used in the Old Filmic composite effect, the screen looks like this:

Conclusion
Adding a film grain effect to your scene can make it look softer – many people like the appearance of film stock over digital film, as the latter can look sterile and artificial. For that reason, film grain is sometimes digitally simulated, as we have done today. For a more ‘filmic’ look, we can also add film bars and change the colour of the video. In the next tutorial, we will play around with individual colour channels and create a chromatic aberration effect.
Acknowledgements
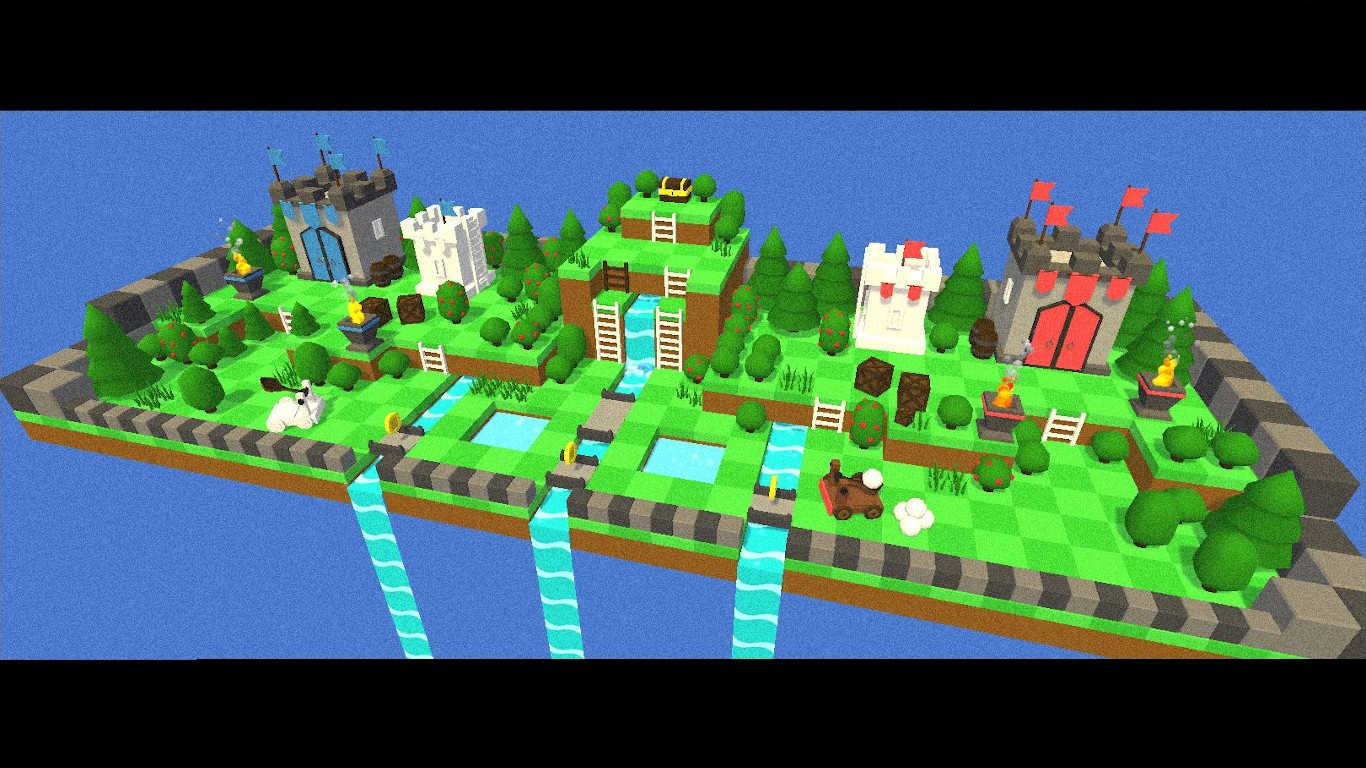
This tutorial series uses the following asset packs - available on the Unity Asset Store:
| Forest - Low Poly Toon Battle Arena / Tower Defense Pack | AurynSky |