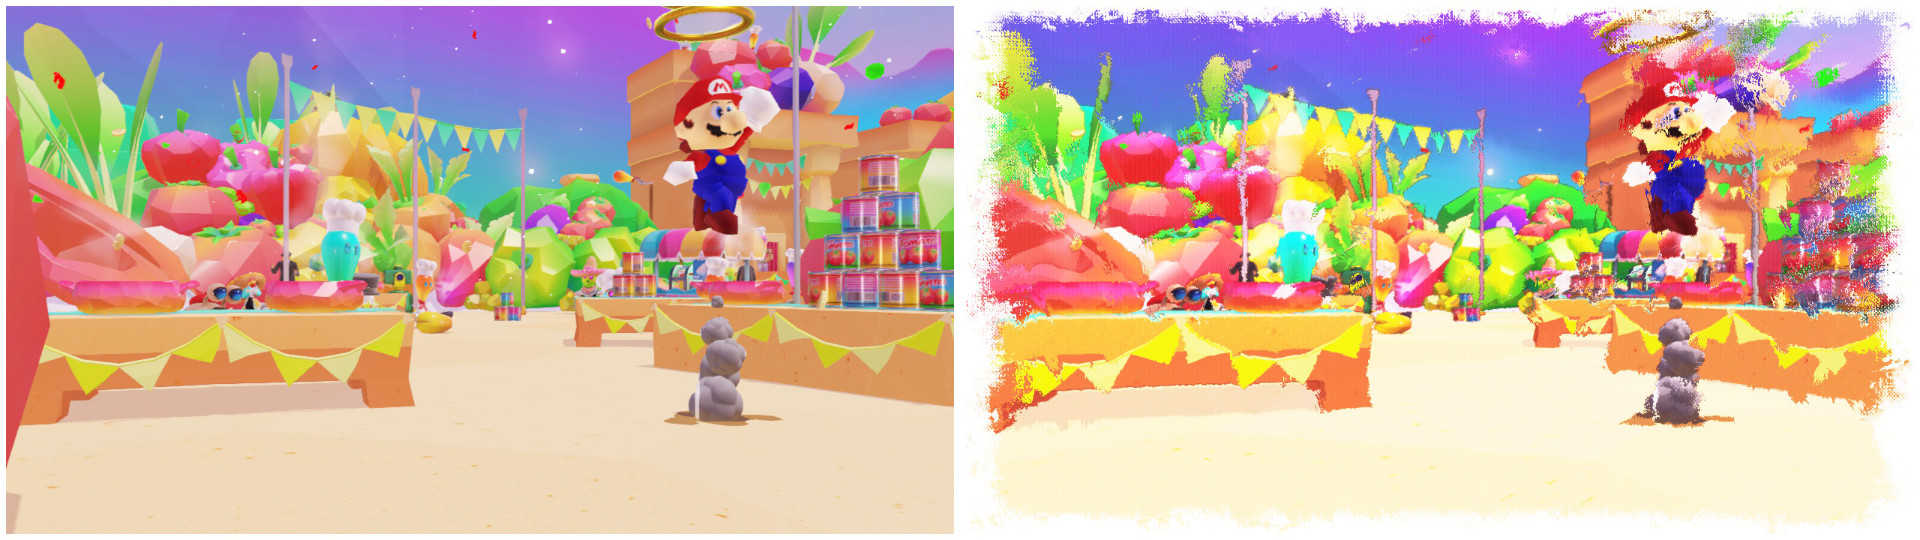
This tutorial looks at the Oil Painting effect seen in Snapshot Mode, which makes your snapshot look like it’s been painted on a canvas. Mario Paint, anyone? For this, we’ll use a type of filter traditionally used to de-noise images without losing fidelity around edges, which has the peculiar property of introducing painting-like artefacts.
Oil Painting
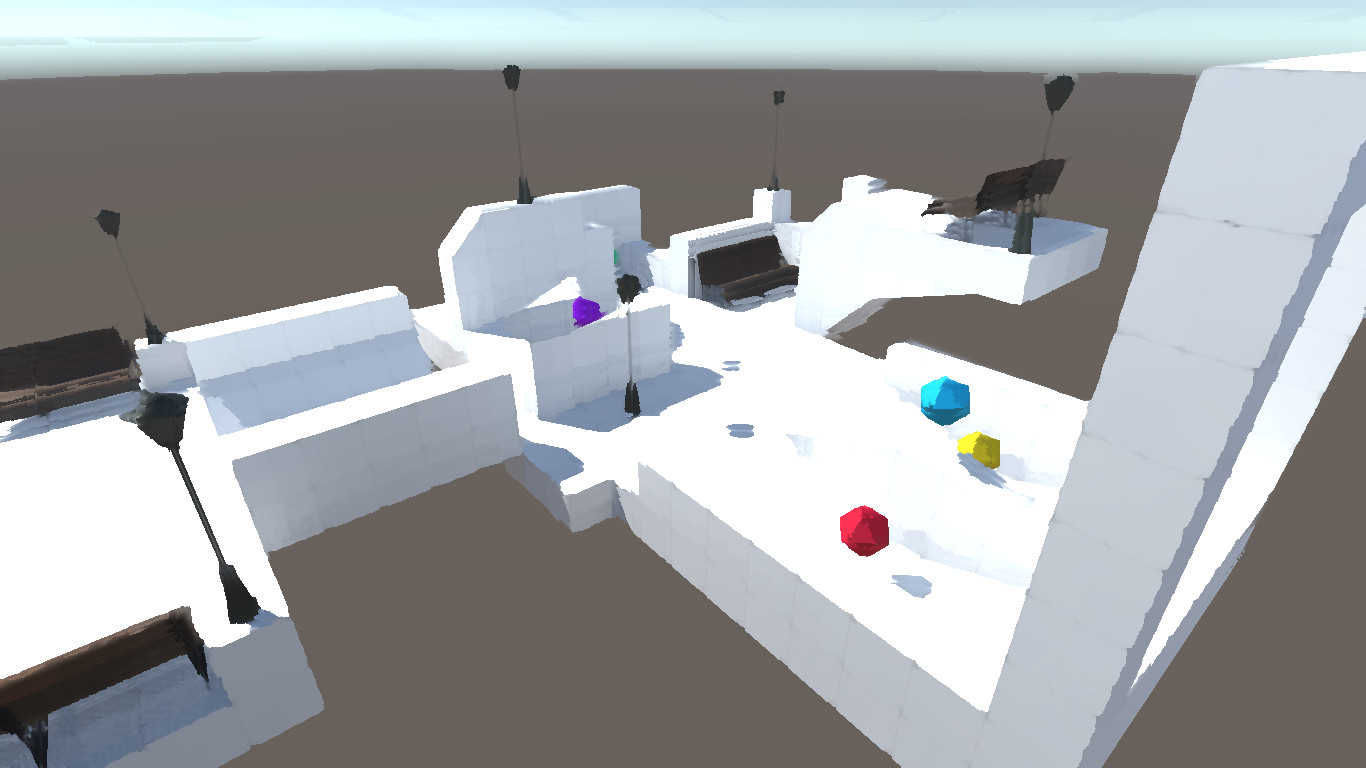
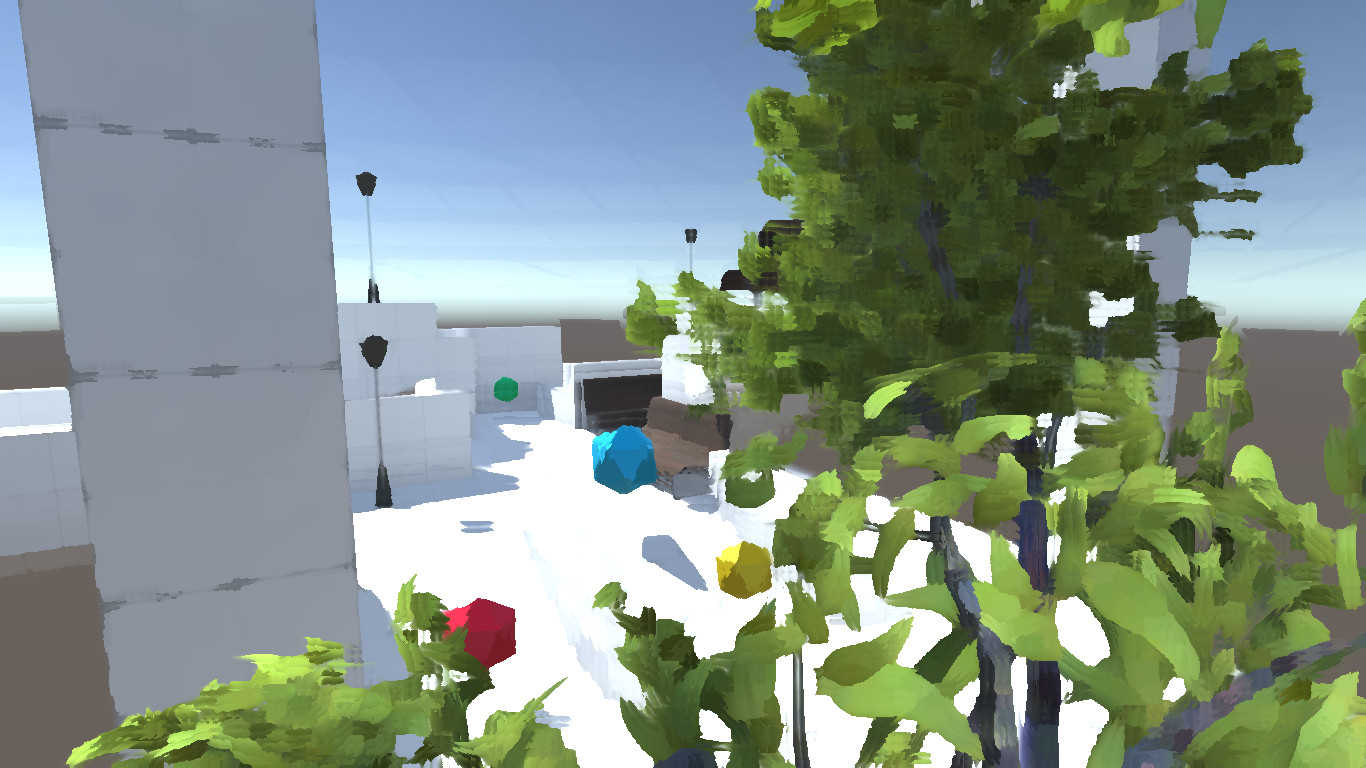
We talked in Part 3 of this series about blurring operators, namely the Box Blur and Gaussian kernel functions. Today, I’d like to introduce you to a new type of kernel that will help us emulate the oil painting effect in Super Mario Odyssey. It’s worth mentioning from the outset that this kind of effect probably works best on a complex scene with lots of noise, so try the shader out on a range of busy scenes for best results!
The Kuwahara filter was originally developed for use in medical imaging as an operator that removes unwanted noise from an image while preserving object edges; other low-pass filters (one of which is the Gaussian filter) blur those edges. Those same properties are useful in artistic imaging; the filter removes texture from images, giving them a blocky, paintbrushed aesthetic. That’s exactly what we’re looking for!
The Kuwahara filter uses a square kernel window, like the Gaussian kernel, with odd-numbered dimensions. The difference here is that the Kuwahara operator divides the window into four overlapping regions, such that the cross-shape of pixels in the middle of the window belong to multiple regions each. It’s much easier to understand on a diagram; on a 5x5 kernel, the top-left 3x3 pixels constitute one region and the top-right 3x3 pixels are a separate region, with a strip of three pixels overlapping and belonging to both regions. The central pixel in a Kuwahara kernel belongs to all four regions.
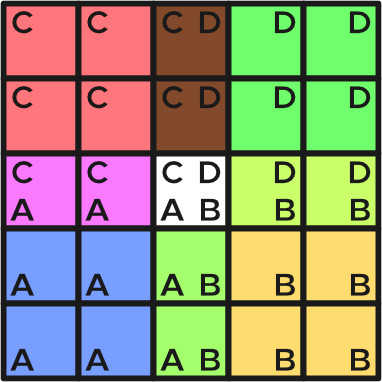
The operator calculates the variance of the colours of the pixels in each of the four regions. The region with the lowest variance is the most ‘stable’, and it’s that region that is picked to be representative of the entire window; the mean of the pixel colours in that region is picked to be the colour for the central pixel in the output image. With me so far?
As you can imagine, the shader for this effect is going to be quite involved, and I’m going to use a few tricks to optimise the shader. Let’s jump right in and look at Shaders/Painting.shader. There aren’t many differences between this and the most basic image effect shader; I’ve included a parameter for the kernel size and added the _MainTex_TexelSize variable as we’ll be considering multiple pixels.
There are a lot of parts to take in here, but let’s define a few variables to keep track of the bounds of the for-loops we’ll be writing. In fact, let’s delete the contents of the fragment shader and start again:
int upper = (_KernelSize - 1) / 2;
int lower = -upper;
We’re also going to be calculating a mean value, so we’ll need to calculate the number of samples taken during each loop. We’ll be performing separate loops in each region to calculate their mean and variance, but since each region is the same size, it’s smart to only calculate the region pixel count one time. We’ll do that next inside the fragment shader:
int samples = (upper + 1) * (upper + 1);
Now we’ll have to write each region for-loop. It’ll be tedious for us to write four individual loops, so instead we can write a function taking the bounds of the region and the number of samples as inputs. But what will the function return? We want it to return both the variance - so we can compare the variance of each region - and the mean - so we can choose the corresponding mean region value accordingly without needing to recalculate it later. First of all, we’ll want to create some container to hold both those values. Above the fragment shader, let’s create a new struct.
struct region
{
    float3 mean;
    float variance;
};
The mean colour is going to be an RGB vector, and the variance is just a single value. Now we can write the region loop function, with region as a return type.
region calcRegion(int2 lower, int2 upper, int samples, float2 uv)
{
    region r;
    ...
    return r;
}
Inside this function, we will calculate the mean and variance. The mean is easy to calculate - sum up the colour values of all pixels and divide by the number of samples, which we’ve passed into the function via int samples. The variance calculation is the “mean of the squares minus the square of the means”, which just means we’ll sum up the square of each pixel colour, then subtract the squared mean from that sum. That leaves us with a 3-dimensional vector, so we’ll use the length function to obtain a single value for r.variance.
region r;

float3 sum = 0.0;
float3 squareSum = 0.0;

...

r.mean = sum / samples;

float3 variance = abs((squareSum / samples) - (r.mean * r.mean));
r.variance = length(variance);

return r;
Now we’ll construct the for-loops to do the summations, running over the bounds supplied to the function via int2 lower and int2 upper. The int2 datatype is similar float2, except it holds integers rather than floating points. We’ll sample the texture at each pixel position in the region and add its colour value to sum, and the square of its colour sum to squareSum. Cast your mind back to Part 3’s Blur shaders, when we used the _TexelSize of _MainTex to ensure we sample the correct part of the image. We also pass the uv into the function as a parameter for this purpose.
...
for (int x = lower.x; x <= upper.x; ++x)
{
    for (int y = lower.y; y <= upper.y; ++y)
    {
        fixed2 offset = fixed2(_MainTex_TexelSize.x * x, _MainTex_TexelSize.y * y);
        fixed3 tex = tex2D(_MainTex, uv + offset);

        sum += tex;
        squareSum += tex * tex;
    }
}
...
That’s most of the heavy lifting done! Now we’ll need to return to the fragment shader and use the calcRegion function to calculate the regional parameters. The next step, then, is to figure out the bounds of each region. We wrote the for-loop in calcRegion to be inclusive of the lower and upper bounds passed into it.
// After the definition of 'samples' in frag shader:
region regionA = calcRegion(int2(lower, lower), int2(0, 0), samples, i.uv);
region regionB = calcRegion(int2(0, lower), int2(upper, 0), samples, i.uv);
region regionC = calcRegion(int2(lower, 0), int2(0, upper), samples, i.uv);
region regionD = calcRegion(int2(0, 0), int2(upper, upper), samples, i.uv);
In this shader, region A is the bottom-left, B is bottom-right, C is top-left, and D is top-right, corresponding to the diagram earlier in this article. The type of each of the four variables is region, which is the name we gave to the data-holding struct before. Now all that’s left to do is pick the correct regional mean, and for that we’re going to employ some shader tricks as we did in Part 5’s Game Boy shader with lerp and saturate; this time we’ll be using step instead of saturate. We’re almost finished!

We’ll start by assigning regionA as having the lowest variance and choose its mean to use as the colour value. Then, in turn, we’ll check if the other three regions have a lower variance and if so, pick that region and set the minimum variance and chosen colour accordingly.
// After region calculations.
fixed3 col = regionA.mean;
fixed minVar = regionA.variance;
When comparing between regions, we’ll aim to avoid if-statements again. The step function takes two parameters and returns 1 if the second parameter is greater than or equal to the first, and 0 otherwise. We can use step to pick between the minimum recorded variance so far and the variance of the region we’re considering - this will obtain a ‘test value’. We’ll put the test value inside a lerp to set the minimum variance and chosen colour accordingly - if the test value was 0, then col and minVar won’t change, and if the test value was 1 we’ll choose this region’s variance and mean to replace both of those values. We’ll do this for each of the remaining regions - B, C and D - in turn. That should finish off our fragment shader.
float testVal;

// Test region B.
testVal = step(regionB.variance, minVar);
col = lerp(col, regionB.mean, testVal);
minVar = lerp(minVar, regionB.variance, testVal);

// Test region C.
testVal = step(regionC.variance, minVar);
col = lerp(col, regionC.mean, testVal);
minVar = lerp(minVar, regionC.variance, testVal);

// Text region D.
testVal = step(regionD.variance, minVar);
col = lerp(col, regionD.mean, testVal);

return fixed4(col, 1.0);
I don’t bother setting minVar on the final check, because there are no further checks that would use it. Pulling it all together, we’ve created a Kuwahara filter that should do what we want. Attach the shader to an ImageEffectBase component on your main camera and see the results speak for themselves! Like I mentioned, you’ll probably find it works best on noisy, busy scenes with lots of details.
Conclusion
We’ve looked at how we can use a Kuwahara filter to achieve a brush-stroke painting effect in Unity. In all, we’ve looked at a lot of different types of shader techniques and learned a lot about how image effects work. In the next tutorial, I’ll be wrapping up the series by recapping what we’ve learned and going into more detail with a few things I glossed over initially.