Detecting edges in images allows developers to write cartoon shaders to boldly outline objects. Typically, they would use object geometry, but we can achieve a cheap edge-detection effect using image effects. In this tutorial, we shall explore the Sobel-Feldman operator and look at bloom effects to implement the Line Drawing and Neon effects in Super Mario Odyssey.

Line Drawing
To detect edges using an image effect, let’s think about how we define an edge. Without being able to use object geometry to decide where an edge is, we will consider edges in the image to be places where the colour changes suddenly in lightness or hue. That means we will have to consider multiple pixels as we did with the Blur filters but using a different kernel. Let’s look at the Sobel filter.
A Sobel operator calculates “gradients” across an image and then uses the magnitude of those gradients to decide where there are edges. Since gradient calculations are inherently one-directional, we shall perform two calculations in the x- and y-directions - but this time, we thankfully won’t need to do them in separate passes, as you’ll see. Each calculation involves a 3x3 kernel.
\[G_x = \begin{bmatrix} -1 & 0 & 1 \\ -2 & 0 & 2 \\ -1 & 0 & 1 \end{bmatrix} \hspace{25pt} G_y = \begin{bmatrix} -1 & -2 & -1 \\ 0 & 0 & 0 \\ 1 & 2 & 1 \end{bmatrix}\]In fact, unlike the kernels we used for blurring in the last tutorial, the horizontal and vertical steps can’t be combined into one matrix easily - we must complete them independently and use Pythagoras’ Theorem on the x-gradient and y-gradient to calculate an overall gradient. In theory, you can pick any pair of perpendicular directions such as the diagonals, but it’s far more convenient to pick the x- and y-directions.
Now let’s look at this in a shader - the template for this can be found in Shaders/EdgeDetect.shader. I’ve defined a sobel() function which will do the heavy lifting for us - the fragment shader is already complete. Running the shader now will give you a very underwhelming black screen, so let’s add some calculation to the sobel() function.
We’ve defined accumulator variables for the horizontal (x) and vertical (y) passes, and for the sake of saving on some typing, texelSize is its own variable. For each of the kernel values, we will want to multiply them by the corresponding pixel values, like the Blur shaders, but since we know the kernel is always 3x3, there’s no point writing everything in a complex loop - let’s just hard-code the calculations. Between the texelSize variable definition and the return statement, splice in this code:
x += tex2D(_MainTex, uv + float2(-texelSize.x, -texelSize.y)) * -1.0;
x += tex2D(_MainTex, uv + float2(-texelSize.x,            0)) * -2.0;
x += tex2D(_MainTex, uv + float2(-texelSize.x,  texelSize.y)) * -1.0;

x += tex2D(_MainTex, uv + float2( texelSize.x, -texelSize.y)) *  1.0;
x += tex2D(_MainTex, uv + float2( texelSize.x,            0)) *  2.0;
x += tex2D(_MainTex, uv + float2( texelSize.x,  texelSize.y)) *  1.0;

y += tex2D(_MainTex, uv + float2(-texelSize.x, -texelSize.y)) * -1.0;
y += tex2D(_MainTex, uv + float2(           0, -texelSize.y)) * -2.0;
y += tex2D(_MainTex, uv + float2( texelSize.x, -texelSize.y)) * -1.0;

y += tex2D(_MainTex, uv + float2(-texelSize.x,  texelSize.y)) *  1.0;
y += tex2D(_MainTex, uv + float2(           0,  texelSize.y)) *  2.0;
y += tex2D(_MainTex, uv + float2( texelSize.x,  texelSize.y)) *  1.0;
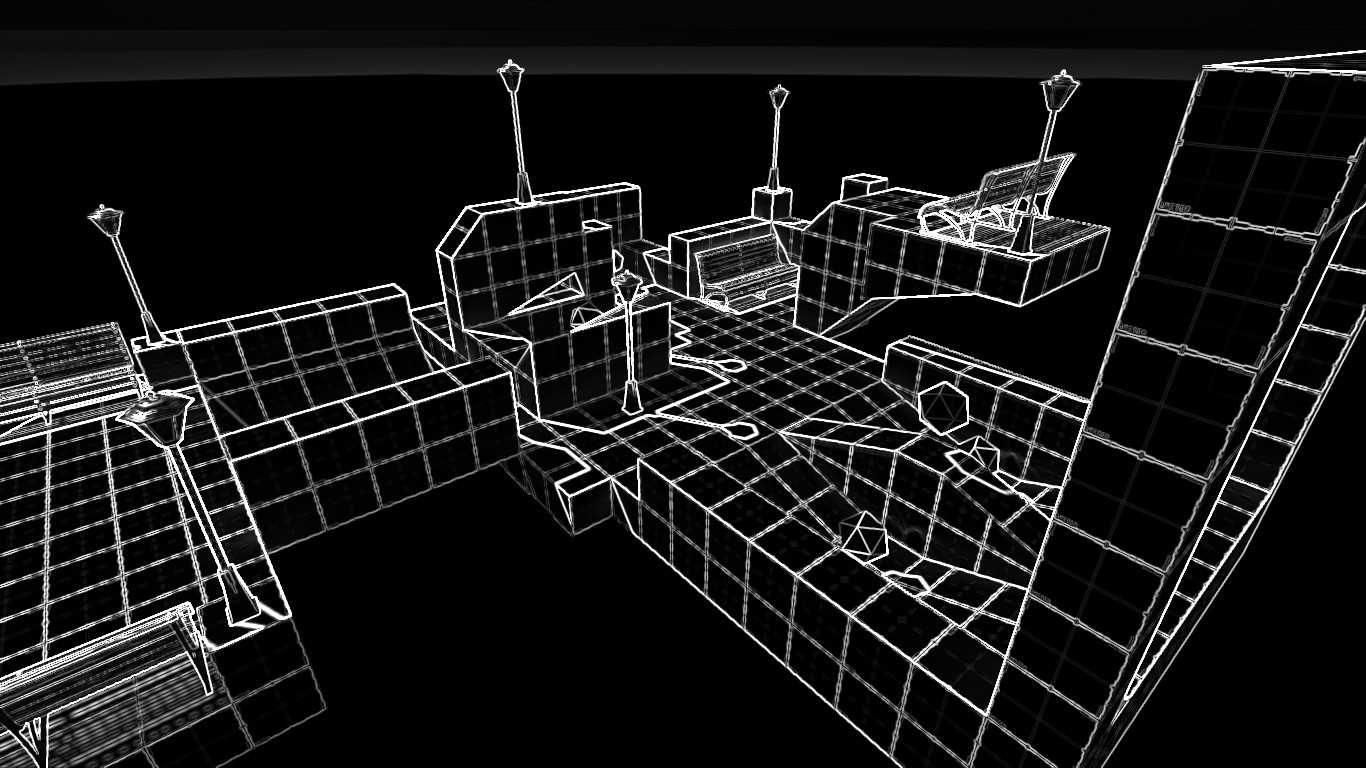
If you look over the values, you’ll see they correspond to the kernel calculations, but I’ve missed out the parts of the calculation where the kernel value is zero. Run the shader now, and you should see some lovely edge detection! I’d suggest that if you intend to use this effect in a game as-is, then consider turning off shadows, because they’ll also be edge-detected and could look strange. Alternatively, use that as your aesthetic - be creative!
You’ll also notice the sqrt() function that we use at the end - it’s short for ‘square root’, as you’d expect. This line is just doing Pythagoras’ Theorem on the independent horizontal and vertical gradients to get the overall gradient magnitude, and therefore the ‘edginess’ of the pixel.
return sqrt(x * x + y * y);
If you wanted it to look more like the Line Drawing effect in Super Mario Odyssey, then try inverting the colours and perhaps make the lines grey.

Neon
The Edge Detect shader was a bit of a breeze compared to the Blur shaders, so let’s take things up a notch and consider the Neon effect. It’s easy to see this is based on Edge Detect with a bit of added colour, so as a first step let’s try multiplying the original image colours by the edge detect values. You’ll find the template in Shaders/Neon.shader, although it’s essentially the same as EdgeDetect.shader. Modify the fragment shader like this:
float3 s = sobel(i.uv);
float3 tex = tex2D(_MainTex, i.uv);

return float4(tex * s, 1.0);
Already it’s looking a bit neon! But if the source file has muted colours, then the result will also look fairly dull. Increasing the saturation of the colours will help inject a little more life into the scene. I won’t go into too much detail about colour theory, but we’ll need to convert from RGB colour space to some other space such as HSV - which stands for “hue, saturation, value” - then modify the saturation and convert back to RGB. There isn’t code built into the shader language or Unity to perform this conversion for us, so instead let’s use code from elsewhere. The code in that example is written in GLSL, so I’ve also converted it into HLSL so we can splice it into our shader.
// Credit for these two functions:
// http://lolengine.net/blog/2013/07/27/rgb-to-hsv-in-glsl
float3 rgb2hsv(float3 c)
{
    float4 K = float4(0.0, -1.0 / 3.0, 2.0 / 3.0, -1.0);
    float4 p = c.g < c.b ? float4(c.bg, K.wz) : float4(c.gb, K.xy);
    float4 q = c.r < p.x ? float4(p.xyw, c.r) : float4(c.r, p.yzx);

    float d = q.x - min(q.w, q.y);
    float e = 1.0e-10;
    return float3(abs(q.z + (q.w - q.y) / (6.0 * d + e)), d / (q.x + e), q.x);
}

float3 hsv2rgb(float3 c)
{
    float4 K = float4(1.0, 2.0 / 3.0, 1.0 / 3.0, 3.0);
    float3 p = abs(frac(c.xxx + K.xyz) * 6.0 - K.www);
    return c.z * lerp(K.xxx, saturate(p - K.xxx), c.y);
}
Now let’s perform the conversions. As well as modifying the saturation, I also modify the value (lightness) so that the bright colours pop even more.
float3 hsvTex = rgb2hsv(tex);
hsvTex.y = 1.0;		// Modify saturation.
hsvTex.z = 1.0;		// Modify lightness/value.
float3 col = hsv2rgb(hsvTex);

return float4(col * s, 1.0);
Run the shader now, and the neon colours should pop! The conversion makes pixels that were near greyscale look much more colourful than before, so the whole scene might look very different to what you were expecting.

The neon effect looks great, but we would usually expect such an effect to glow, especially the brightest parts of the image. We can do that by implementing another step on top of what we’ve done so far - let’s discuss a simplified bloom shader.
Bloom
At its core, Bloom is used to make bright light sources stand out in a scene by adding a glowing effect around them. Neon sure is a bright light source! In this section, we’ll introduce a powerful new concept that allows us to use a Pass from a different shader.
Let’s go over the theory behind Bloom. We’ll want to isolate the parts of the image that have a high brightness value - those are the ‘light sources’ - then blur them a little to imitate the glowing effect. Once we have the blurred version of the image, we shall composite that image on top of the original image to obtain the final Bloom result. There are many more in-depth ways of implementing bloom, but this will suffice for our needs.
Now let’s implement this all in a shader. Open Shaders/Bloom.shader and take a look at what we’ve got - two passes, the first of which uses the same RGB-HSV conversion functions we saw back in the Neon filter, and the second of which is just sampling a texture. You might have spotted something new, too - both new passes have names. These names are not required, but we will see an instance where we must Name a pass very soon.
Let’s start with the first pass, named “ThresholdPass”, which is going to compare the brightness value with some threshold value. Let’s define this in Properties.
// Properties.
_Threshold("Bloom Threshold", Range(0, 1)) = 0.5

// Variable declarations.
float _Threshold;
Now, instead of returning the original texture unscathed, we’ll do a comparison between the brightness of the pixel and the threshold. We can use the ternary operator in shader language, just like you would in C#, so we’ll use that to avoid lengthy if-statements and return either the original pixel or a completely black pixel.
float brightness = rgb2hsv(tex).y;
return (brightness > _Threshold) ? tex : float4(0.0, 0.0, 0.0, 1.0);
That’s it for the first pass. Now we should turn our attention to the script being used to control the shader, since it will act a little differently to the others we have implemented so far. Let’s create a new C# script called ImageEffectBloom.cs and inherit from ImageEffectBase.cs, as we did for ImageEffectGaussian.cs:
using UnityEngine;

public class ImageEffectBloom : ImageEffectBase
{
	protected override void OnRenderImage(RenderTexture src, RenderTexture dst)
	{

	}
}
First off, we shall need a temporary RenderTexture to hold the result of the thresholding pass. We will also define variables to keep track of the pass IDs for the shader so we don’t throw too many magic numbers in our code. Then, we can use that pass ID in a Graphics.Blit() in order to perform the thresholding step.
// Above the function.
private const int thresholdPass = 0;

// Inside the function.
RenderTexture thresholdTex =
	RenderTexture.GetTemporary(src.width, src.height, 0, src.format);

Graphics.Blit(src, thresholdTex, material, thresholdPass);
Back in Unity’s Scene View, remove all Image Effect scripts from your camera for now, and attach this brand-new script. Place the Bloom shader in the shader slot and hit Play - all that should be visible are the brightest scene elements.
The second component of the Bloom effect is blurring the thresholded image. This is where we’ll unlock the secrets of using Passes from other shaders: UsePass. From here on, I’ll assume you’ve followed Part 3 and implemented the Blur shaders the same way I have - if not, you’ll have to tweak a few names.
By using UsePass we can reference other shader passes by name. To do this, we’re going to have to go back and make sure the shader passes we plan to use have names. Open the source files for the shader you’re going to use - either GaussianBlurSinglepass or GaussianBlurMultipass will do - and give their passes sensible names by using Name at the top of the pass. I’m going to do both simultaneously and add functionality to ImageEffectBloom to switch between both.
// Singlepass:
Name "BlurPass"

// Multipass first pass:
Name "HorizontalPass"

// Multipass second pass:
Name "VerticalPass"
I’ve been very sneaky and already did this in the versions of these shaders found in the Complete folder. We’ll now be able to reference these three shader passes inside the Bloom shader using UsePass. The syntax is simple - it’s UsePass followed by the name of the shader and shader pass. We’ll put these Passes in between the two already in the file.
// If using single-pass blur.
UsePass "SMO/Complete/GaussianBlurSinglepass/BLURPASS"

// If using multipass blur.
UsePass "SMO/Complete/GaussianBlurMultipass/HORIZONTALPASS"
UsePass "SMO/Complete/GaussianBlurMultipass/VERTICALPASS"
The only modification you need to make is to state the name of the shader pass in all-caps, because this is the name that Unity gives to those passes internally. It’s important to note that you should treat these as if they are full-fat passes - they will be given their own IDs - and that all Properties or CGINCLUDEs need to be redefined inside Bloom.shader to work as intended. The template already copied over the properties used by the Gaussian blur filters, but to refresh your memory, here they are again.
// In Properties.
_KernelSize("Kernel Size (N)", Int) = 21
_Spread("St. dev. (sigma)", Float) = 5.0
Let’s go back over to ImageEffectBloom.cs. We have a few new passes, so we’ll add their IDs to variables with similar names to those used by the passes.
// Single-pass.
private const int blurPass = 1;

// Multi-pass.
private const int horizontalPass = 2;
private const int verticalPass = 3;
We won’t ever be using both versions of the Gaussian filter at the same time, so let’s add a ‘switch’ we can use to pick the one we’re working with. Somewhere outside the class definition, let’s add an enum that defines the two modes of operation. Alongside it, we’ll also keep track of the state using a variable.
// At the top of class definition.
[SerializeField]
private BlurMode blurMode = BlurMode.MultiPass;

// Below ImageEffectBloom class definition.
enum BlurMode
{
	SinglePass, MultiPass
}
If you’ve never seen [SerializeField] before, it lets us define a private variable that’s still exposed in the Inspector in Unity. Now that we’re tracking the mode, let’s apply the blurring step based on the mode. We’ll need to tweak the material properties outside the shader, which we can do with a few functions available in Unity.
// After last Graphics.Blit().
RenderTexture blurTex =
	RenderTexture.GetTemporary(src.width, src.height, 0, src.format);

// Tweak material properties.
material.SetInt("_KernelSize", 21);
material.SetFloat("_Spread", 5.0f);

if(blurMode == BlurMode.SinglePass)
{
    Graphics.Blit(thresholdTex, blurTex, material, blurPass);

    RenderTexture.ReleaseTemporary(thresholdTex);
}
else
{
    RenderTexture temp =
        RenderTexture.GetTemporary(src.width, src.height, 0, src.format);

    Graphics.Blit(thresholdTex, temp, material, horizontalPass);
    Graphics.Blit(temp, blurTex, material, verticalPass);

    RenderTexture.ReleaseTemporary(thresholdTex);
    RenderTexture.ReleaseTemporary(temp);
}
We base the number of, and IDs of, the blurring passes on the mode, like this. Now if we were to call Graphics.Blit(blurTex, dst) and take a look at the screen output, we get a blurred version of the threshold texture, as expected. This is almost what we want, but far too blurry!
Let’s return to the Bloom shader and fill in the final pass. This one is going to composite the original source image and the blurred threshold image together, so we’ll have to make sure both are passed into the function. We’ll pass in the threshold image as the first parameter to Graphics.Blit(), which gets passed into _MainTex, so we’ll add another variable for the source texture in this pass below the other variables.
// Texture representing the result of the bloom blur.
sampler2D _SrcTex;
Now all we’ll do is sample both textures and add them together in the fragment shader - it’s as easy as that.
float3 originalTex = tex2D(_SrcTex, i.uv);
float3 blurredTex  = tex2D(_MainTex, i.uv);

return float4(originalTex + blurredTex, 1.0);
The final thing we must do is pass the correct data to this shader pass and execute it. First off, add another shader pass ID constant for this final pass. Then, we’ll simply put the source image into the correct shader variable and perform the final Blit(). Do make sure you release the last temporary RenderTexture too!
// After if-else statement.
// Set the source texture.
material.SetTexture("_SrcTex", src);

// Do the final Blit().
Graphics.Blit(blurTex, dst, material, bloomPass);

// Release the final temp texture.
RenderTexture.ReleaseTemporary(blurTex);
Now run the shader - it’s the bloom we’ve been seeking all this time! We opted to write a cheap blur effect because we really don’t need the highest fidelity, nor are we paying particular attention to HDR (High Dynamic Range) rendering in this example, but if you’d like to iterate on this design and create a better bloom effect, there are plenty of resources to take a look at. Good luck if you attempt something cool!

Multiple image effects
We haven’t yet discussed how to run multiple image effects at once, but it’s simple - just attach multiple image effect scripts to your main camera and add the shaders you wish to run to those components. The image effects will run in order from top to bottom, so do make sure the effects are listed in the correct order! To complete our Neon Bloom effect, add an ImageEffectBase script with the Neon shader attached, then add an ImageEffectBloom script below it and attach the Bloom shader. Now our effect is looking just the way we’d like it!

Conclusion
Today we learned how to detected the edges of objects using screen-space image gradients, then took those edges and used them to implement a neon effect. A layer of bloom on top of that, obtained by using our previous work on blur shaders with UsePass, resulted in a more refined look for the neon shader.
The next article in this series will explore some pixelated effects to emulate the NES, SNES and Game Boy filters. Together with those filters, I’ll also show you how to write a CRT TV effect to bring the effect right into the late 20th century.