I recently played Manifold Garden, a game based on Escher-esque architecture. It’s full of mind-blowing sequences, and one of my favourite technical elements was the game’s portals, which are used heavily to explore the concept of impossible space. You walk into a small room, and there’s a vast world inside! Today, we’ll recreate the tech behind this type of portal.
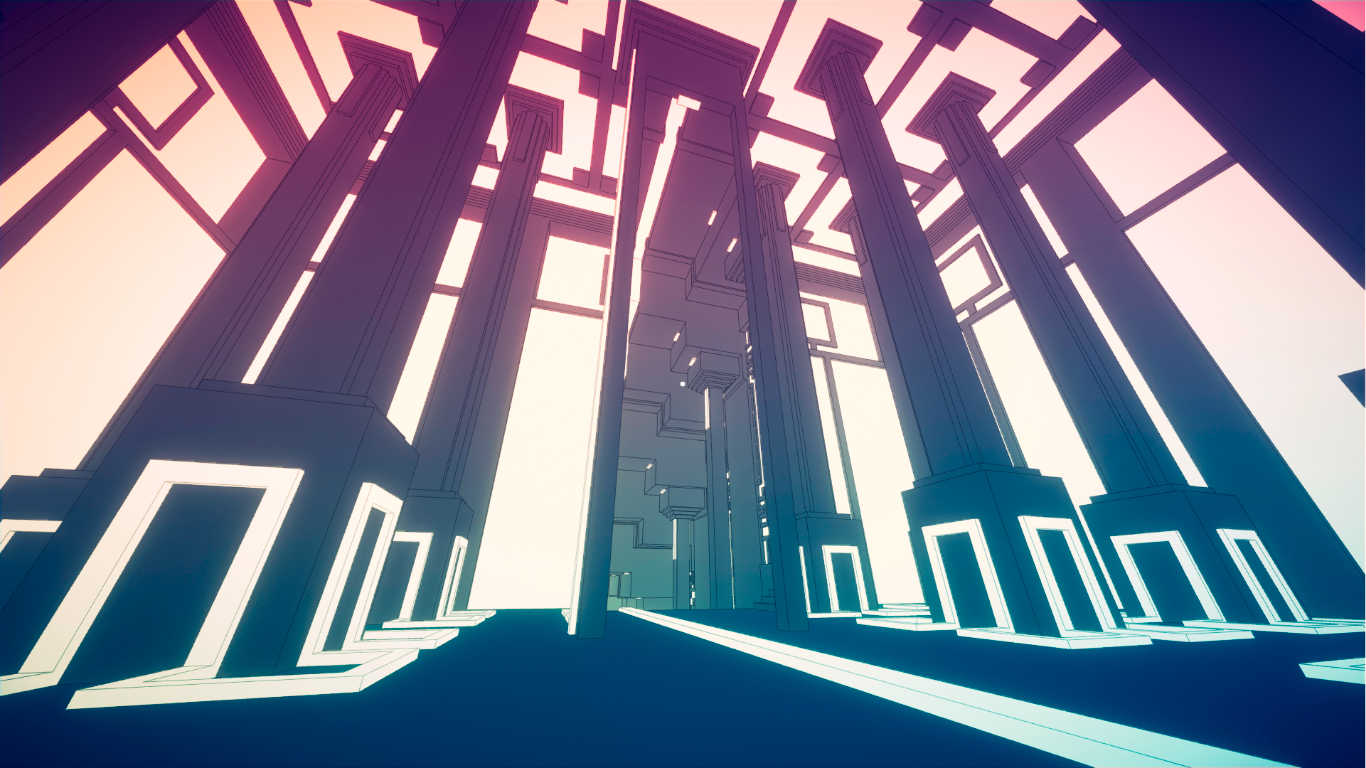
Screenshot from Manifold Garden
Portal Surfaces
There are several technologies we can use to create a portal effect, but they all include using a camera to capture what the world looks like from behind a portal’s exit, then pasting the image over the portal’s entrance. The first part of this article is going to be about positioning the camera properly in order to take that photo, and then in the second half we’ll figure out how to use the rendered image to display something on the portal’s surface. We’ll only be talking about the basic visuals today - the mechanics of travelling through the portal and other effects will be described in later tutorials.
It is highly recommended to read this tutorial with a copy of the project open in Unity, as there are a lot of moving parts and we’ll be jumping from script to script often. Download it from GitHub now!
Camera Positioning
There are a lot of moving parts (literally!) when it comes to positioning the cameras correctly. But the general idea goes like this: place a virtual camera behind the “out-portal” with the same offset and rotation as that of the player in front of the “in-portal”. Let’s explore the method in more detail.
The player will be looking in an arbitrary direction, from an arbitrary position, and we’ll have two portal surfaces in the scene. We need each portal’s surface to look like the world as seen from the other portal. So, for each portal - let’s call the one being considered the “in-portal” - we’ll retrieve the rotation of the player and their offset from the in-portal, then convert both of them from world space to the in-portal’s local space. The position and rotation are now relative to the in-portal; the diagram below abstracts this idea to 2D.
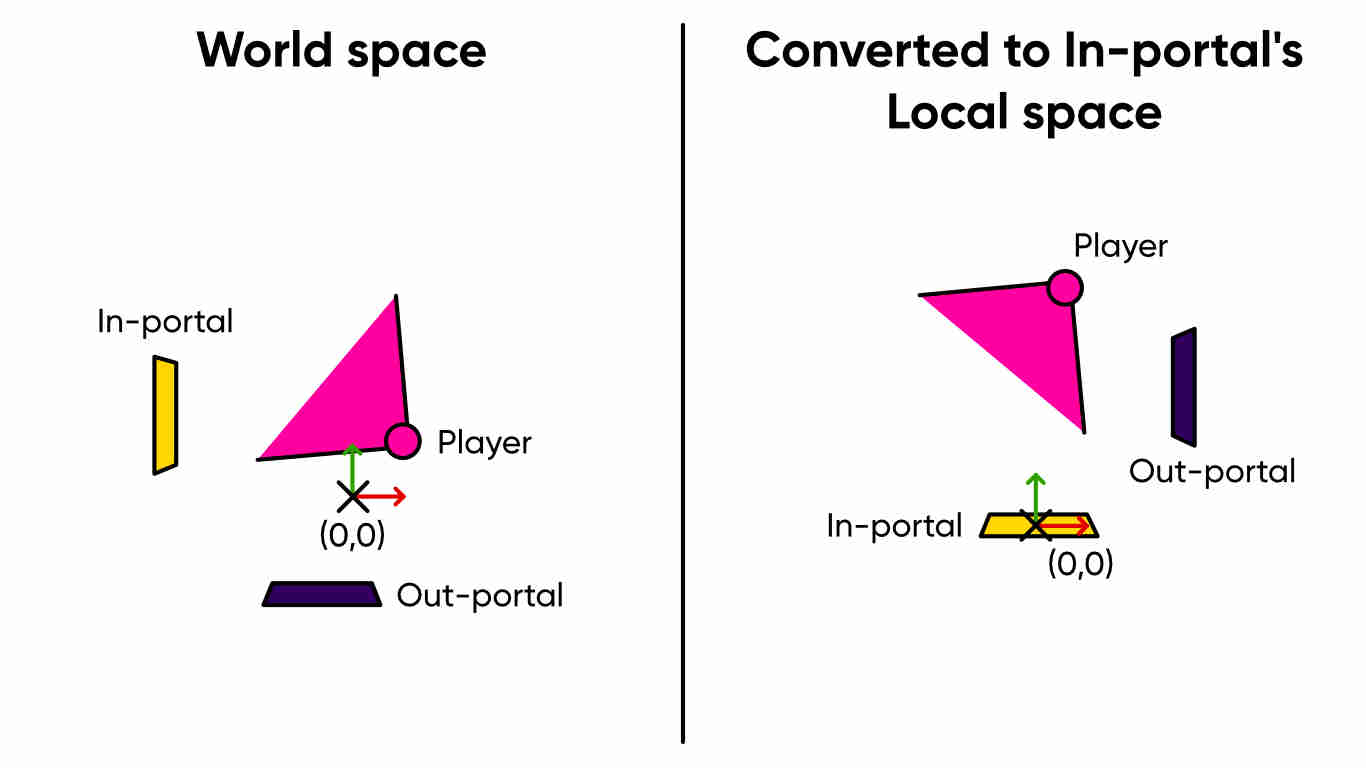
Take that relative offset and imagine it is now relative to the other portal - the “out-portal”. We want to reflect the positional offset in the out-portal’s surface plane so that it is behind the portal. Then, we’ll do the same with the relative rotation: rather than pointing towards the area behind the portal, rotate it 180 degrees such that it points to the world outside the portal. Now, convert the position and rotation from the out-portal’s local space to world space and place a secondary camera in the scene with the new position and rotation. The result is seen in the diagram below:

That’s the method for positioning the camera. Now let’s look at some real code. Much of the code pertains to later tutorials, so for now I shall skip over those sections. For now, open up the BasicPortals.unity scene. The scene contains some basic level geometry, a lovely animated robot asset from the Unity Asset Store, our two portal surfaces, and a camera object called BasicPortalCamera containing the player camera and the ‘virtual’ portal camera. Observe that the virtual camera is inactive, so only the player camera will render directly to the screen every frame. We’re going to use the virtual camera to capture the scene through the two portals at runtime.
The player camera has a script called BasicPortalCamera.cs attached to it - let’s open that file (found at Scripts/BasicPortal/BasicPortalCamera.cs) and code up the positioning method we just discussed.
This script requires a few references first. It needs access to the two portals, the ‘virtual’ portal camera, and a material we’ll use for drawing the portal surfaces later. We’ll also cache the player camera component with the mainCamera variable and there’s a couple of other member variables we’ll talk about in the rendering section later.
[SerializeField]
private Portal[] portals = new Portal[2];

[SerializeField]
private Camera portalCamera;

[SerializeField]
private Material portalMaterial;

private Camera mainCamera;
This script has a few methods. We’ll look over Awake and Start later. There’s also the OnRenderImage method we’ll talk about later, and the RenderCamera method we’ll look at now. It takes in an inPortal and outPortal as parameters - the inPortal is the one we’re rendering the view for.
private void RenderCamera(Portal inPortal, Portal outPortal)
{
    ...
}
The first step was to calculate the player camera’s position and rotation relative to the in-portal. For positioning, we can use the InverseTransformPoint function, which converts a world-space position to a local-space position. The reverse process to convert from local-space to world-space uses the TransformPoint function. We’ll use the InverseTransformPoint function to convert the player’s world-space position to inPortal’s local space.
Rotating the local-space point around the portal is easy - we can build a rotation of 180 degrees around the local y-axis using Quaternion.Euler(0.0f, 180.0f, 0.0f), then multiply the relative point by that rotation. Finally, the rotated position is converted from outPortal’s local space to world space using TransformPoint. The result is that the portalCamera is placed at the correct position behind the outPortal.
To deal with the rotations, we’ll need to use the built-in functions of the Quaternion class. To obtain the relative rotation in inPortal’s local space, we’ll multiply the player’s rotation by the inPortal’s inverse rotation; the Quaternion.Inverse function is used to obtain inPortal’s inverse. Then, we rotate 180 degrees around the local y-axis, just as we did for the position, before finally converting back to world space by multiplying by the outPortal’s rotation. The result is that the portalCamera points out of the portal and into the world.
Transform inTransform = inPortal.transform;
Transform outTransform = outPortal.transform;

// Position the camera behind the other portal.
Vector3 relativePos = inTransform.InverseTransformPoint(transform.position);
relativePos = Quaternion.Euler(0.0f, 180.0f, 0.0f) * relativePos;
portalCamera.transform.position = outTransform.TransformPoint(relativePos);

// Rotate the camera to look through the other portal.
Quaternion relativeRot = Quaternion.Inverse(inTransform.rotation) * transform.rotation;
relativeRot = Quaternion.Euler(0.0f, 180.0f, 0.0f) * relativeRot;
portalCamera.transform.rotation = outTransform.rotation * relativeRot;
Those transformations will put the camera in the correct position. Now, we’ll deal with rendering.
Portal Rendering
We’re going to use the stencil buffer to render the portal surfaces - we’ve discussed the stencil buffer in the past if you’d like to read more about them; they are used for storing special per-pixel reference values which allows us to implement impossible geometry inside shaders, amongst other things. A pair of shaders will use the stencil. We’ll draw the portal surface mesh initially using a block-colour shader which also writes a reference value to the stencil buffer - a unique value for each portal surface. Then, a second shader will be used to write the images captured by the virtual camera to the screen as part of a post-processing image effect. That shader will read the stencil buffer and only draw pixels which have the appropriate stencil reference value. Let’s look at the shader we’ll use for the portal surfaces, found at Shaders/BasicPortal/PortalMask.shader. To start off, we’ll name the shader "Portals/PortalMask" and define two properties: a base colour to fallback to whenever portal rendering is disabled, and an ID.
Shader "Portals/PortalMask"
{
    Properties
    {
        _Colour("Base Colour", Color) = (1, 1, 1, 1)
        _MaskID("Mask ID", Int) = 1
    }
    SubShader
    {
        ...
    }
}
Inside the SubShader, we have the usual suspects - some Tags, and a Pass which includes a CGPROGRAM...ENDCG block. But the Pass contains the less-typical Stencil keyword, which is where we interact with the stencil buffer. Recall from previous discussions that the stencil buffer is the same size as the framebuffer (i.e. the image), and it contains a value of zero inside each pixel by default.
Stencil
{
    Ref [_MaskID]
    Comp Always
    Pass Replace
}
Inside the stencil, we provide a reference value using the Ref keyword. In our case, we’ll want to use the _MaskID property as our reference value. The stencil uses a comparison function, Comp, to determine whether it should render a pixel by comparing the value already in the stencil buffer to the reference value. In our case, we’re using the Always function, which means the pixel will be drawn regardless of the stencil value (and provided it passes a depth test too). If the stencil test passes (which it will) and so does the depth test, the Pass function determines what happens to the stencil buffer value for this pixel after the shader pass has completed. It’s possible to increment or decrement it, or write a value of zero, but we’ll want to replace the existing value with the reference value. For that, we use the Replace function.
Inside the CGPROGRAM...ENDCG block, we’ll use the standard image effect vertex shader and structs. For the fragment shader, all we do is output the _Colour we defined above.
fixed4 frag(v2f i) : SV_Target
{
    return _Colour;
}
Let’s look back at BasicPortalCamera.cs. We still need to add a final step to the RenderCamera method in order to instruct the portalCamera to render from the position we moved it to. First, let’s explain what Awake and Start do and introduce the remaining member variables that we skipped over earlier.
private RenderTexture tempTexture;

private const int maskID1 = 1;
private const int maskID2 = 2;

private void Awake()
{
    mainCamera = GetComponent<Camera>();
    tempTexture = new RenderTexture(Screen.width, Screen.height, 24);

    portalCamera.targetTexture = tempTexture;
}

private void Start()
{
    portals[0].SetMaskID(maskID1);
    portals[1].SetMaskID(maskID2);
}
Remember that the portalCamera is inactive, so it will only render to its targetTexture when instructed to. In Awake, we need to set the targetTexture of the camera to something, so we create a render texture the same size of the screen, with a 24-bit depth buffer (it’s worth noting the depth and stencil buffers are the same buffer, but bit-depths of 16 or below store depth only, no stencil), and then assign that to the camera. The texture is stored in the tempTexture member variable because we’ll need to access it elsewhere.
The Start method assigns a stencil ID to each of the two portals. There’s no need to go into much detail with the Portal script, found in Scripts/Portal.cs, but let’s look at its SetMaskID method.
public void SetMaskID(int id)
{
    material.SetInt("_MaskID", id);
}
This method sets the mask ID for use within the PortalMask shader. We’ll tell the first portal to use a stencil reference value of 1, and the other to use a reference value of 2. That means the portals won’t interfere with one another while rendering. Now let’s add the final bits of code to the RenderCamera method in BasicPortalCamera. We’re ignoring some of the code in the middle of the method, which we will explore in a future tutorial; the final part of the method tells the camera to render its current viewpoint to its targetTexture.
// Render the camera to its render target.
portalCamera.Render();
You may be asking: what happens to the objects between the portalCamera and the portal surface? Don’t we need to explicitly exclude those from rendering? The answer is yes - and this will be covered in the next tutorial.
The next step is to deal with the rendering strategy in OnRenderImage. This is a built-in Unity callback for postprocessing effects - so we’re going to render the player’s point of view, then if either of the portals is in the player’s sight we’ll render the portal view to a separate texture and paste a small section of the portal image over the base image. The bit that gets cut out depends on the stencil values.
private void OnRenderImage(RenderTexture src, RenderTexture dst)
{
    if(portals[0].IsRendererVisible())
    {
        // Render the first portal output onto the image.
        RenderCamera(portals[0], portals[1]);
        portalMaterial.SetInt("_MaskID", maskID1);
        Graphics.Blit(tempTexture, src, portalMaterial);
    }

    if(portals[1].IsRendererVisible())
    {
        // Render the second portal output onto the image.
        RenderCamera(portals[1], portals[0]);
        portalMaterial.SetInt("_MaskID", maskID2);
        Graphics.Blit(tempTexture, src, portalMaterial);
    }

    // Output the combined texture.
    Graphics.Blit(src, dst);
}
Stepping through the method line-by-line, we’re saying: if the player can see part of the first portal, then render that portal’s viewpoint. Using a mask ID of 1, copy the portal texture to the main texture - but only where the portal can be seen on the main texture. Then, do the same thing for the second portal and a mask ID of 2. Finally, output the resulting main texture. The IsRendererVisible method is defined in the Portal script and looks like this:
public bool IsRendererVisible()
{
    return renderer.isVisible;
}
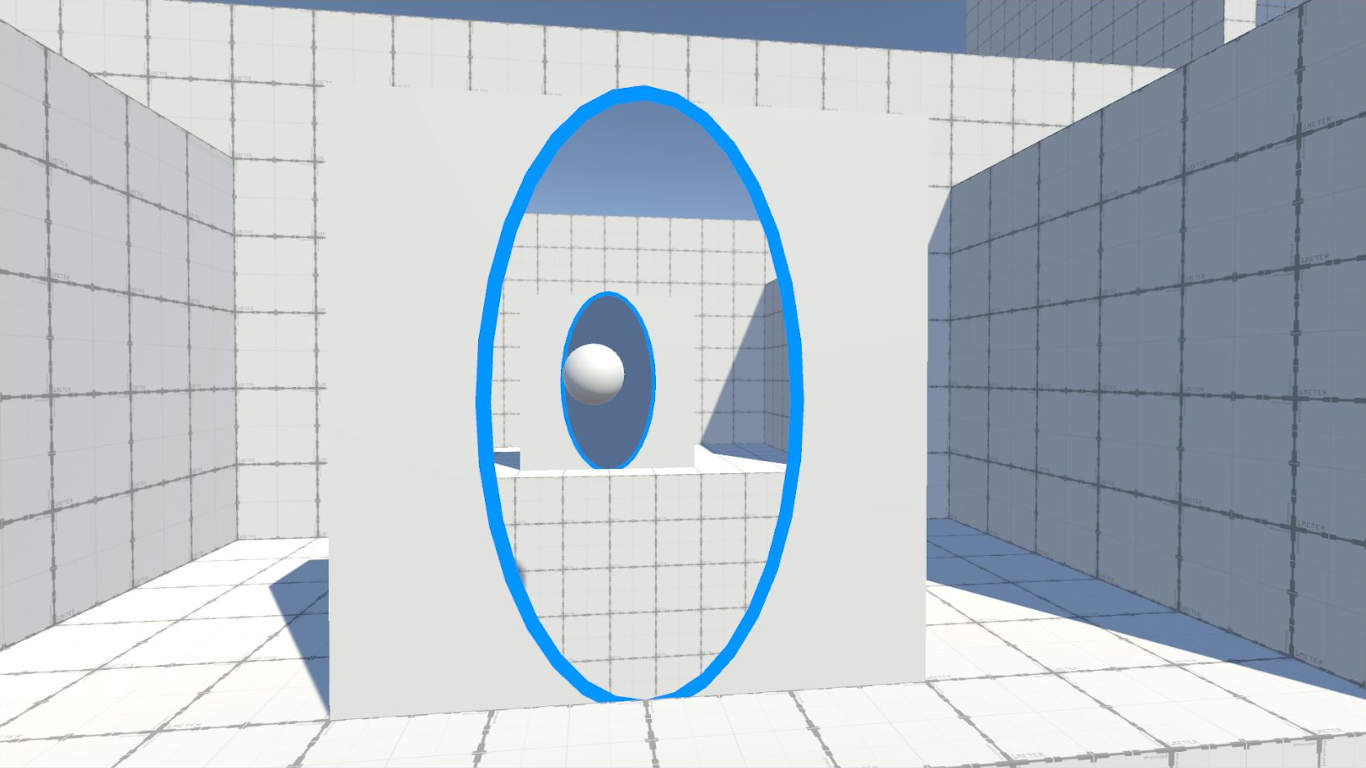
That’s everything! Now, if we play the scene, you’ll be able to see the correct view through the portal.
Limitations
There’s a handful of limitations and edge cases in the code we’ve written so far. Some of them will be fixed in future articles, so I’ll talk about the specific limitations of this portal that won’t be removed. A minor inconvenience is that, since we’re using the stencil buffer, this effect could interfere with other stencil-based effects. It’s a pedantic issue, as you can change the stencil IDs used by the effect, but it’s something to consider if you’re using stencils for something else.
The main issue with this portal is that it’s not recursive, meaning it can’t render a portal seen inside a portal, inside a portal, and so on. It’s feasible to use stencil rendering to achieve this, but it’s a complex operation and not substantially more efficient than the alternative method we’ll use in a future tutorial to write a recursive portal. That approach won’t be a postprocessing effect.
Conclusion
We’ve created a couple of shaders that allow us to create a non-recursive portal effect. Using the stencil buffer and some smart camera placement, we’re able to capture the scene behind a portal’s surface, then splice the correct part of the capture onto the screen where the other portal surface is situated.
In the next tutorial, we’ll talk about an edge case: how do you make sure the objects between the portalCamera and the back of outPortal don’t get rendered?
Acknowledgements
Assets
This tutorial series uses the following asset packs from various sources:
| “Skybox Volume 2 (Nebula)” | Hedgehog Team |
| “Robot Sphere” | Razgrizzz Demon |
| “Low Poly Hand Painted Dungeon Arch” | BitGem |