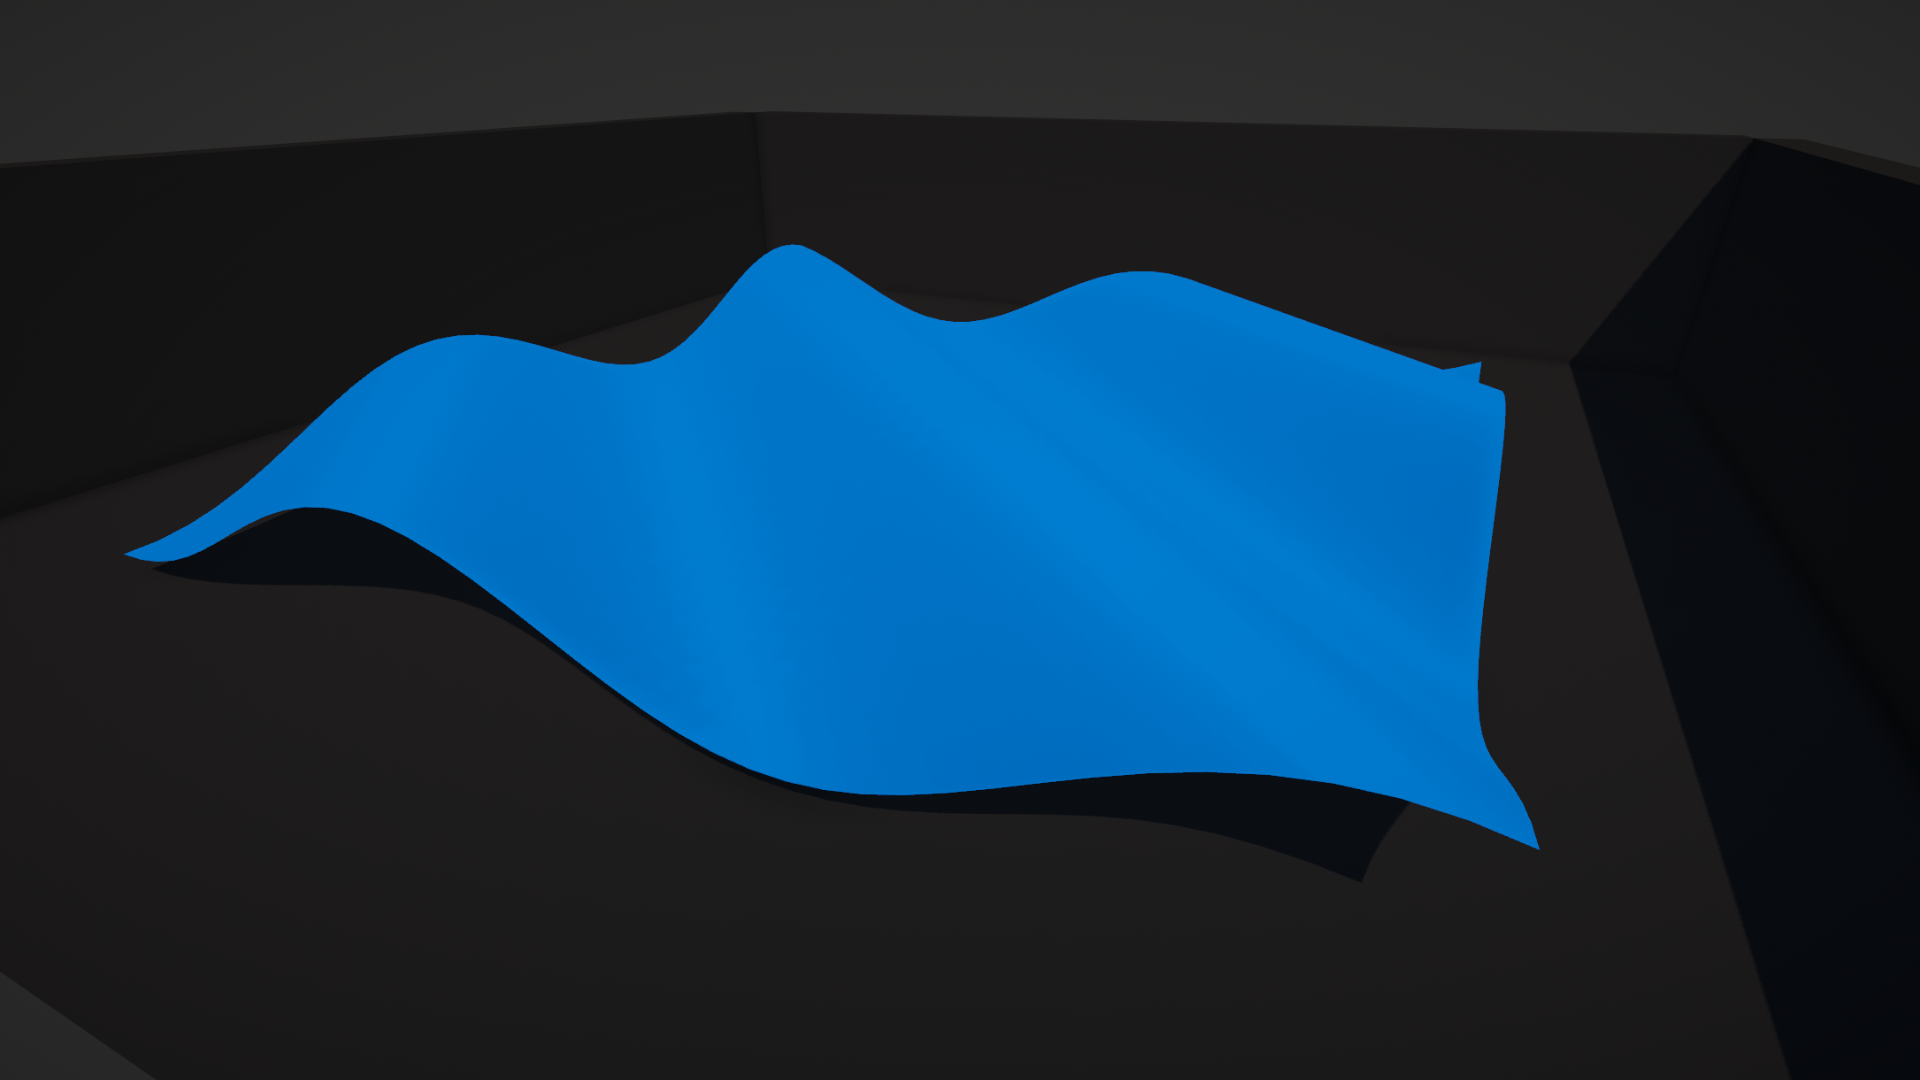
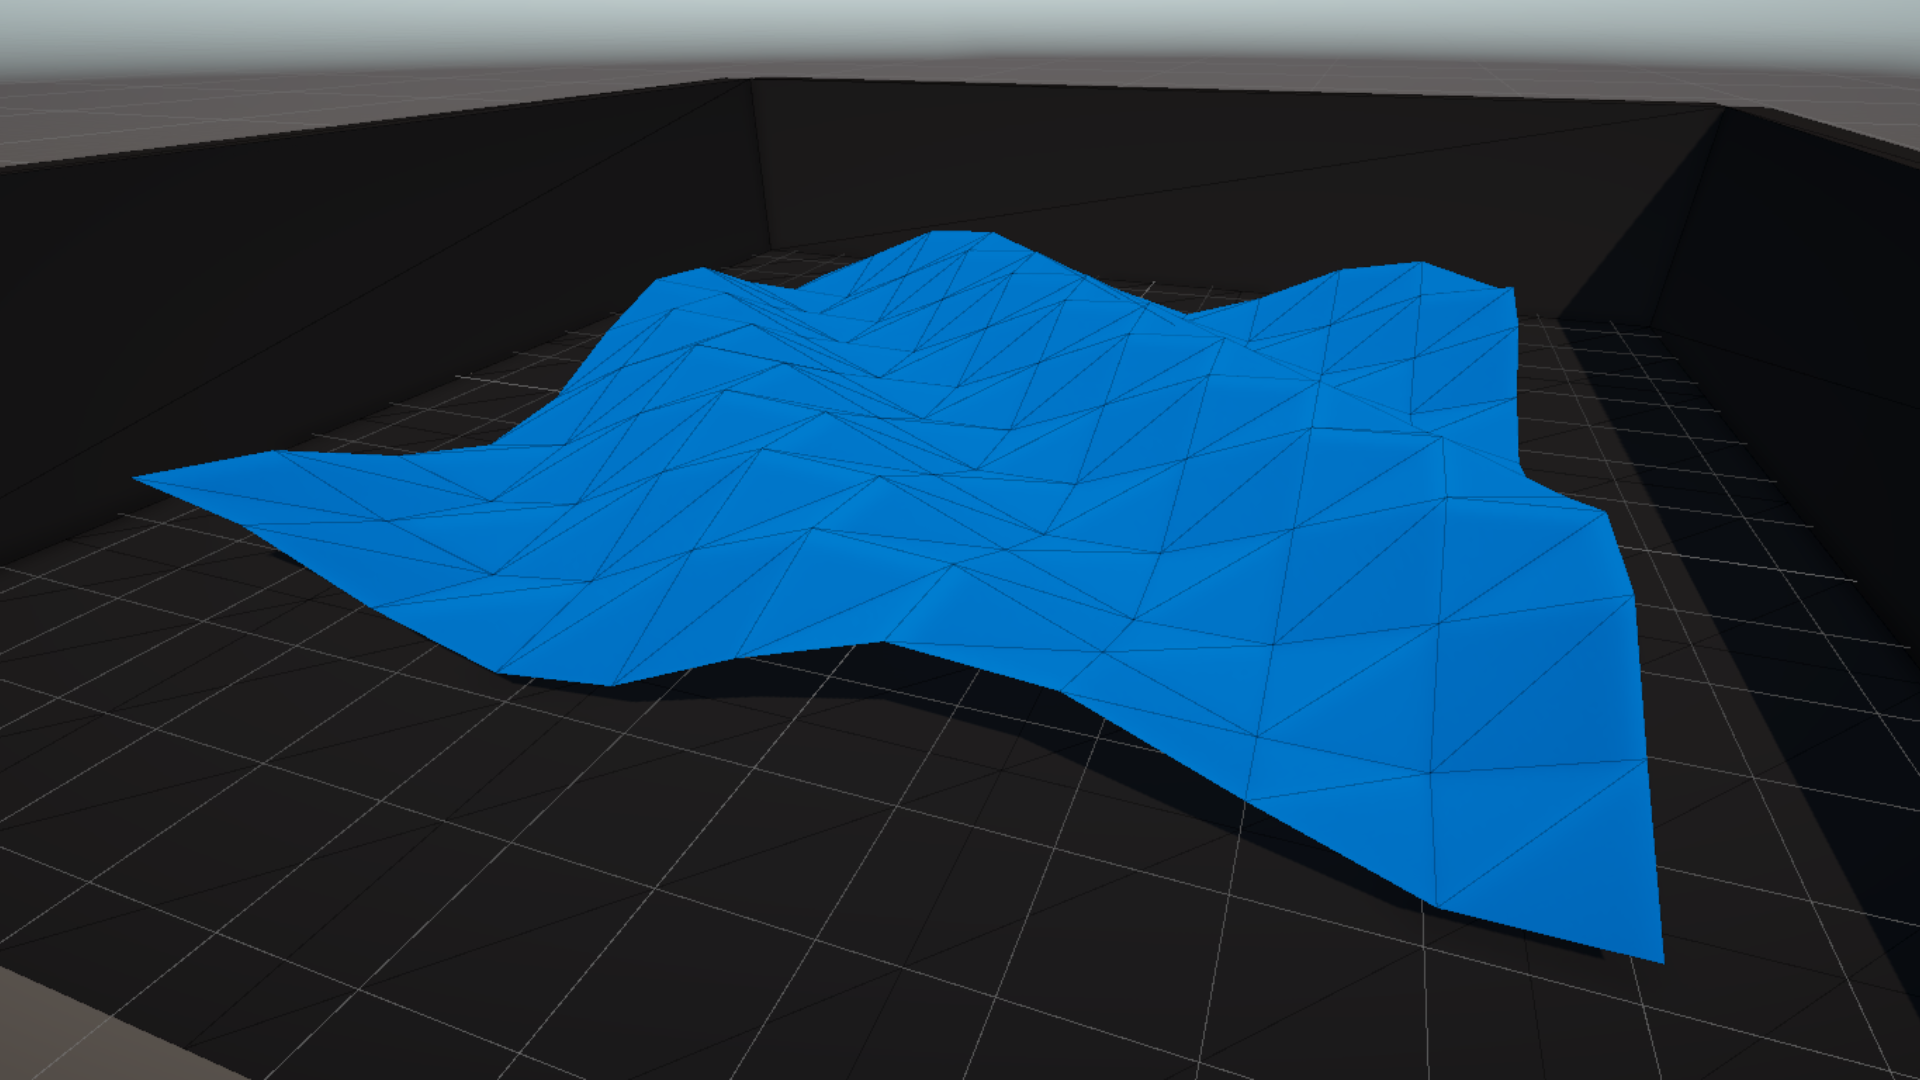
In Part 5 of this series, we’re going to delve into the world of vertex shaders to make a wave effect like this:
Check out this tutorial over on YouTube too!
What is a Vertex Shader?
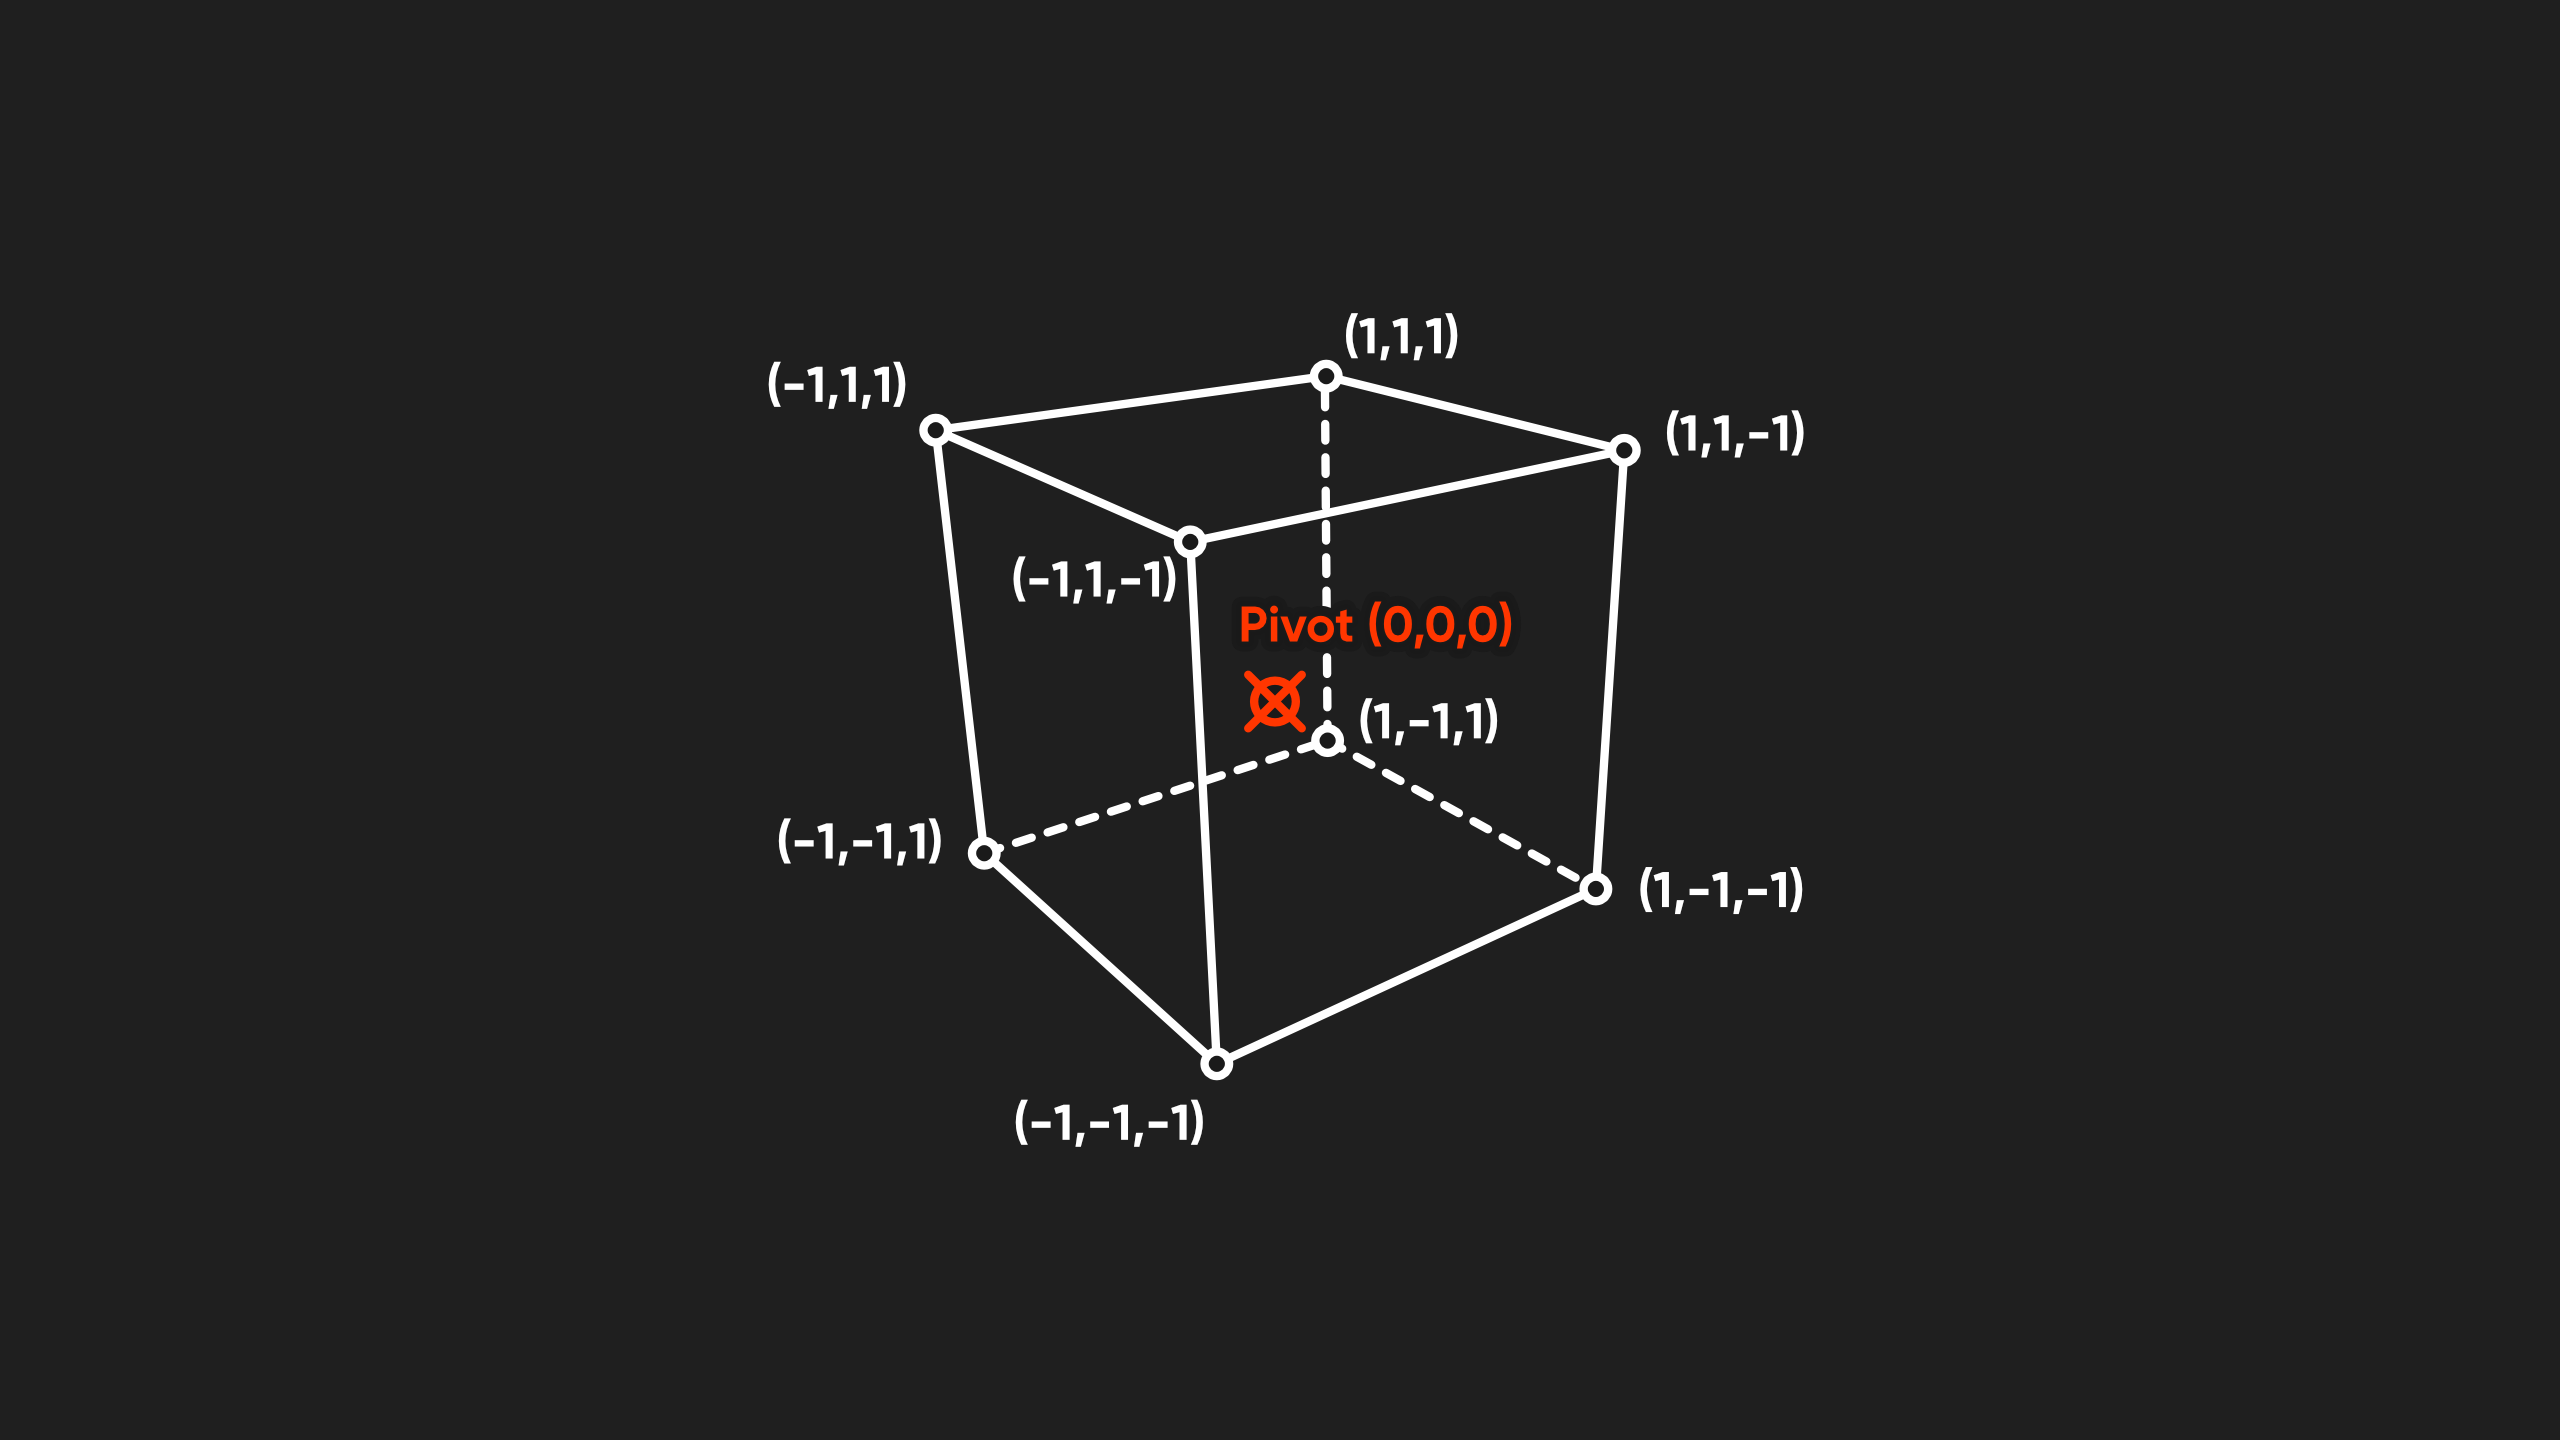
Before we rush into making the wave shader, let’s talk about what a vertex shader actually is. A mesh is made up of vertices - these are the points that lie on the corners of the mesh, and between those vertices we have faces which we can see. Each frame, Unity needs to read the vertex data and figure out where exactly to show the vertex on your screen. It does this through a series of transformations, starting with just abstract mesh data where the vertex positions are defined relative to some mesh origin point - this is called object space.
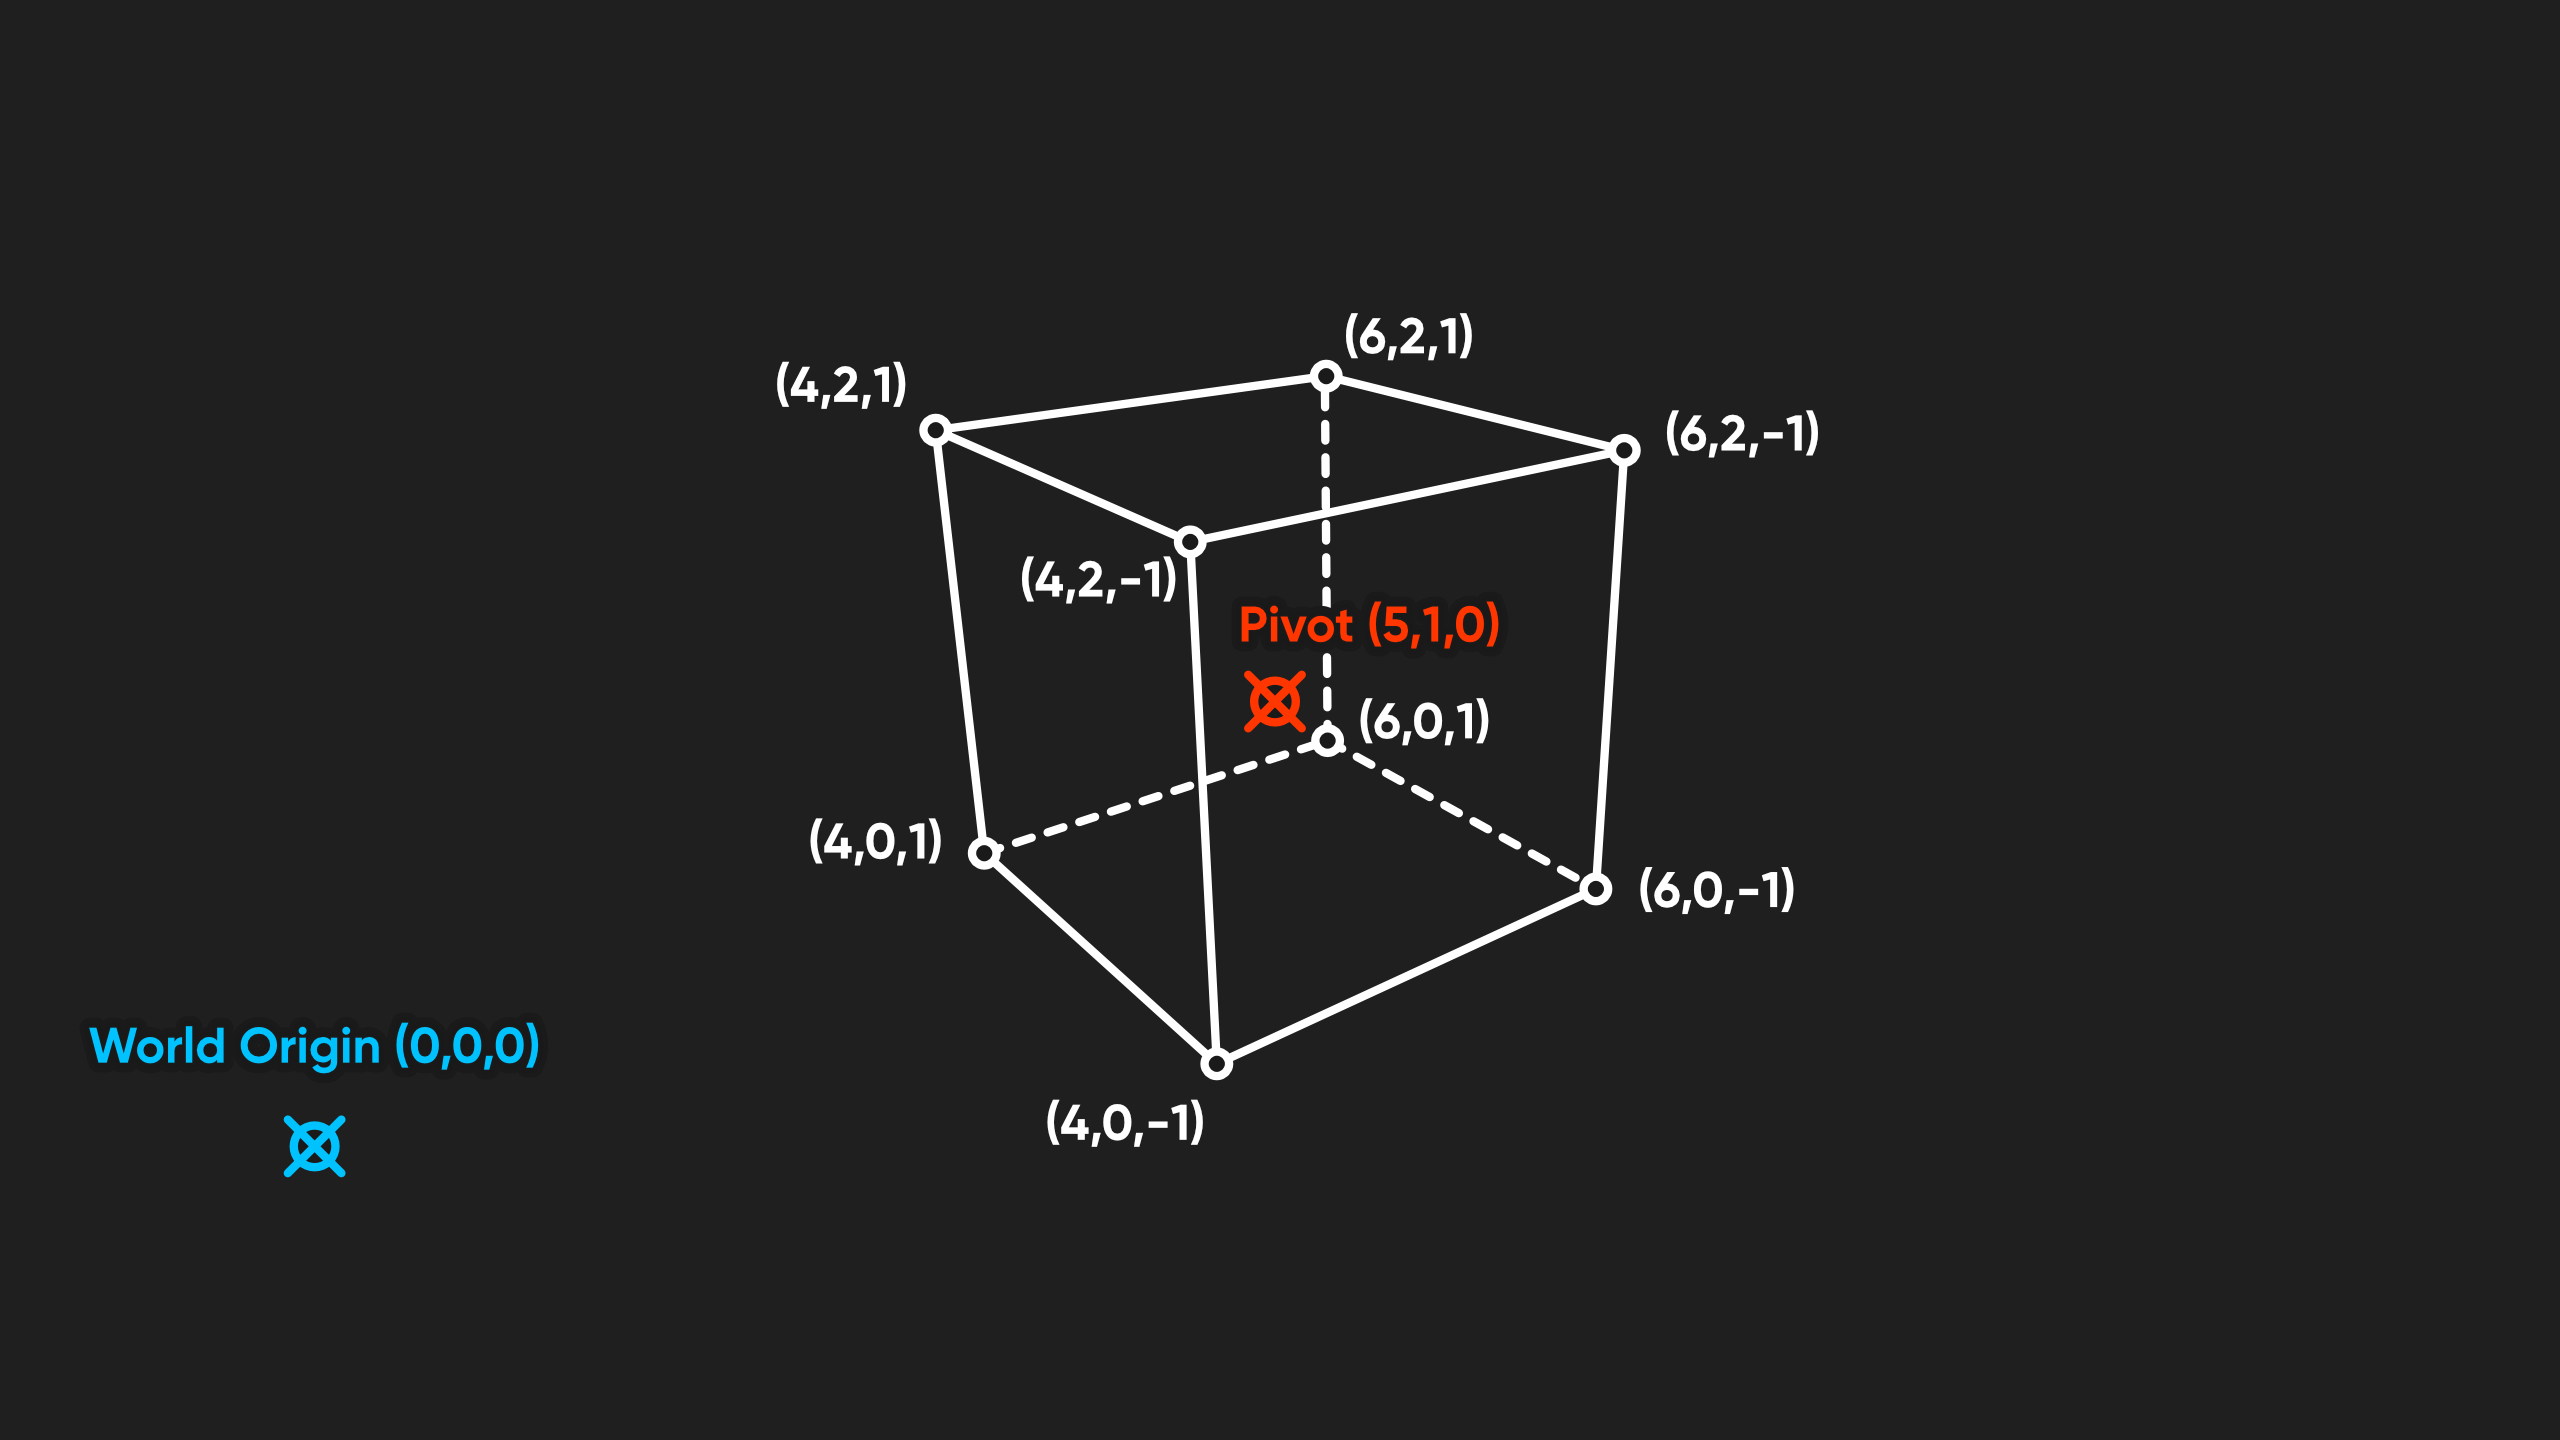
Based on the Transform position, the vertices are moved into world space where they are now relative to the world origin.
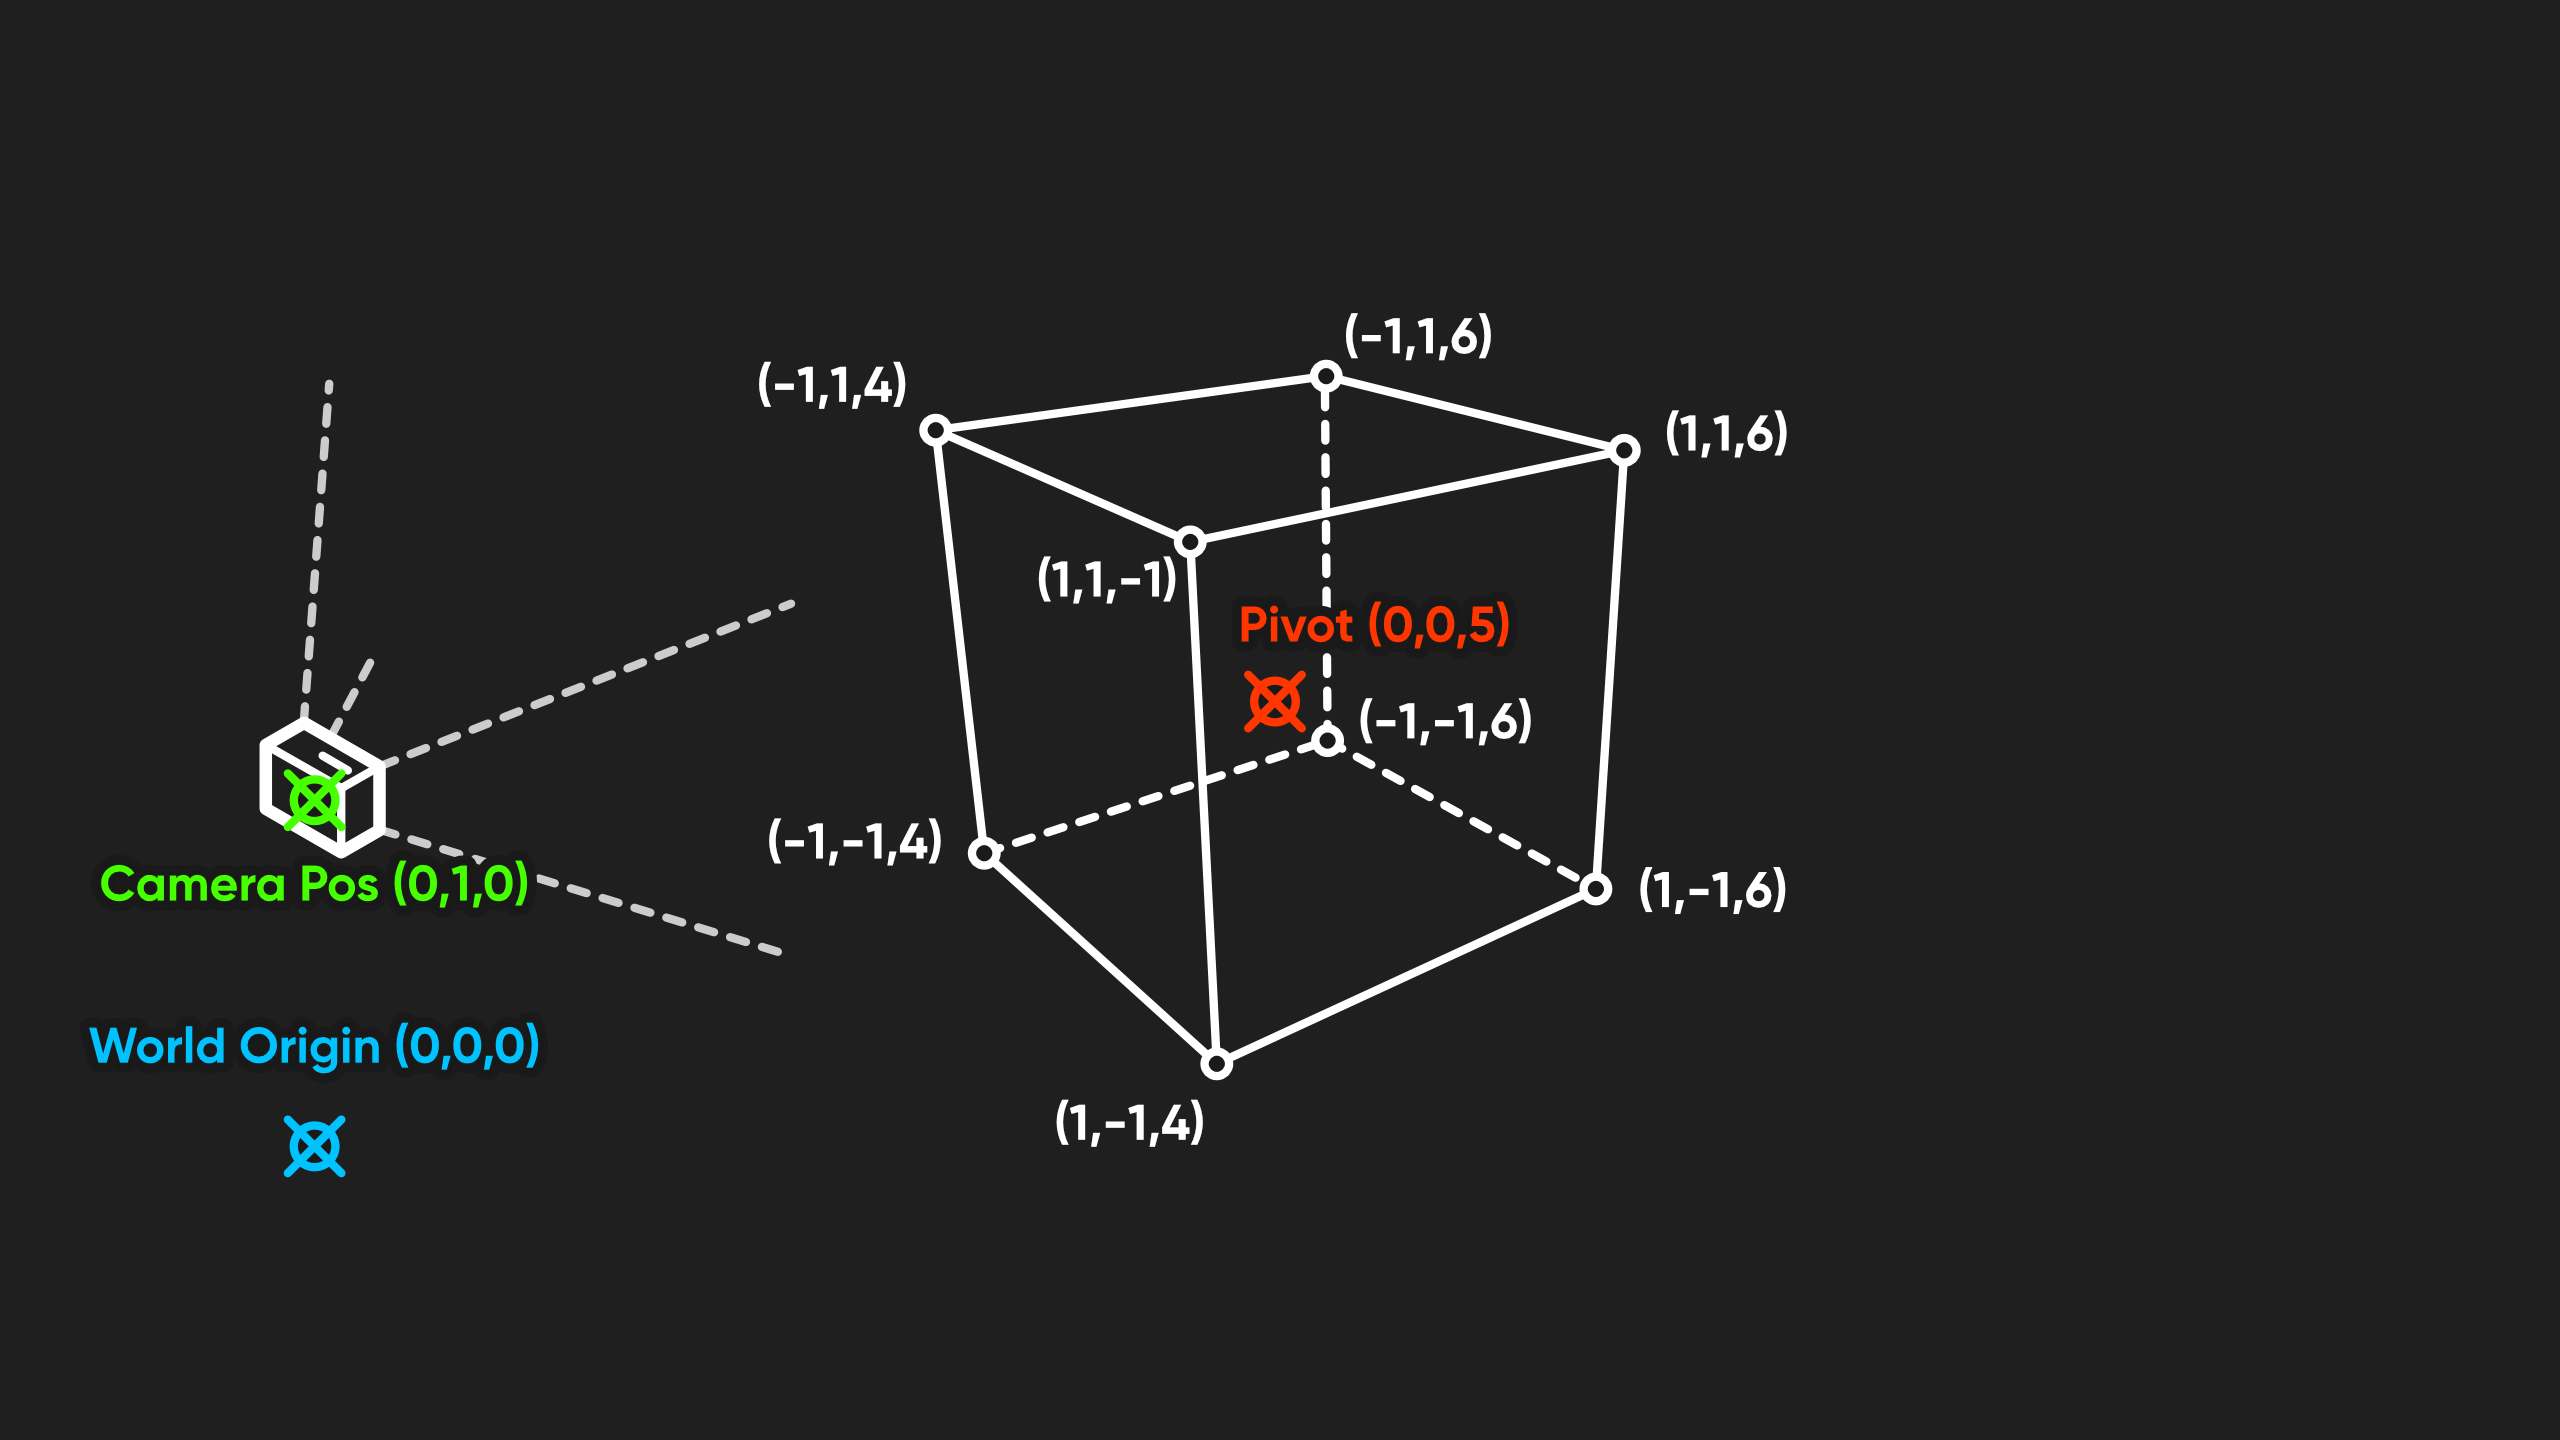
Then, based on the camera’s position and properties, the vertices are transformed into clip space, which is now relative to the screen.
Traditionally, this series of transformations is what the vertex shader does. In code, you have to write it yourself, with a bit of help from Unity’s built-in functions, but Shader Graph does all this for you behind the scenes.
v2f vert (appdata v)
{
     v2f o;
     o.positionCS = TransformObjectToHClip(v.positionOS.xyz);
     o.uv = TRANSFORM_TEX(v.uv, _BaseTex);
     return o;
}
After the vertex shader, your mesh is rasterized - i.e. turned into pixels - and then a fragment shader runs on all those pixels to color your object.
This does open up an opportunity, however. Even in Shader Graph, we have some control over those vertices during the vertex shader stage. We can move them around if we want, which is what we’re going to do in this tutorial.
The Wave Shader
This wave shader is a pretty good demonstration of what we can do in the vertex shader. In this example, each vertex is moving up and down according to a sine wave, but different vertices are at different points in the wave.
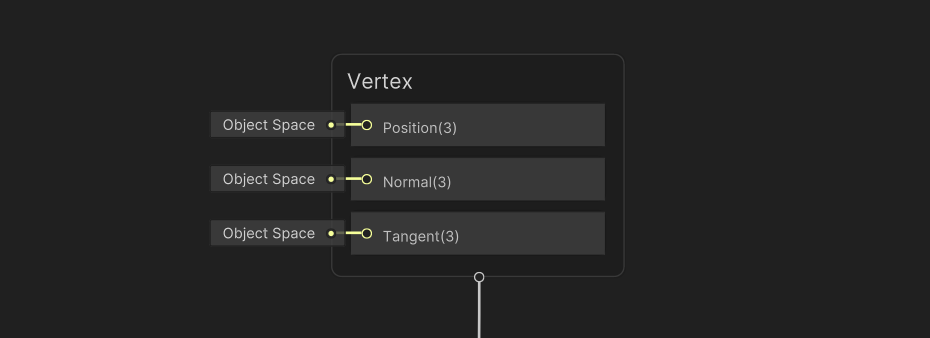
I’ll create a new graph via Create -> Shader Graph -> URP -> Unlit Shader Graph, and call it “Waves”. This time, let’s focus on the top half of the output stack, which are the vertex stage outputs. In most graphs there are only three blocks (Position, Normal, and Tangent), and for now, we’re going to just focus on the Position output. The position vector that we slot into the output needs to be in Object Space, as indicated by the little tag to the left of it.
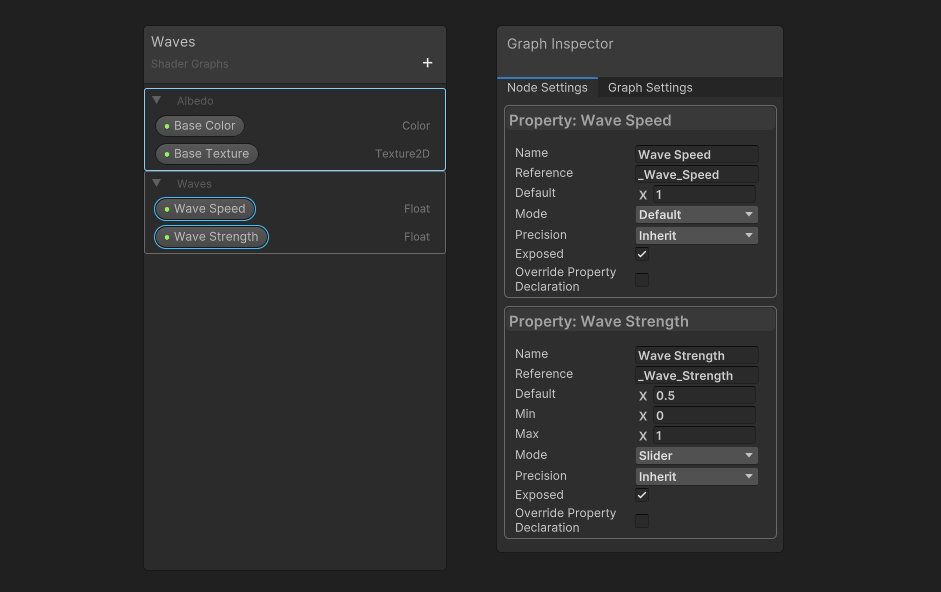
I’m going to add two properties, both of type Float: one will be called Wave Speed, and it will control how quickly each vertex moves up and down, and the other will be called Wave Strength, which controls how far the vertex moves.
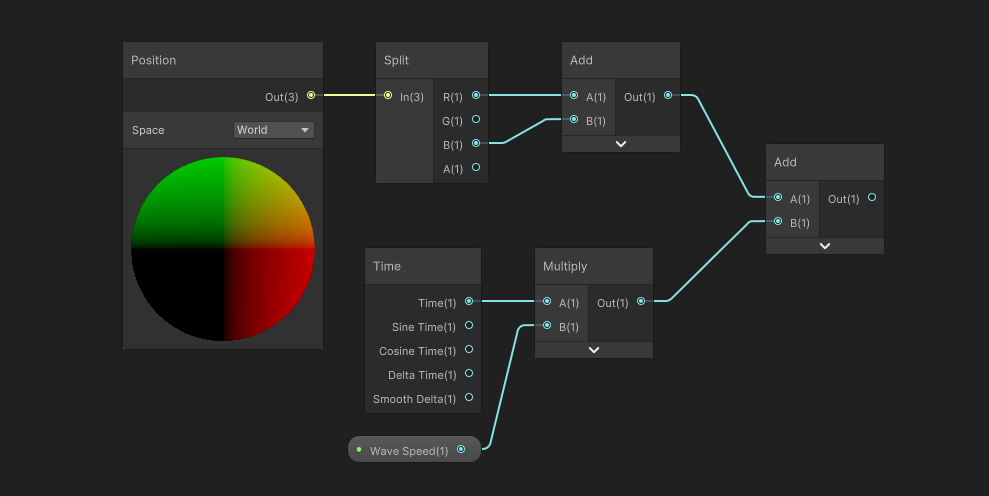
On the graph surface, the first thing I’ll do is get the ‘seed’ value for the sine function. As I mentioned, each vertex should be on a different point along the sine wave. If we just input a Time node into the sine function, the entire mesh will bob up and down as a whole. Maybe that’s what you want but those aren’t terribly interesting waves to me!
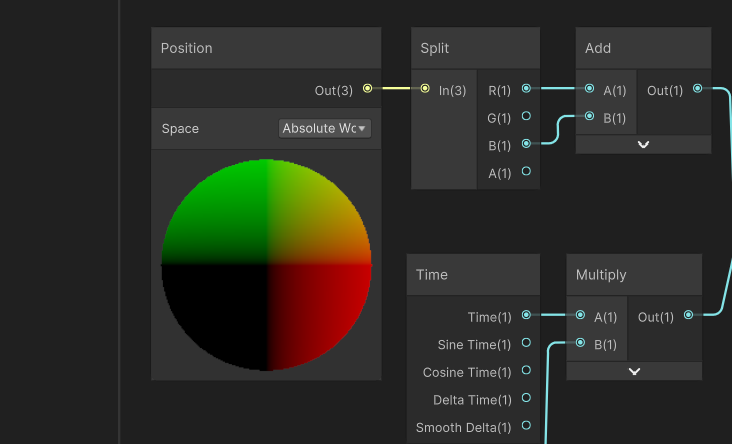
Instead, let’s use the world position of the vertex as an ‘offset’ value for the sine function. I’ll do that with a Position node which is set to World space. You can set this to Object space if you want, but by using World space, I’ll be able to tile these meshes together in the world and the waves will connect up properly.
Next, I will add a timing mechanism by adding a Time node and multiplying it by my Wave Speed property. Here is where we decide what direction those waves will travel in. I’ll use a Split node to get specific components of the position - now, if we were to add just the X component to the timer, the waves will end up scrolling horizontally, and if we used just the Z instead, they will scroll… I guess this is still horizontally, but the other horizontal. In my example, I had them scrolling diagonally, which I can do by adding the X and the Z.
This value can be passed into the Sine node, which essentially gives us the y-offset value we wanted. I’ll scale the offset by multiplying it with the Wave Strength property and then create a new Vector3 with 0 in the X and Z fields, and our y-offset in the Y field. Now it’s an offset vector!
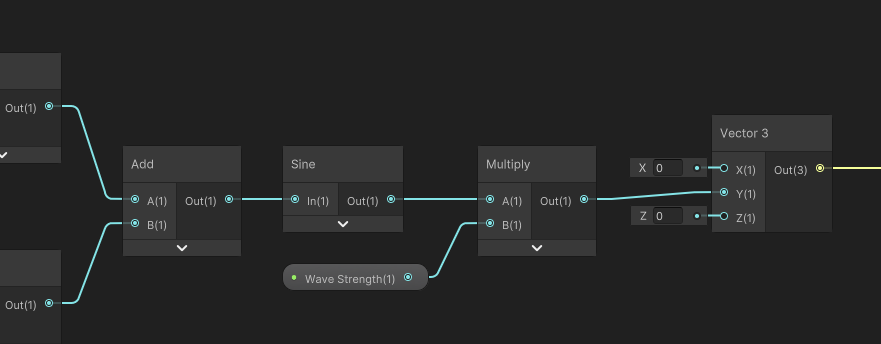
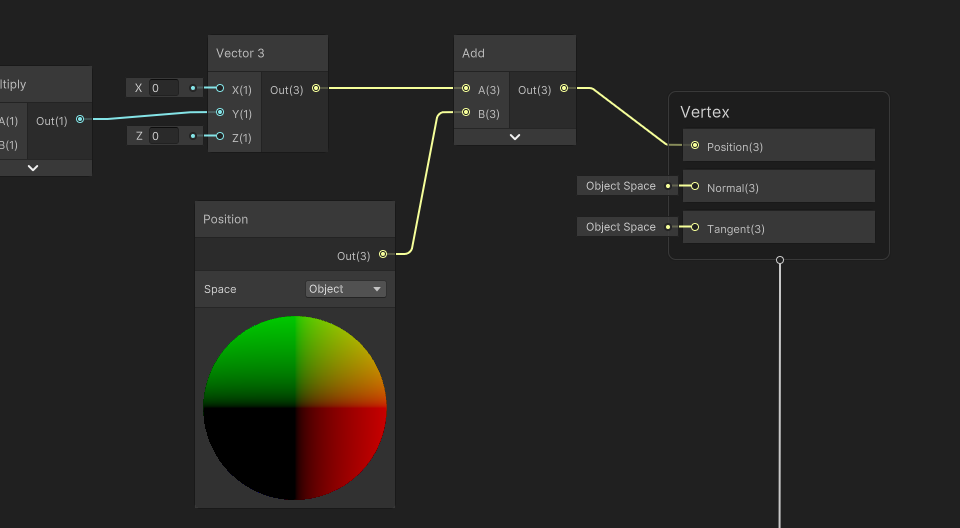
Now all we need to do is get another Position node - this time, it must be in Object space - and add our offset, then connect the result to the Position graph output.
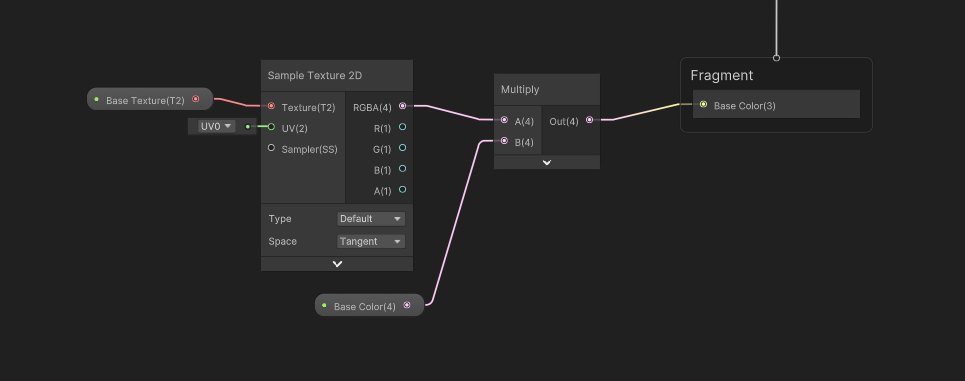
I also took the liberty of adding Base Color and Base Texture properties and wiring those up to the Base Color graph output in the Fragment shader stage, but you should be familiar with that after reading Parts 1 and 2 of this series.
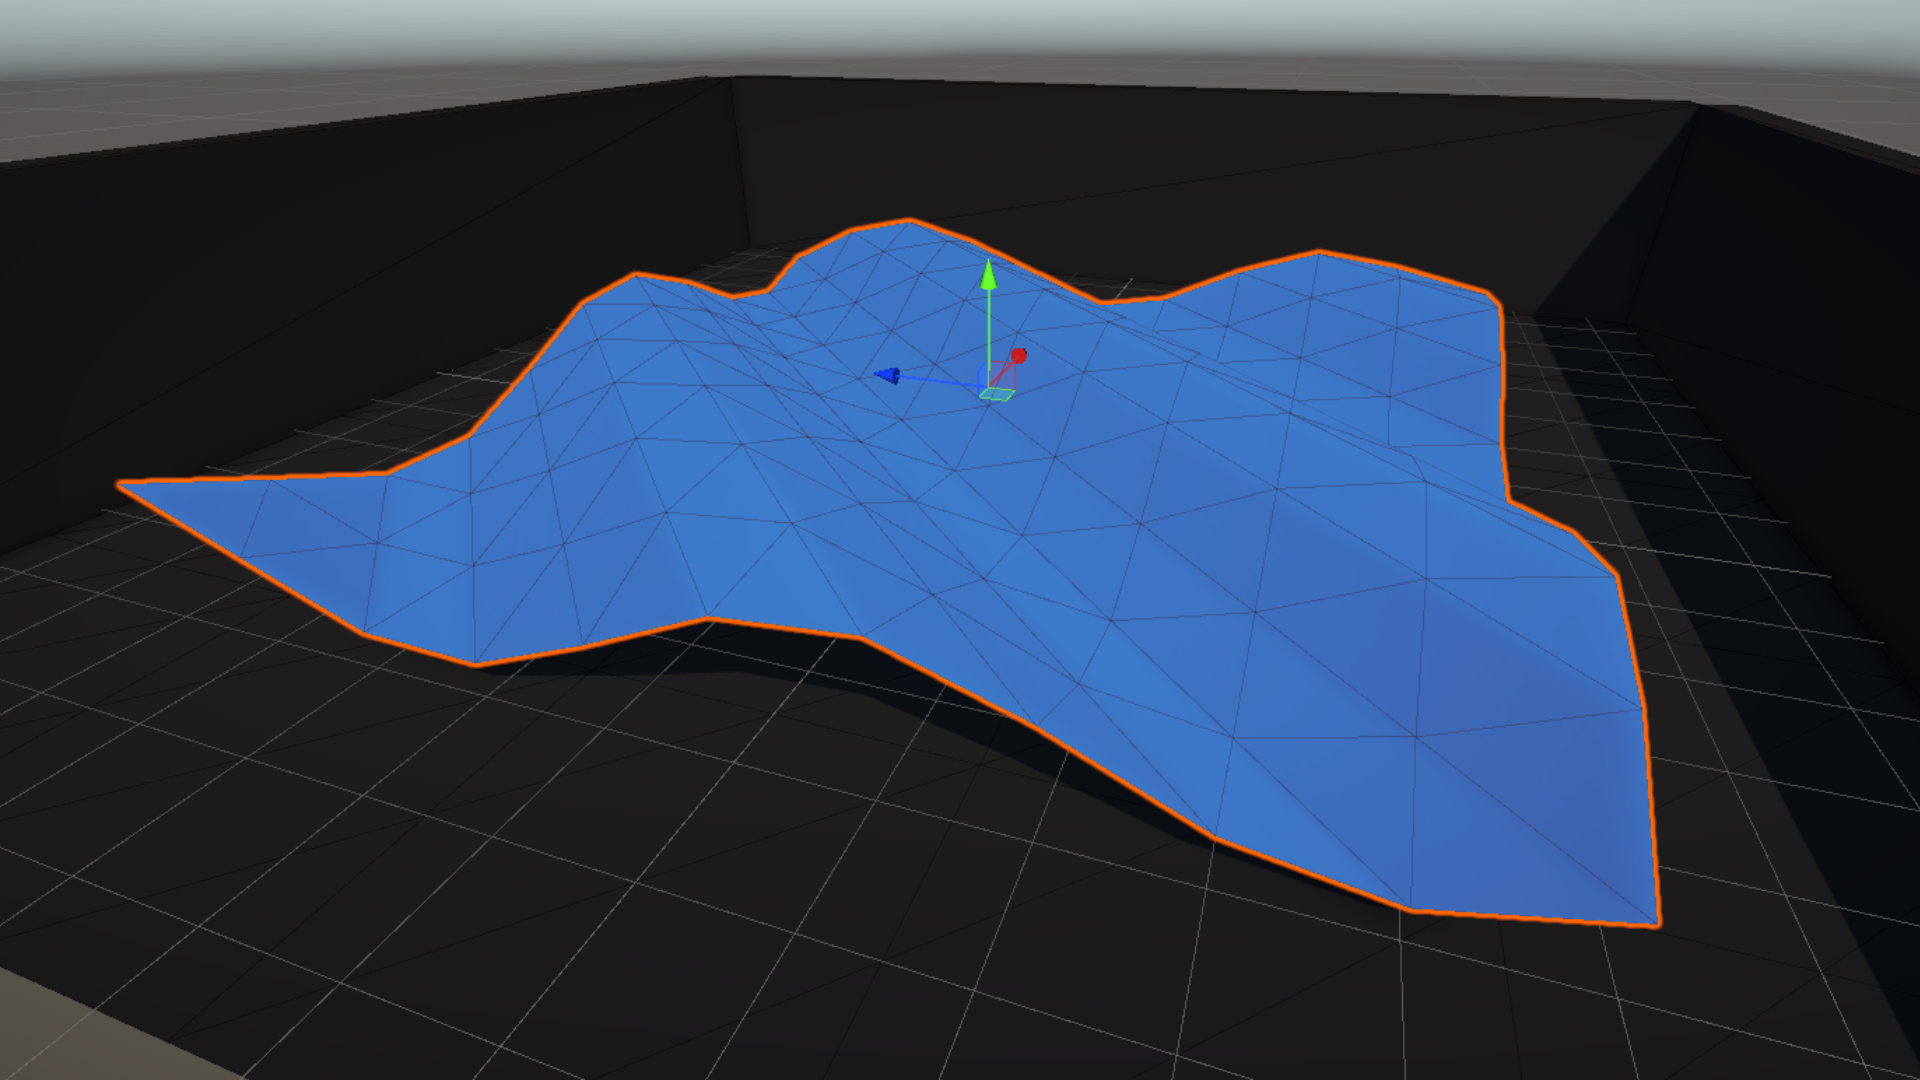
Now, in the Scene View, our waves should be rolling across the surface. Here, I’m using Unity’s default plane mesh, but you can see a lot of weird angular shapes on the mesh, which isn’t great. There’s three ways we can fix this.

Increasing Fidelity
Method 1 is to just rotate the mesh 90 degrees. That angular pattern is down to the way the triangles are arranged on the mesh, so rotating it means the edges of the triangles are now aligned with the waves. This still isn’t great because there are still long, flat lines across the surface.
Method 2 is to use a much higher-poly mesh. There’s one included in the GitHub repository that I made in Blender, and as you can see, the waves are far smoother and more detailed, the drawback being that you now need to process a lot more vertices.
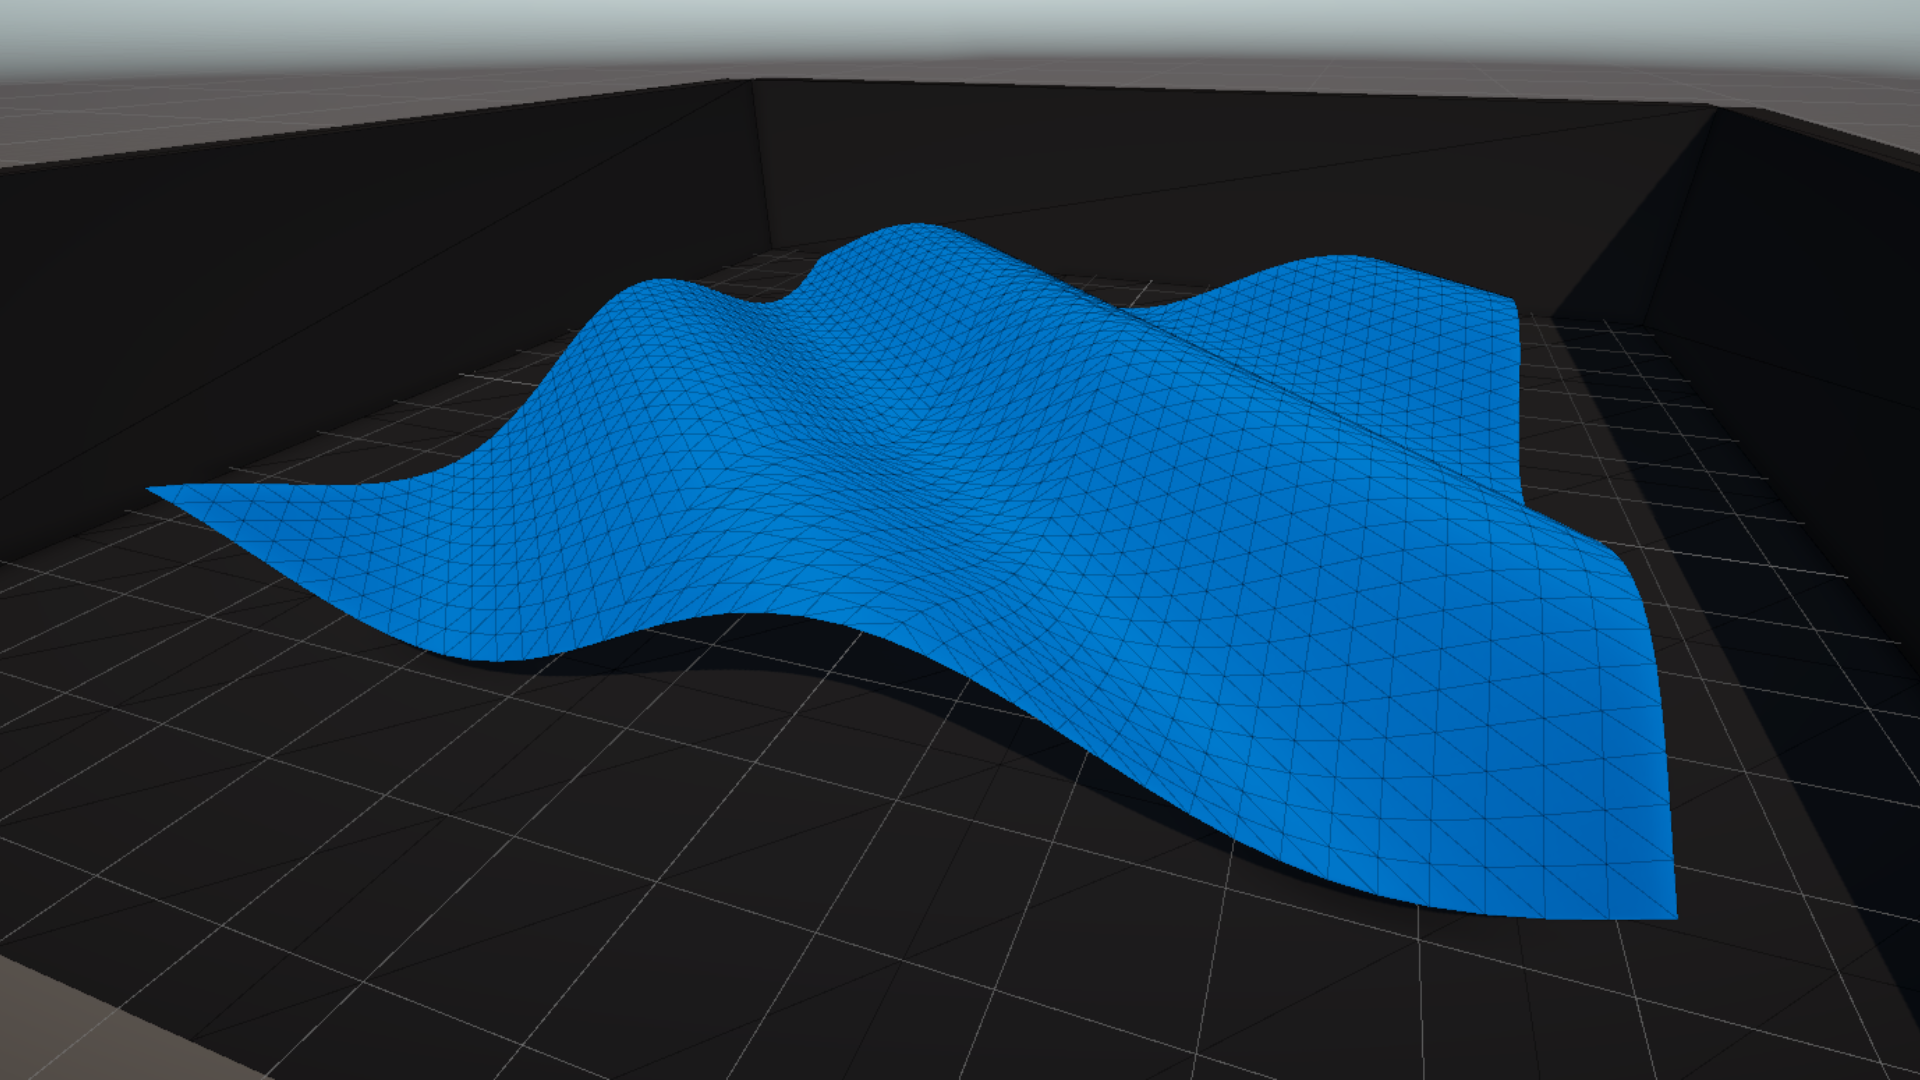
Method 3 is to use tessellation. Unfortunately, URP Shader Graph does not support tessellation for some reason, although it really ought to by now. Oh well. I can quickly show you how it works in HDRP.
Subscribe to my Patreon for perks including early access, your name in the credits of my videos, and bonus access to several premium shader packs!
The HDRP Bit (sorry)
Tessellation is the ability to create new vertices between existing vertices right before running the vertex shader. This is super easy to implement: just head over to the Graph Settings tab and tick the Tessellation setting under the Surface settings tab, which adds two new output blocks.
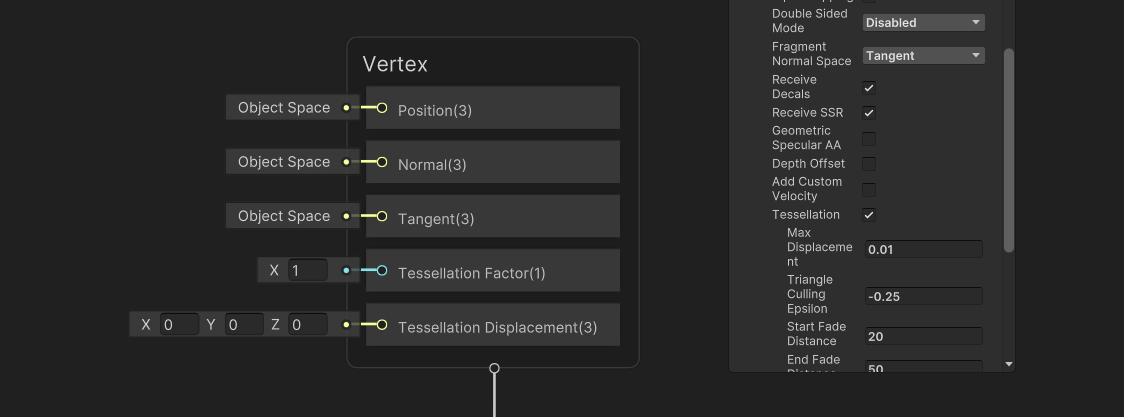
We’ll need to change the first Position node to use Absolute World instead of World space, because HDRP uses camera-relative rendering. Without changing this, our wave effect will move around strangely every time we rotate the camera.
Instead of adding our offset to the existing vertex position, let’s remove those two nodes and connect the offset directly to the new Tessellation Displacement output. Then, we need to input something to the Tessellation Factor output. A value of 1 doesn’t do anything to the mesh, while values above that will subdivide the mesh into smaller pieces by adding vertices and faces between the existing ones. Let’s use a value of 3.
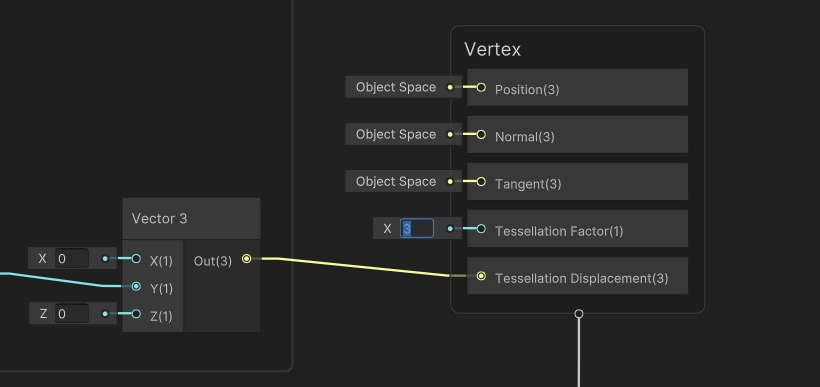
As you can see, the waves are a lot more detailed now! The Tessellation Factor can go up to the hardware limit of 64 but that’s overkill for our needs. Here, it’s set to 3.

Conclusion
Hopefully this has given you some idea of how vertex shaders can be used to animate the shape of your mesh. Play around with it and see if you can come up with some interesting effects just within the vertex shader!
In the next part, we’ll finally delve into lighting and see how Unity handles physically based rendering. Thanks for reading, and until next time, have fun making shaders!
Subscribe to my Patreon for perks including early access, your name in the credits of my videos, and bonus access to several premium shader packs!
Acknowledgements
Special thanks to my Patreon backers for Jan - Feb 2024!
CD Ilello JP Scott Harper Verisutha Jack Dixon Morrie Mr.FoxQC Leonard Pascal pixel_Wing Alexis Lessard claudio croci Hassan Karouni Jun Lukas Schneider Mikel Bulnes Ming Lei Muhammad Azman Olly J Paul Froggatt Will Poillion Zachary Alstadt 源 刘
