Shader Graph is Unity’s visual editing tool for shaders. It empowers you to create many of the effects that were previously only possible to make with shader code, but instead, it uses nodes, which makes it easier for some people to get to grips with Shader Graph and often speeds up iteration compared to writing code.
In this tutorial, I’ll go over the absolute basics of Shader Graph, from setup, to the interface, to making your very first shader. I’m using Unity 2022.3, the latest Long Term Support (LTS) version of Unity as of the making of this tutorial. I’ll also be focusing on 3D over 2D, although Shader Graph supports both.
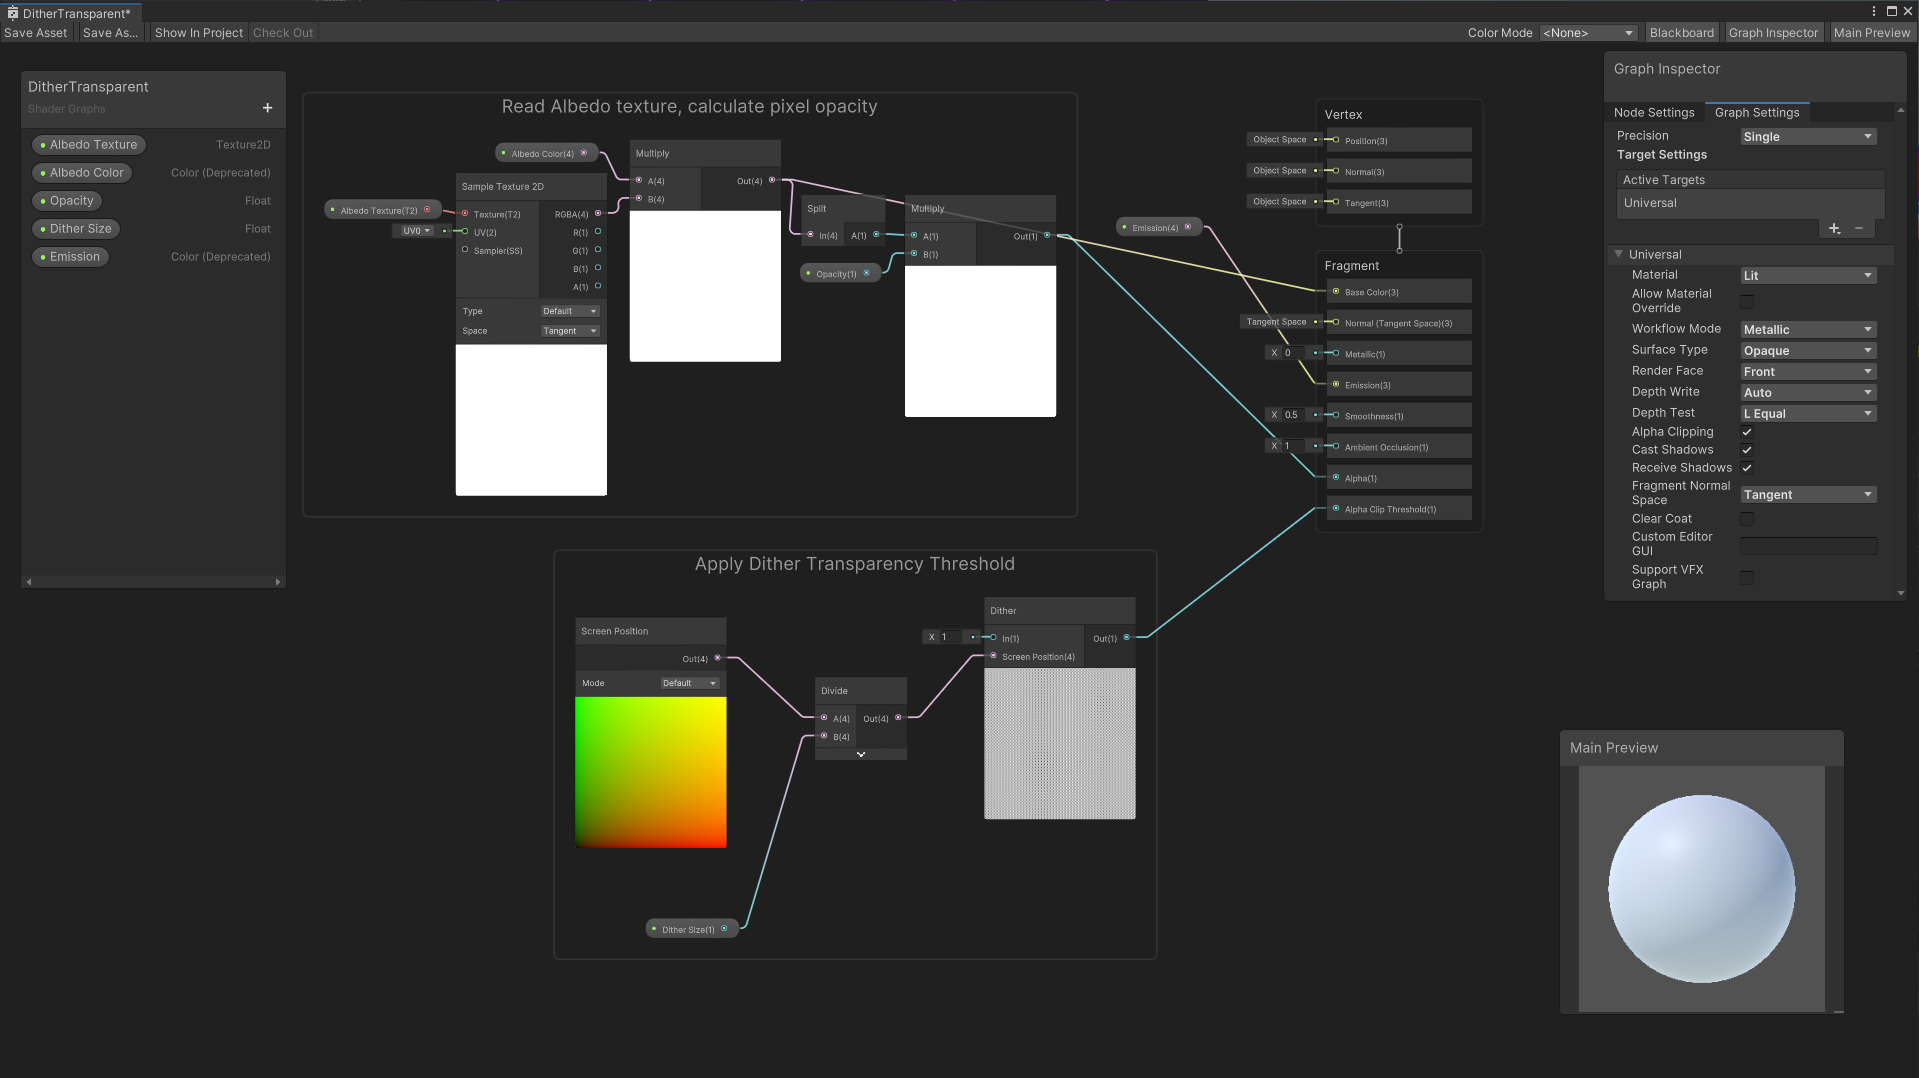
Here’s an example of what Shader Graph looks like:
Pick a Pipeline
One of the biggest changes to Shader Graph in recent-ish times is that it works across all of Unity’s render pipelines (it was previously not available in the built-in pipeline). If you have never encountered Unity’s render pipeline system before, then welcome to the seventh circle of hell. Apparently, that’s violence, which checks out.

When you create a new project through the Unity Hub, you’ll be confronted with a list of templates. There are three main ones I want to highlight:
-
3D creates a new project using the Built-in Render Pipeline. That’s the legacy renderer which has been around since the start of Unity and was previously the only renderer. Christ knows why this option isn’t labelled something like “3D with Built-in Pipeline” for clarity.
-
3D (URP) means the Universal Render Pipeline, which is intended for use in games aimed at any device, from mobile to desktop to console.
-
3D (HDRP) is the High Definition Render Pipeline, which works for high-end desktop and console games.
If in doubt, I recommend URP. That’s what I’ll be using for this tutorial!
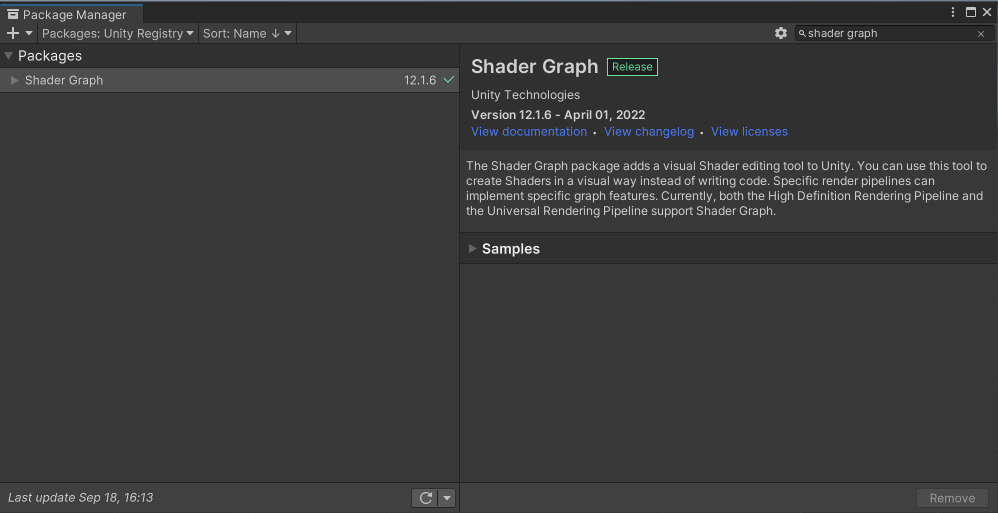
If you picked URP or HDRP, then Unity installs Shader Graph into your project by default. Wonderful! However, built-in pipeline users must install the Shader Graph package themselves. In the Editor, go to Window -> Package Manager, change the Packages drop-down to “Unity Registry” to list all available packages, and search for Shader Graph with the search bar. Once you’ve found it in the list, click the Install button in the bottom-right.
Subscribe to my Patreon for perks including early access, your name in the credits of my videos, and bonus access to several premium shader packs!
Your Very First Shader Graph
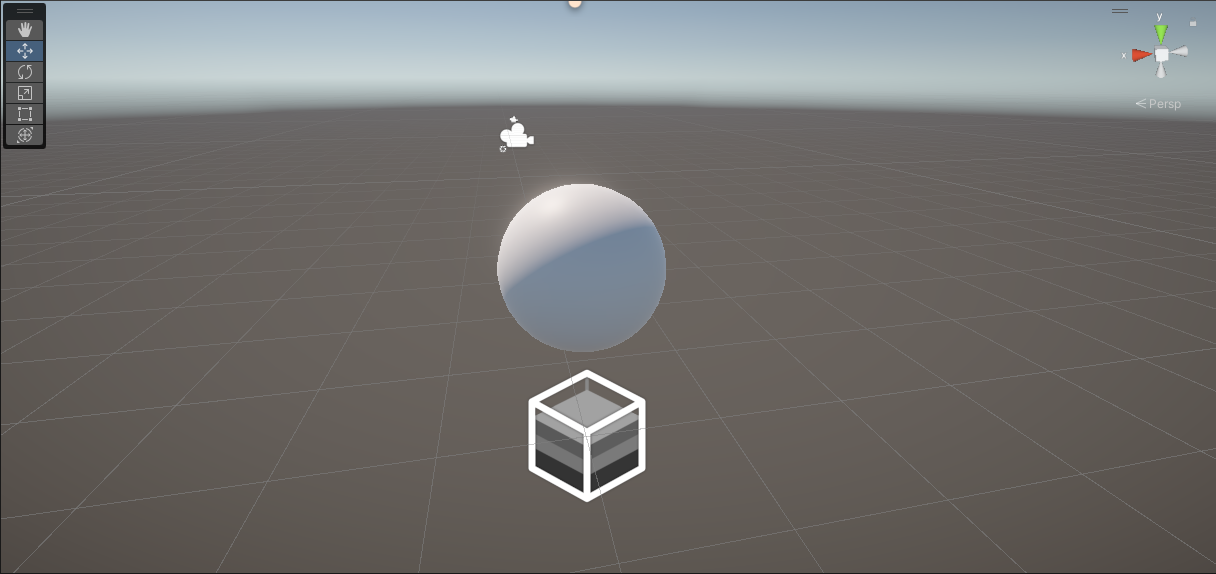
A good starting point on your Shader Graph journey is making a shader which lets you change the color of the object. Pretty simple! To visualize the shader once we’re done, I’ll add a sphere to my scene, and later, we will create and attach materials to the sphere to see the shader in action.
Everything should be set up now, so it’s time to start making a graph. I usually put all my shaders into their own project folder named “Shaders”, but you are free to organize your project however you see fit. Right-click in the Project View and go to Create -> Shader Graph. In this sub-menu, you may see different options depending on which render pipeline you are using, but generally, you can’t go wrong if you pick from the URP, HDRP, or Built-in sub-menu, whichever corresponds to the pipeline you picked.
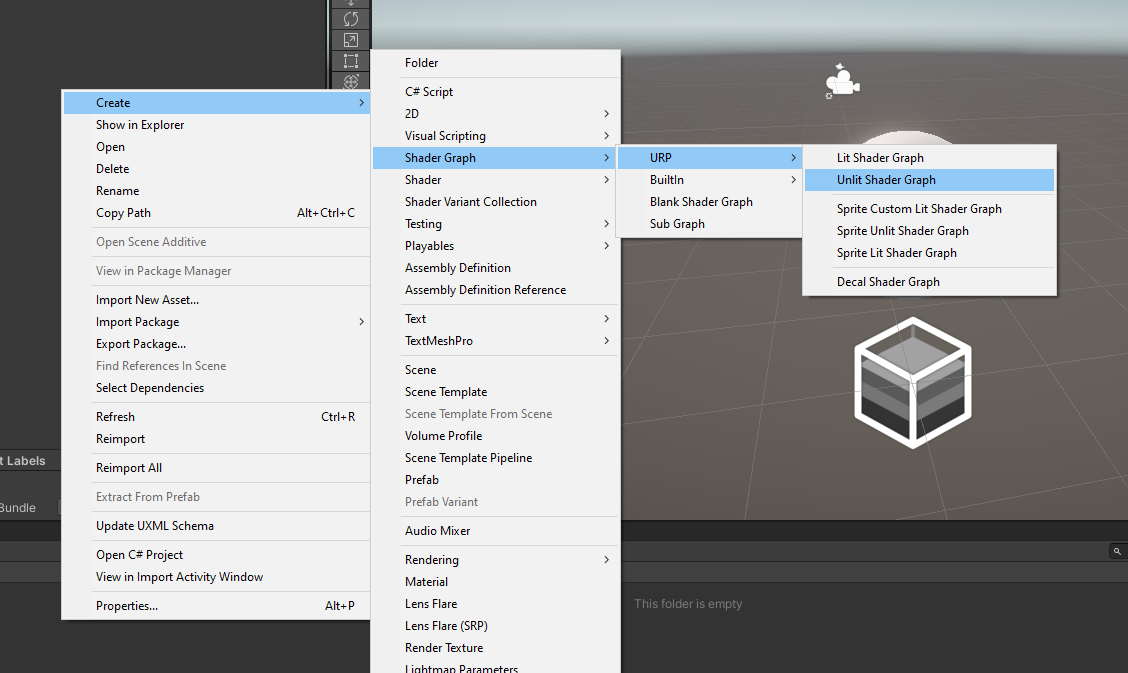
Each pipeline has a different set of Shader Graph presets in their sub-menus, but all of them have Lit and Unlit presets. I’ll pick an Unlit Shader Graph for now, and I’ll name the graph “ColorExample”. Even though I’m Bri’ish, I’ve been forced to adopt American English spelling to stay consistent with how most programming languages spell “color”. When you double-click the graph asset that pops up, Unity opens the Shader Graph editor. As with most other Unity windows, you can dock or undock it, resize it, or maximize it.
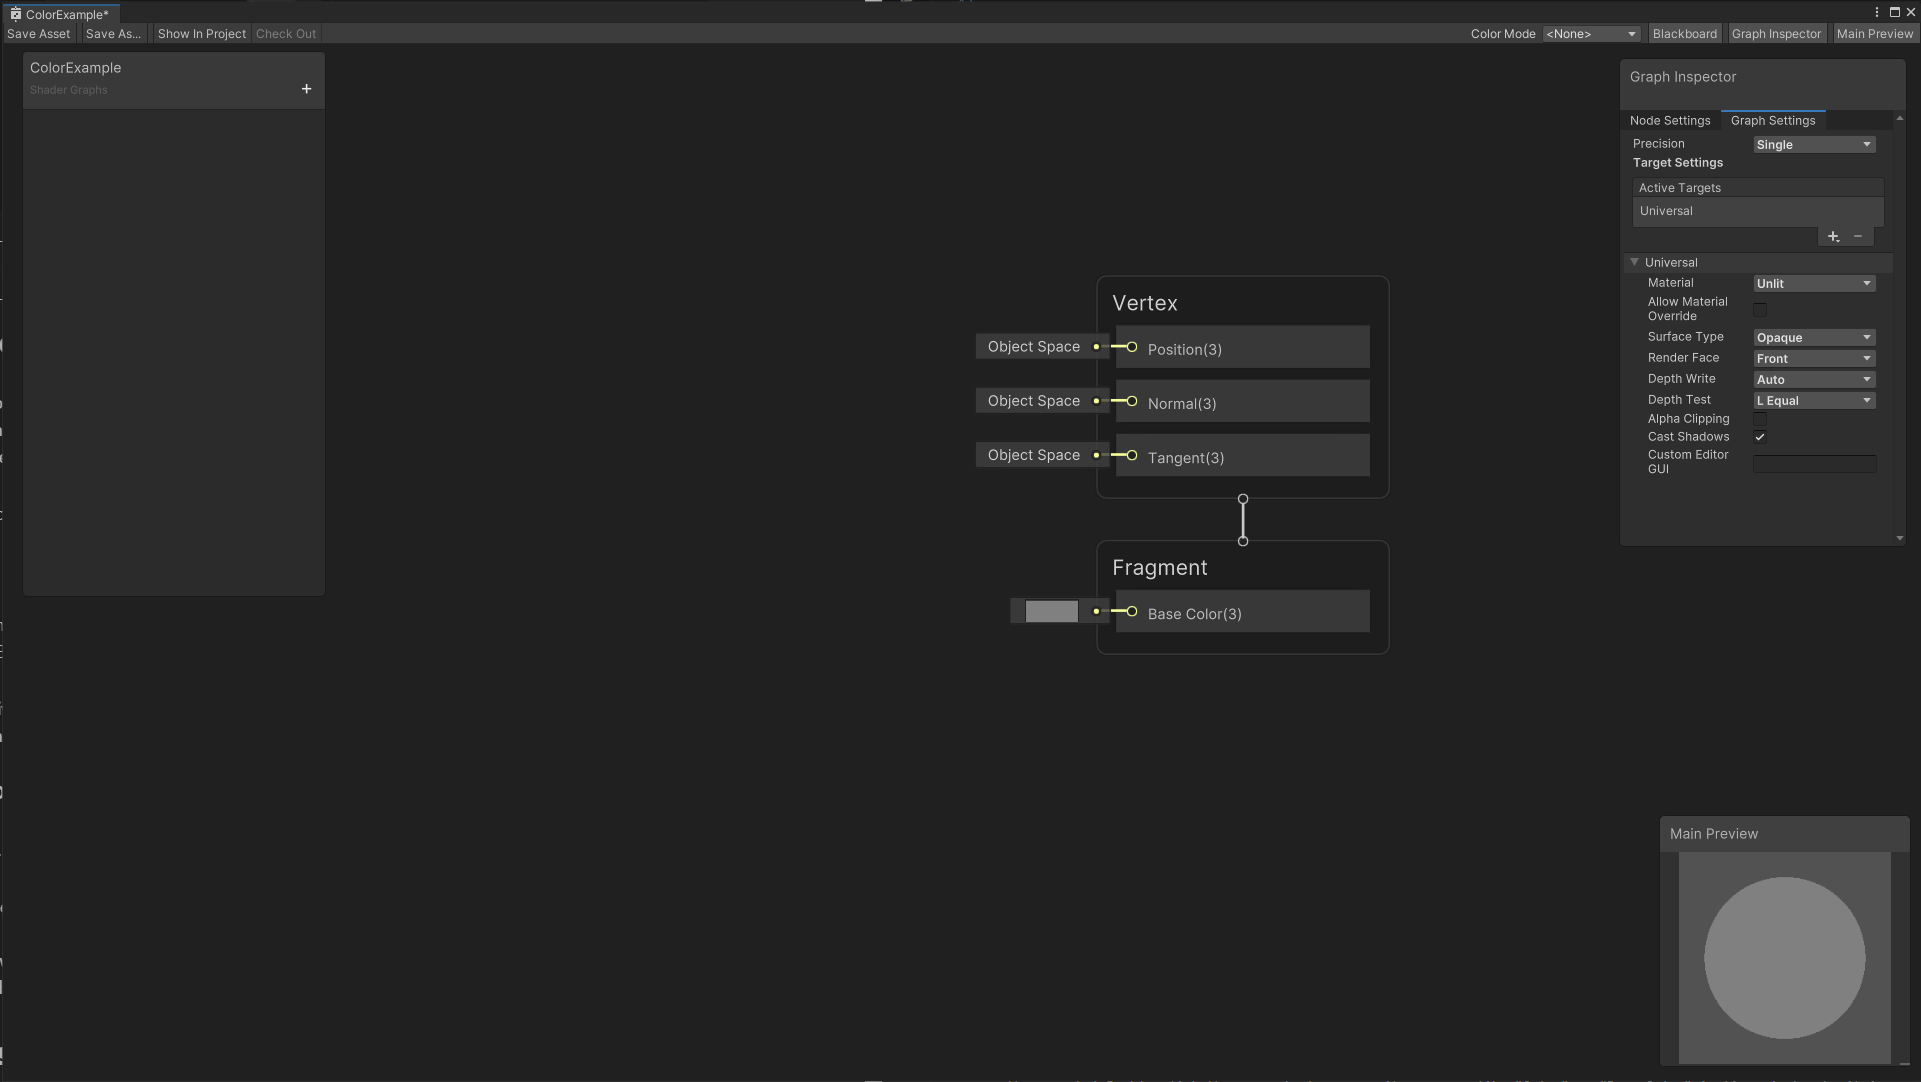
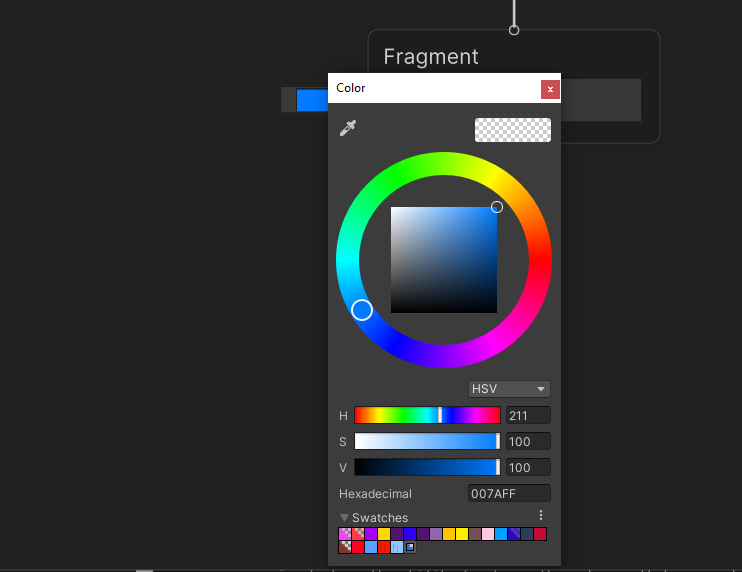
The interface is split into a few distinct parts. All the magic happens in the middle, where you will see the Output Stack. As the name implies, these are the graph outputs - we modify these values to change how the shader behaves. The part I’m most interested in is the Base Color output block. If you click the small box linked to Base Color, a color wheel will pop up and we can choose any color we want. I went with a lovely blue color, then we can click off the window.
To save our changes, go to the top-left of the graph window and click the Save Asset button. Get used to this step - for whatever reason, pressing Ctrl-S will not save your changes, so you need to make sure you click that Save Asset button fairly often. It’s your friend so treat it right!

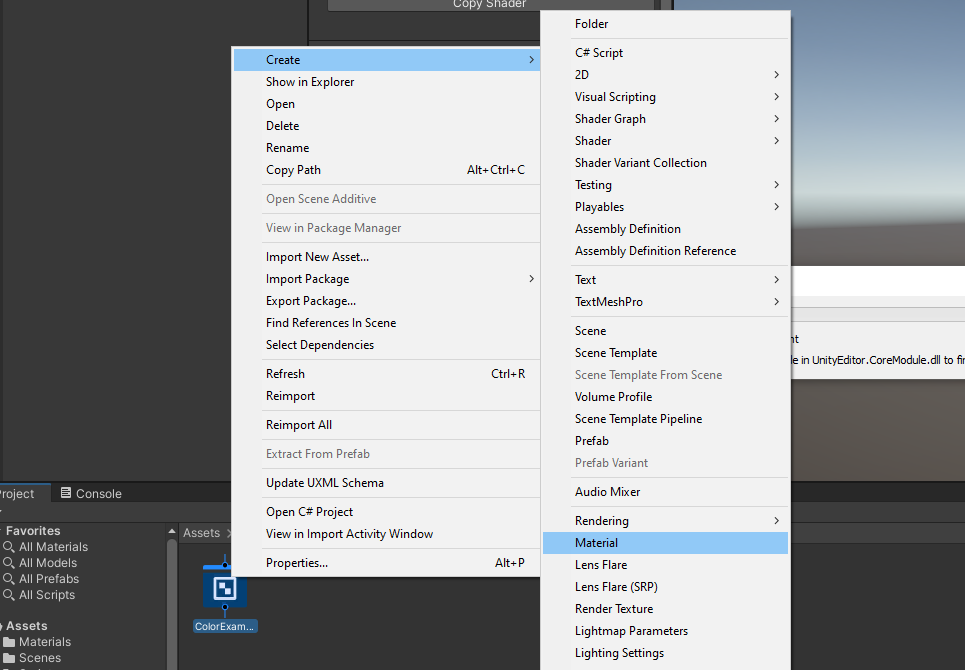
Back in the Scene View, I want to use the shader we just made on the sphere, so create a new material by right-clicking ColorExample in the Project View and selecting Create -> Material. You should see a material which uses the ColorExample material, but if you ever need to change which shader a material uses, you can go to the Shader drop-down at the top of the material Inspector window. All your graphs will be in a sub-folder named “Shader Graphs” by default.
Drag the material, and it will turn blue. Mission successful! That’s nice, but our shader doesn’t provide any way to change the color. You can create a million materials with this shader, and every single one of them will be the same shade of blue. It’d be nice to have the ability to change the color so that we can have lots of material with different colors, all using the same shader.
Hop back into the Shader Graph window. We are going to add a Property, which is sort of like a variable you’d use when programming. The small window in the top-left corner is the Blackboard, and the plus arrow in its top-right corner lets us add graph properties. Click it, and find the Color property type in the list. There’s quite a few types of property that you’ll use in other graphs! Double-click the property to rename it - a name like “Color” or “Base Color” is fine, just make it is somewhat descriptive.

Now, left-click and drag the property onto your graph. That’s your first node! Okay, it’s not the most exciting node, but it’s a start.

Nodes are the bits of functionality that can be connected together to build the behavior of the graph. This is a very simple shader, though, so this is the only node we’ll use. Left-click and drag a wire between the tiny circle on the right of the property and the tiny circle on the left of the Base Color output; I refer to those tiny circles as pins, or as inputs and outputs.

The graph is now set up to use this property for the color of objects, but we’ll do one small extra step to make the shader nicer to work with when creating materials. Click back on the property, and turn your attention to the window in the top-right, which is the Graph Inspector. It has two tabs, so make sure Node Settings is selected. Here, we can change a few things about the property, such as its Default value, which starts off as black. I’ll change it to blue, which means all materials created with this shader will start off as blue. Also make sure the Exposed box is ticked, which makes the property appear in the material Inspector window.

We’re done with the graph, so click the Save Asset button once again and come back to the Scene View. Now, we can pick any color we want on the material, and if we use Ctrl+D to duplicate the material, we can pick different colors for each material and assign each one to different objects. With a couple of very basic steps, we’ve created an unlit color shader with a little bit of versatility.

Conclusion
Hopefully you learned a bit about the Shader Graph interface and the very basics of creating properties, dragging nodes onto the graph, and connecting nodes together. This tutorial will continue in future parts, which will go over textures, lighting, transparency, and a little bit of scripting!
