In Part 6 of this series, let’s talk about different types of lighting and how we can use them in Shader Graph.
Lighting
Lighting is one of the core aspects of your game’s graphics that help to make a scene feel more realistic, and a lot of the work is done inside the shader. Whether you’re aiming for photorealism or a stylized look, lighting is key. So let’s enlighten ourselves (sorry) about some of the types of lighting we might see in our scenes. I’ll assume you have some basic knowledge about vectors.
Diffuse Light
First up, we have diffuse light. Surfaces in real life are rarely perfectly smooth and appear uneven when you zoom right in. When light reaches a point on the surface, it gets reflected in all directions, so the intensity of the light that reaches your eye doesn’t depend on the angle you’re viewing from.

The only thing that matters is the angle between the surface normal and the light source - anything above 90 degrees results in no illumination. With diffuse light, the total amount of light reflected from a point on the surface is equal to the dot product between the normal vector and the light vector - n dot l.

Specular Light
Next, we have specular light, which causes shiny highlights on some parts of the surface. Perfectly smooth objects reflect the majority of incoming light rays in the same direction.
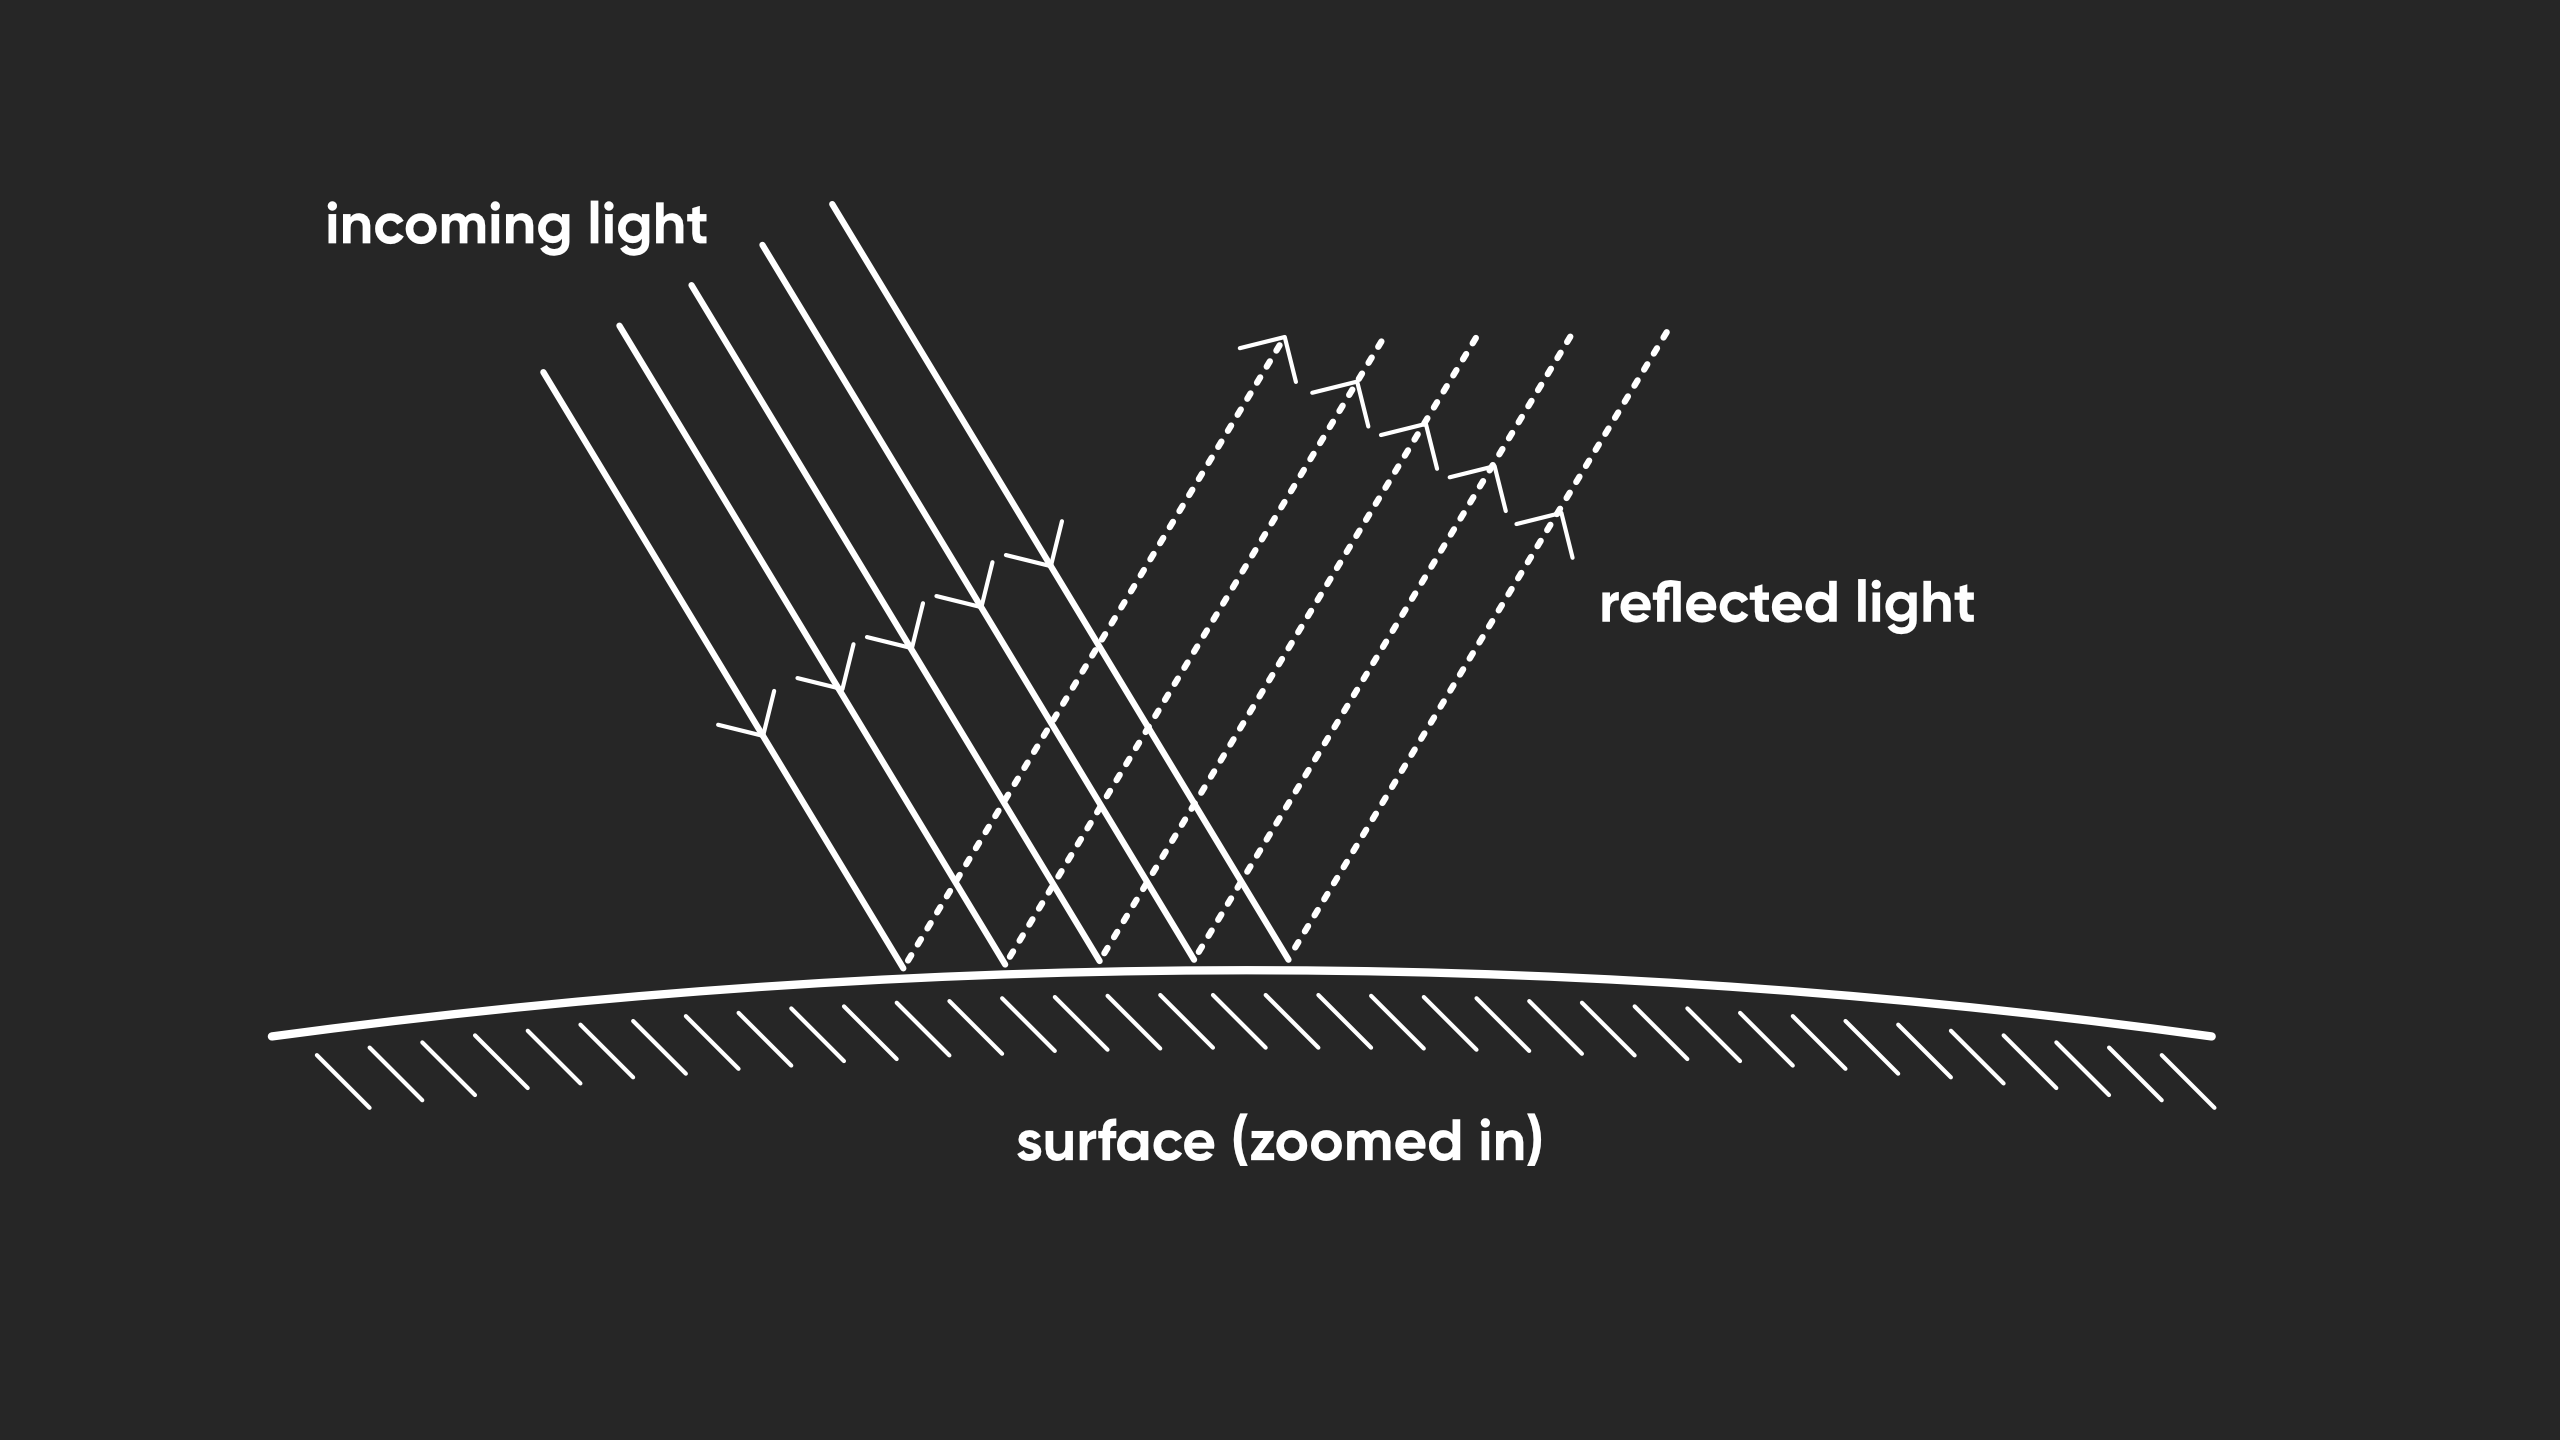
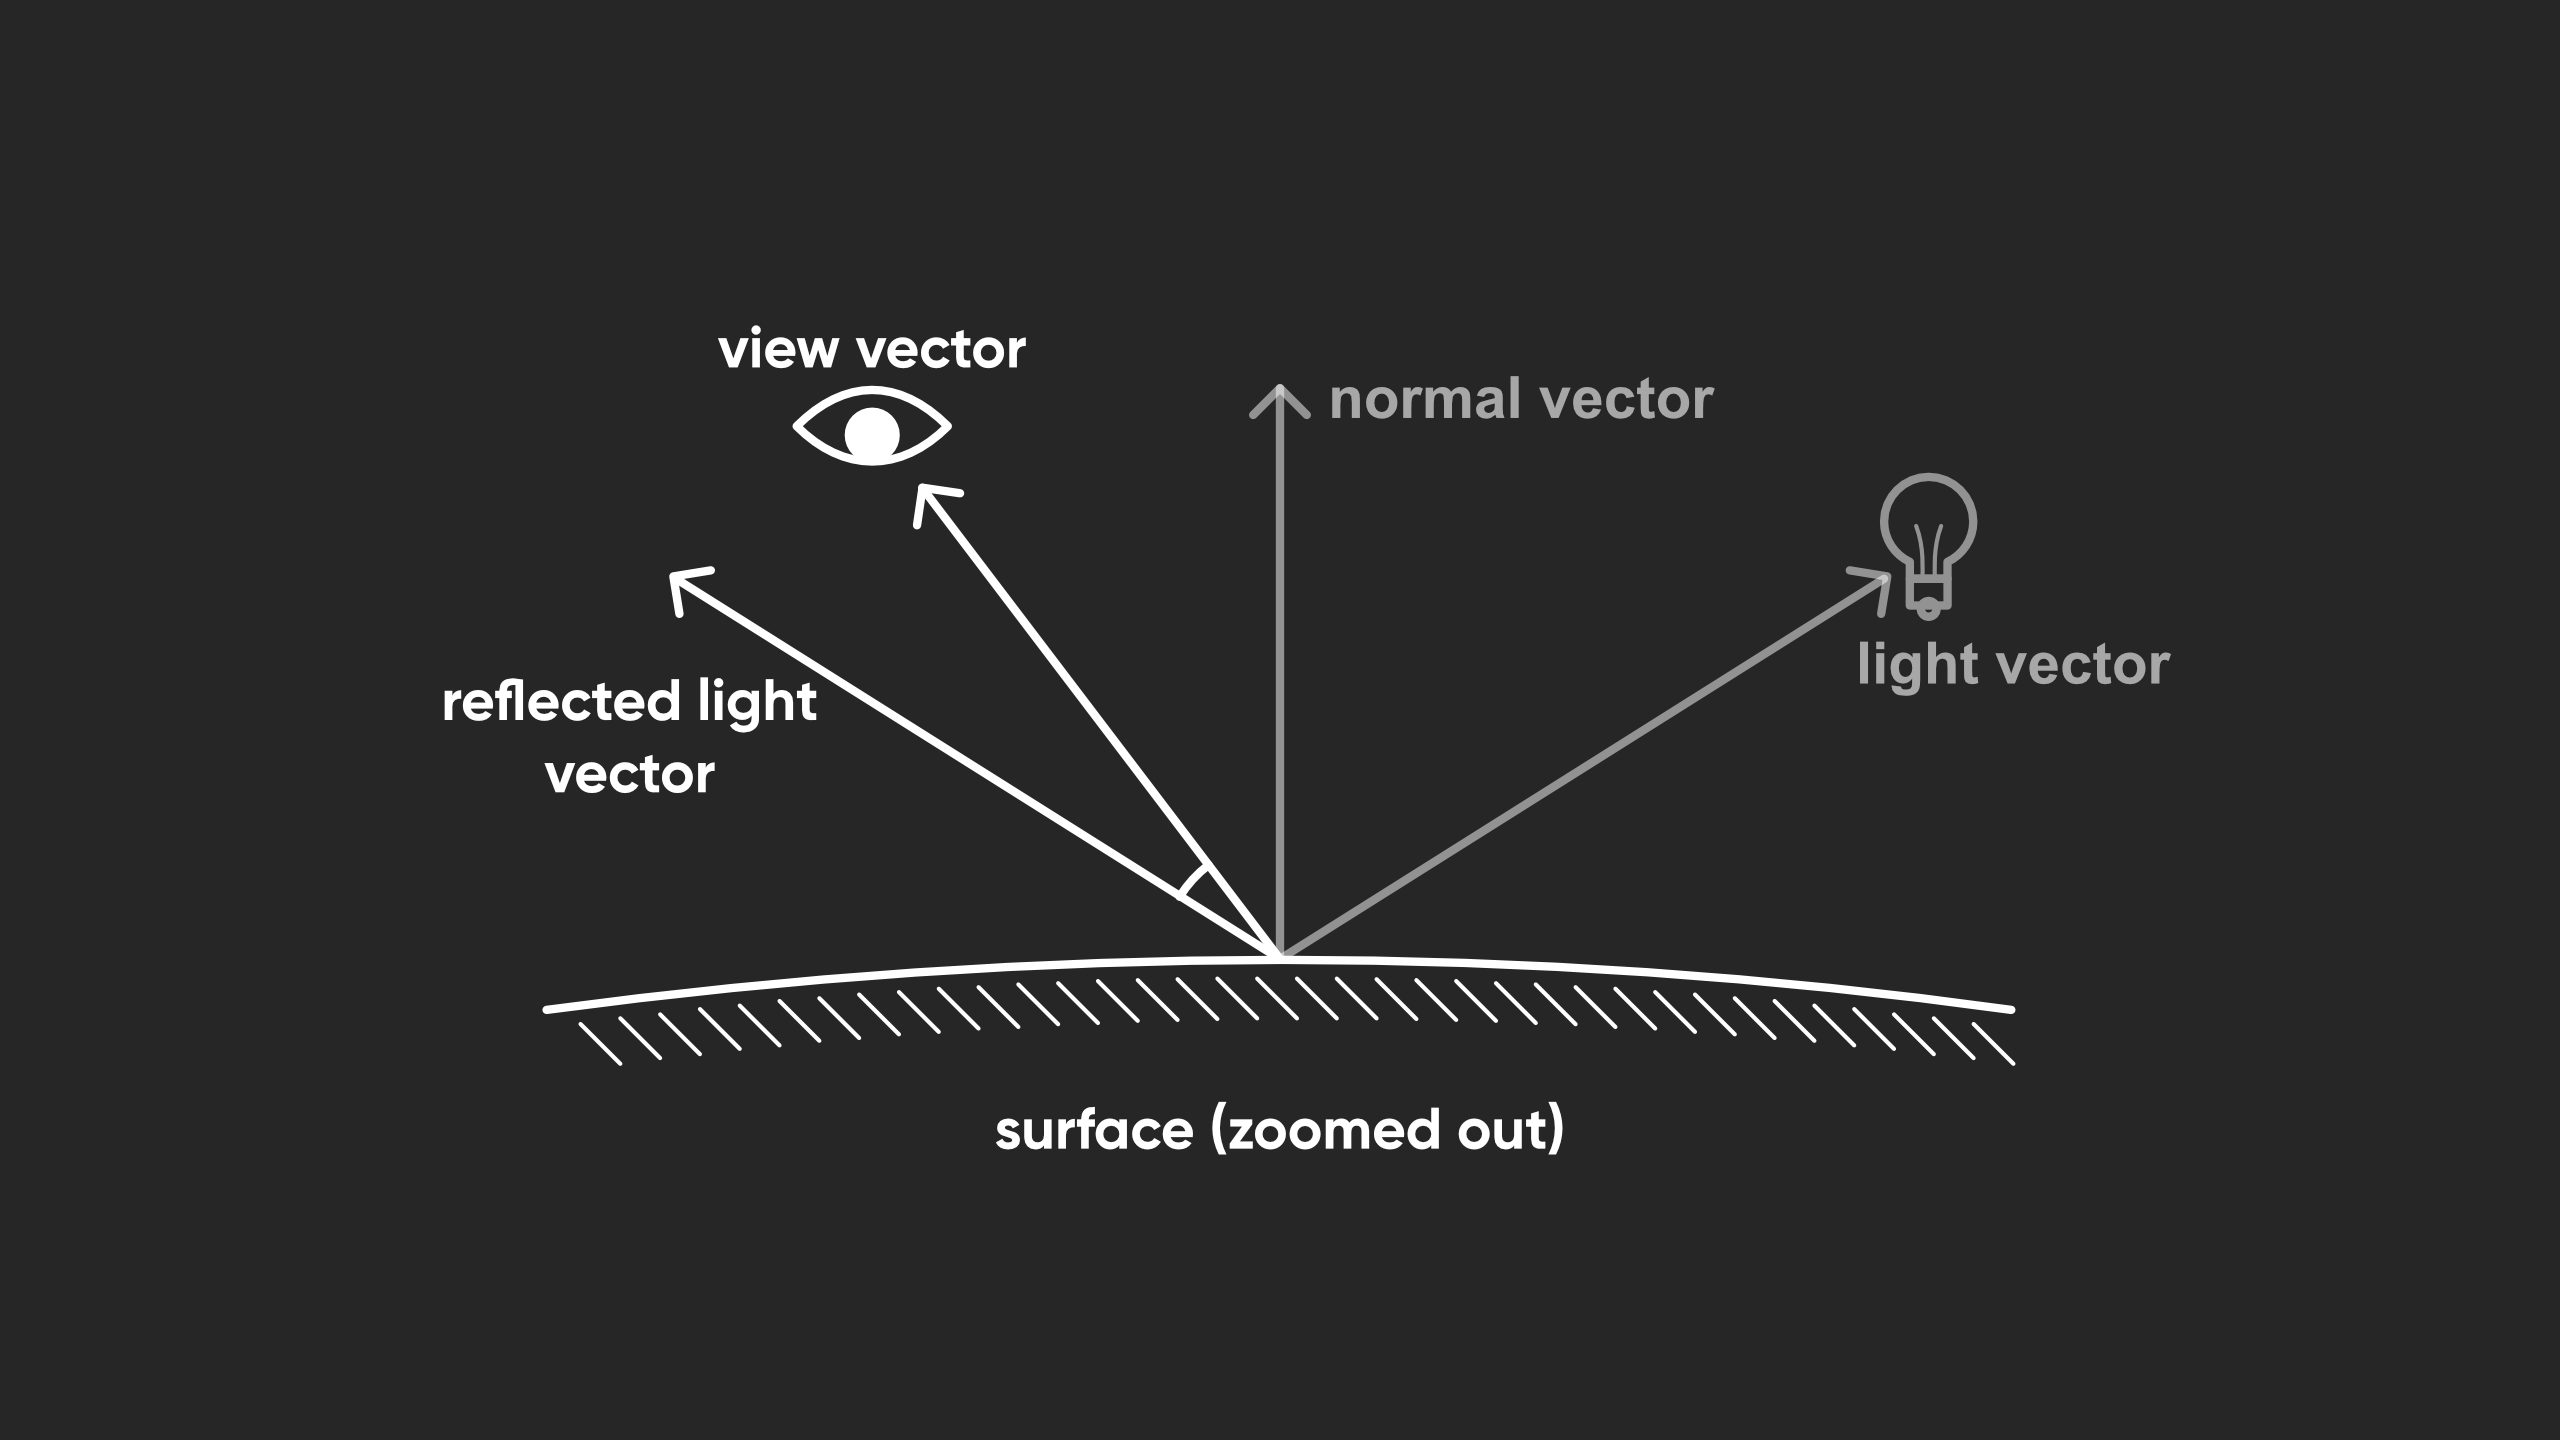
When this happens, the amount of illumination on the surface definitely depends on the position of the viewer. This is why the specular highlight on a sphere appears to move around when the camera moves around. With specular light, the amount of reflected light is equal to the dot product between the view vector (i.e., the vector between the surface point and the eye/camera/viewer) and the reflected light vector - r dot v.
Ambient Light
Now let’s talk about ambient light. This one is easy and it’s been here the whole time: it’s a base level of light applied to the entire scene, which you’ll see even if there are no light sources in the scene. This can be used to loosely approximate indirect light bounces, sort of like how an indoor room can be illuminated by a window.
The light sources in a scene include actual light objects we manually place, such as directional or point lights, and environmental lighting, such as indirect light bounces from other objects or from the skybox. However, setting up lights is a bit outside the scope of this tutorial because I want to focus on how lighting works within the shader.
Lit Shaders
On that note, let’s right-click in the Project View and go to Create -> Shader Graph -> URP -> Lit Shader Graph and name it “LightingExample”. When we open this graph, we’ll see far more things in the output stack than we’re used to! Unity’s Lit shader uses what’s called Physically Based Rendering, or PBR, which essentially means we tell Unity about the physical properties of an object - what its base or albedo color is, how rough the surface is, whether it’s metallic or non-metallic - and from this information, Unity automatically figures out how much diffuse and specular light should appear on the object. We don’t need to worry about the lighting calculations ourselves.
For this tutorial, I’m going to use a grass texture from ambientCG. It’s the same one from Part 2 of this series! However, what I didn’t mention is that ambientCG normally gives you not only a texture for the base color, but also textures for its roughness, ambient occlusion, displacement, and normals. Those are all terms I’ll cover throughout this tutorial.

Let’s go through each of the graph outputs in order.
Subscribe to my Patreon for perks including early access, your name in the credits of my videos, and bonus access to several premium shader packs!
Base Color
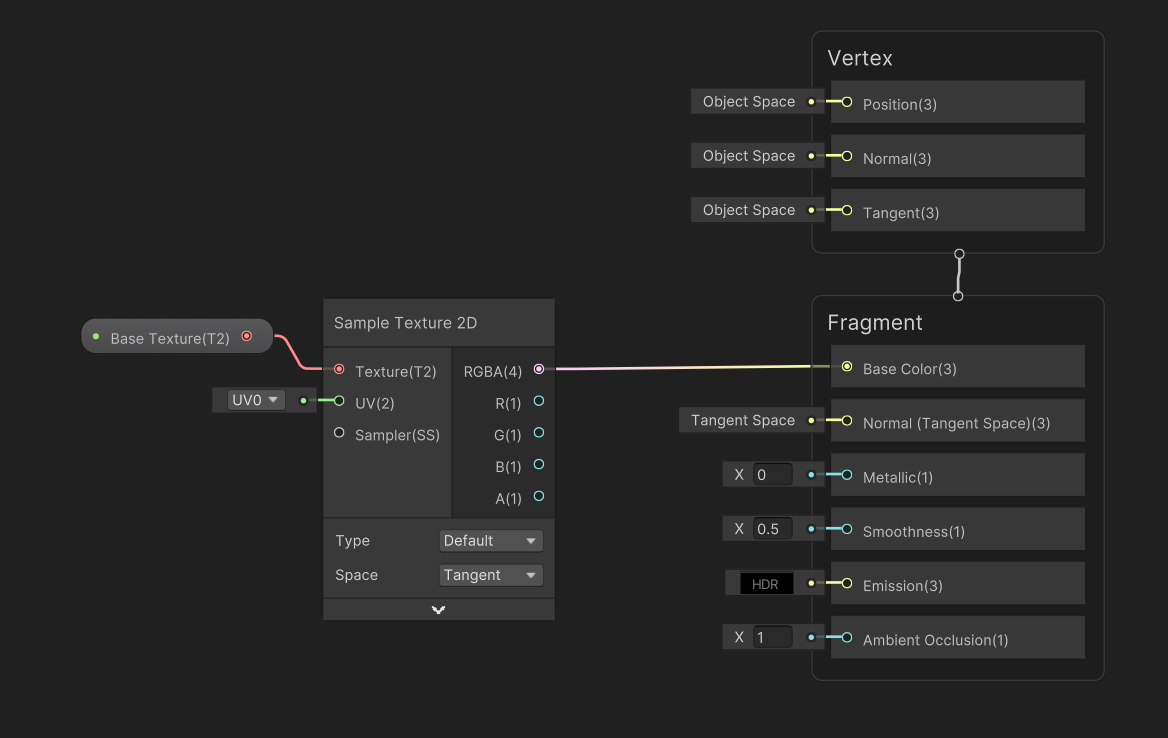
The Base Color output represents the albedo color of the object - this works exactly the same as it does in an Unlit graph, and you’ll be familiar with this from Part 2. Let’s add a Base Texture property of type Texture2D, then connect that property to a Sample Texture 2D node and output the result to the Base Color graph output. Simple!
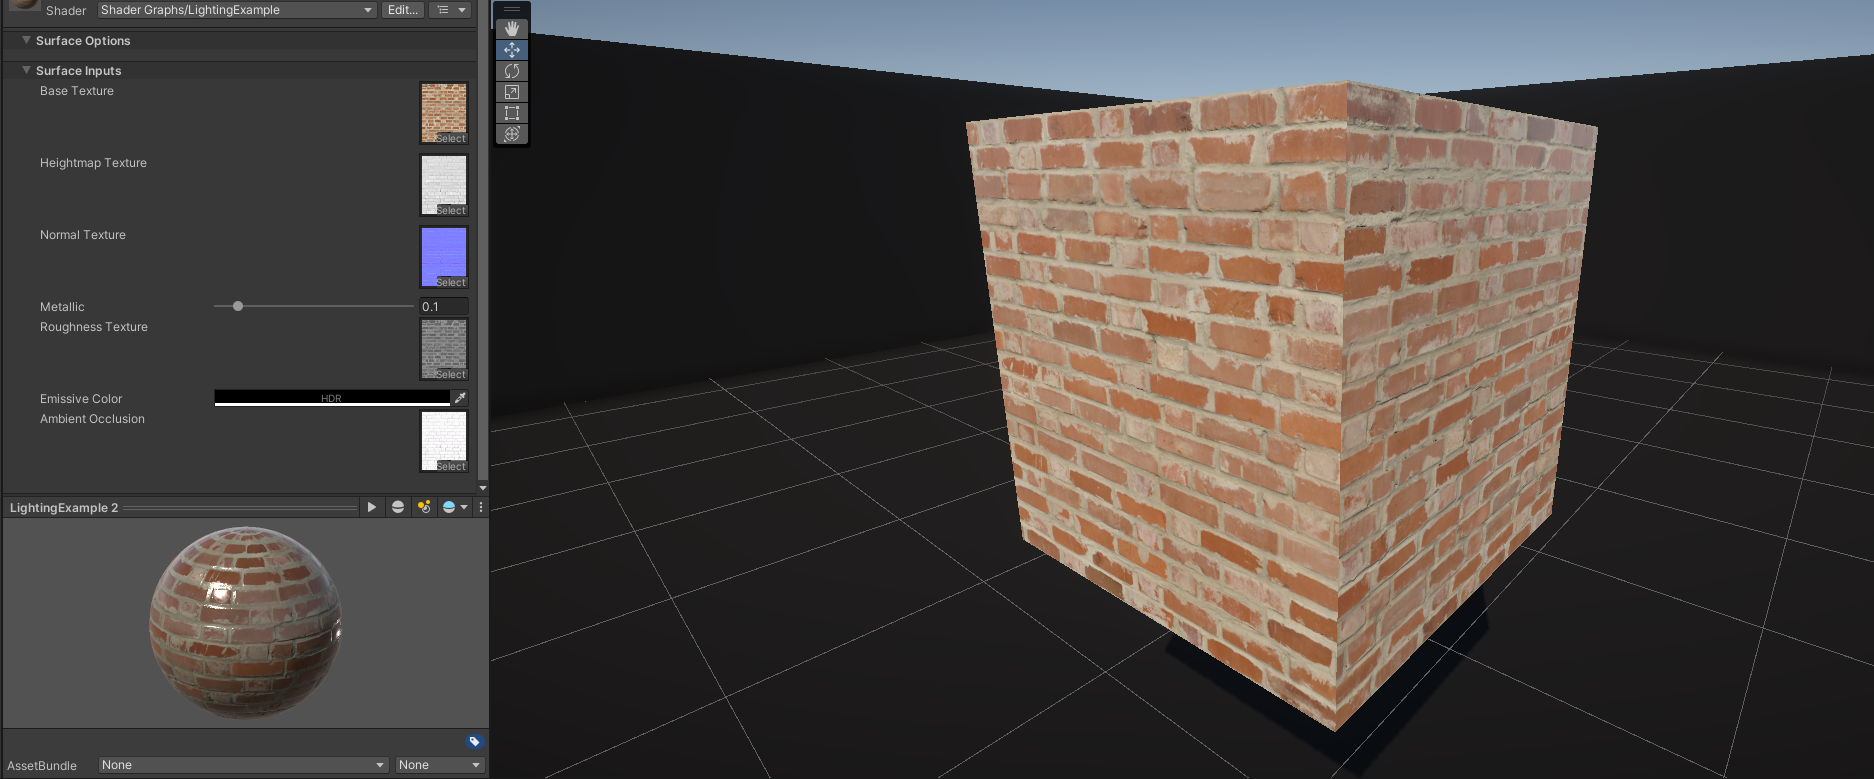
However, let’s also deal with the Displacement texture we got from ambientCG. This is a greyscale texture representing how far each bit of the surface should pop out, so we also call it a heightmap. Black pixels are the low areas and white pixels are the high areas.
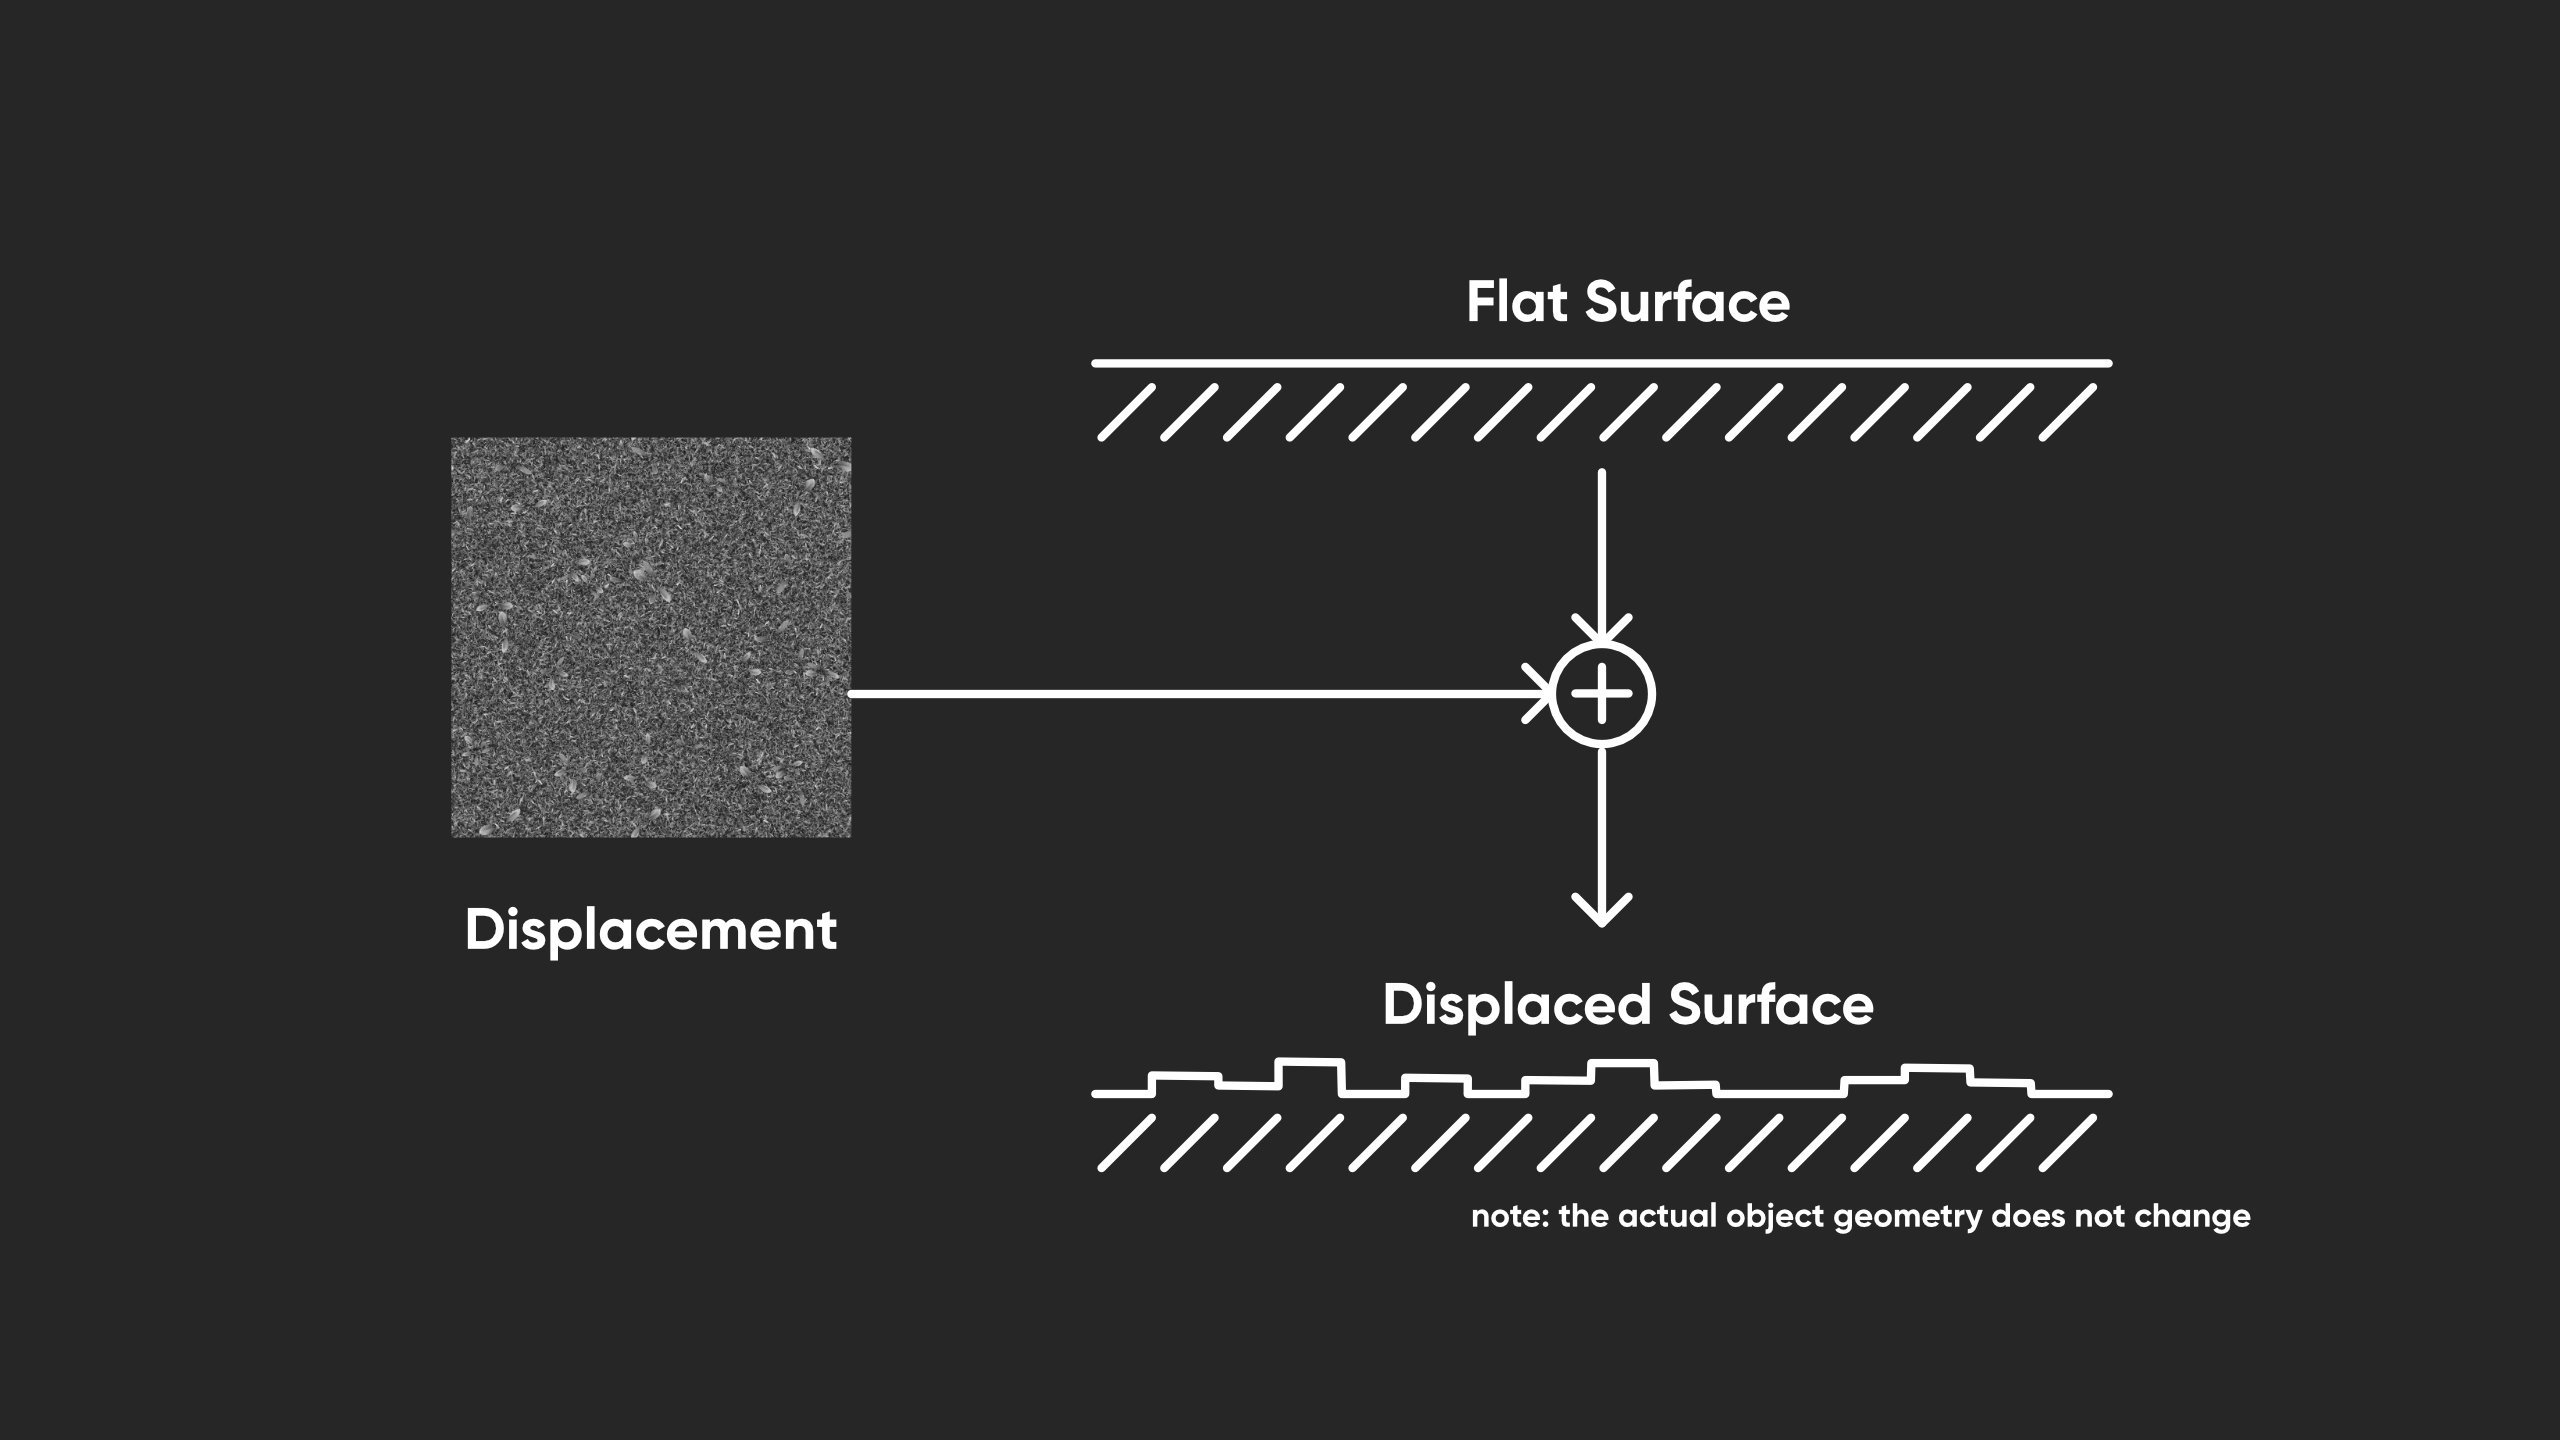
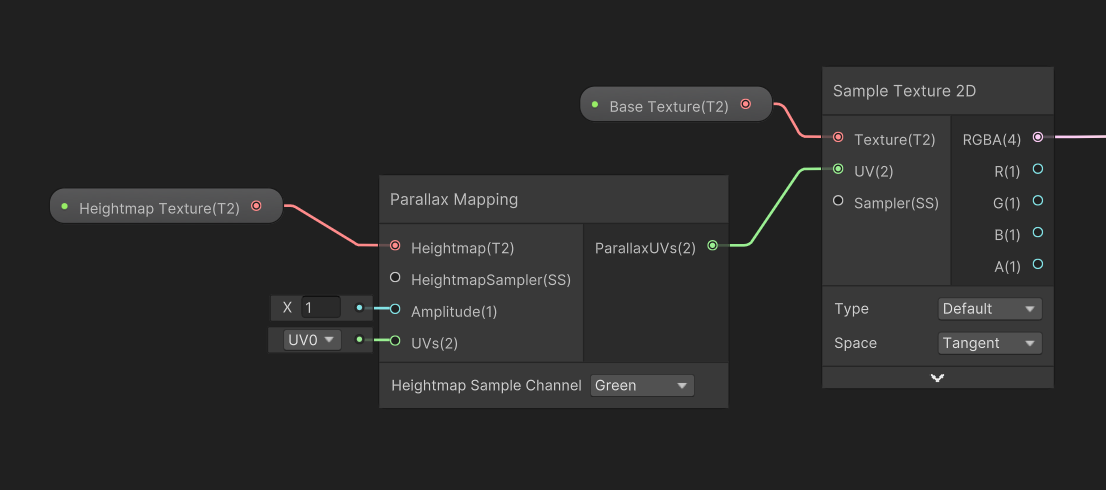
We can pass this to our shader with a Texture2D property called Heightmap Texture. This heightmap isn’t going to actually change the shape of the object geometry though. Instead, we’ll use a node called Parallax Mapping, which uses our heightmap and some fiddly math to modify the UVs we use for the base texture. On the graph, I use the Parallax Mapping output as the UV input for the Base Texture sample.
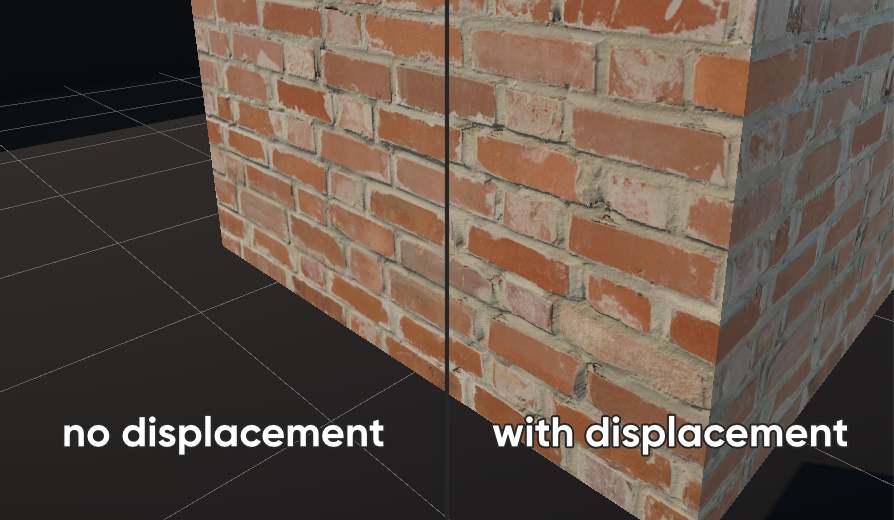
It’s a bit hard to see what’s happening in a screenshot, although I think it’s more apparent on this brick texture (which is also from ambientCG) than the grass texture.
Normals
Next up, we have the Normal Texture. The normal map feels similar to the displacement map, but it is distinct: the displacement map was pretending that some pixels have moved away from the surface, whereas the normal map changes the angle of each pixel. It’s like saying “this pixel doesn’t face the same way as the physical object geometry - it should face a bit left”.

Unity modifies its internal lighting calculation accordingly. Using both normal and displacement maps like this can yield nice results. In Shader Graph, I’ll add a Texture2D called Normal Texture and then connect it to a Sample Texture 2D node. We should use the displaced UVs from earlier. Also, we should change the Type option to Normal because Unity samples regular textures and normal textures slightly differently. We can connect the output to the Normal graph output.

Metallic
Next, we have the Metallic graph output. If you go to the Graph Settings, you’ll see that Lit graphs actually have two workflow options: Metallic and Specular.
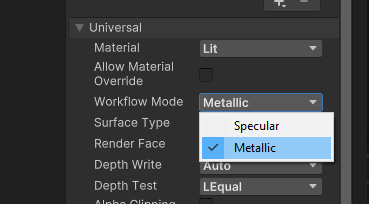
With Metallic, we control specular reflections by just saying whether the object is a metal or not, using a slider between 0 and 1. With Specular, you have direct control over the color of the specular highlight, but it’s essentially your personal choice which one you pick. I’ll stick with Metallic. Since we don’t have a texture for this, I’m going to use a Float property called Metallic and wire it up directly to the Metallic output, but you can definitely include a texture and sample it for the metallic if you have access to one.

Smoothness
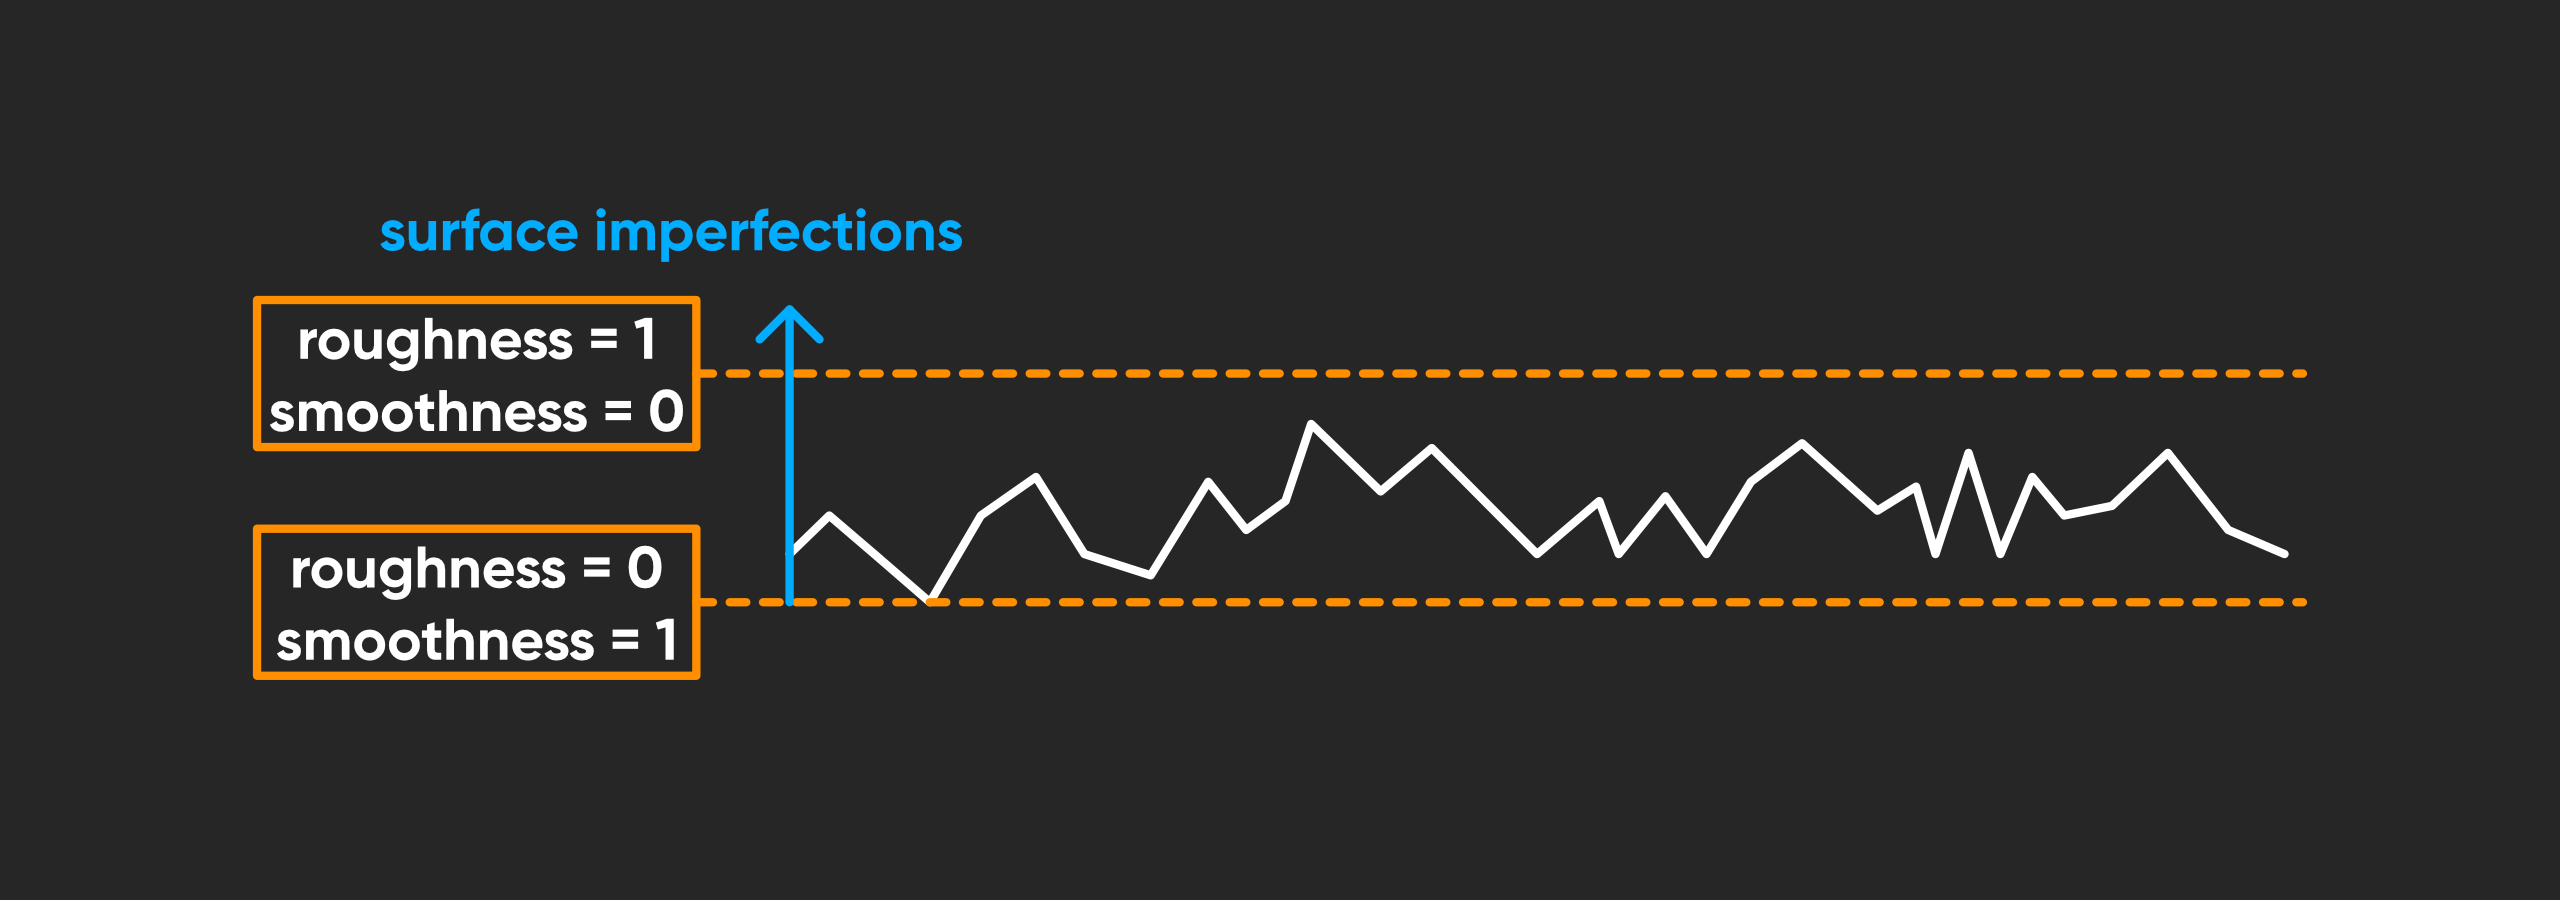
Next, we have the Smoothness graph output. Annoyingly, ambientCG doesn’t give us a smoothness map - it gives us a roughness map, which is the opposite concept: on a roughness map, black represents perfect smoothness and white represents a totally rough surface.

On the other hand, Unity expects white to represent perfect smoothness, but it’s not a problem - we can correct the discrepancy inside the shader.
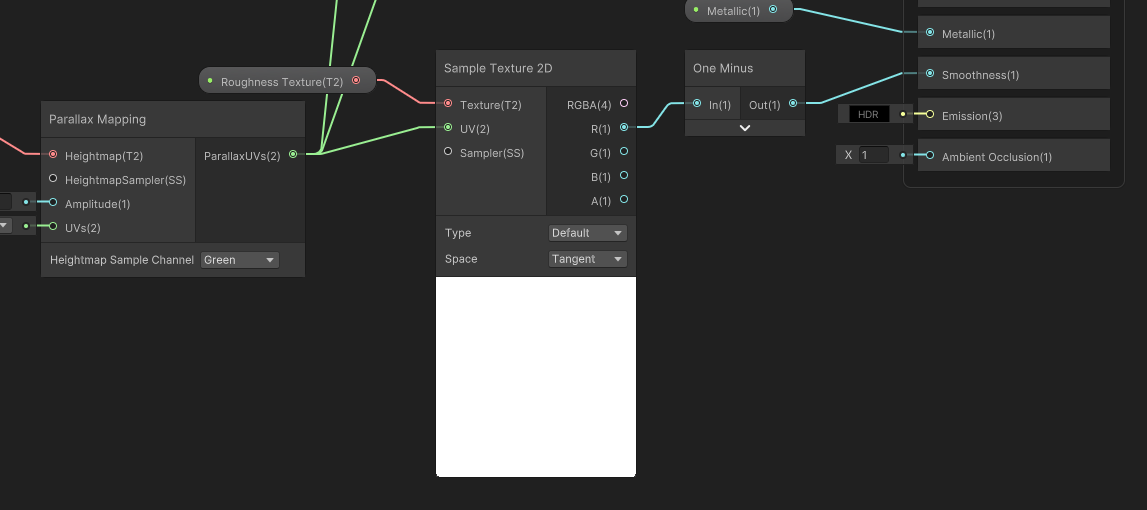
Let’s add a new Texture2D property called Roughness Texture and wire it up to a Sample Texture 2D node, just like we’ve done with the other textures. This time, however, I’m gonna take the Red output (because this is a greyscale texture, we can pick any of the RGB outputs to get the roughness) and I’m going to pass it into a One Minus node, which will invert the values. We can then pass the result into the Smoothness output.
Emission
Let’s move on to the Emission output. ambientCG didn’t supply a texture for this one either, but essentially, the Base Color output is influenced by shadow - if we place our object in a dark room, then the color of the object gets dimmer. Emissive color, on the other hand, does not dim. No matter where the object is, it will stay lit.
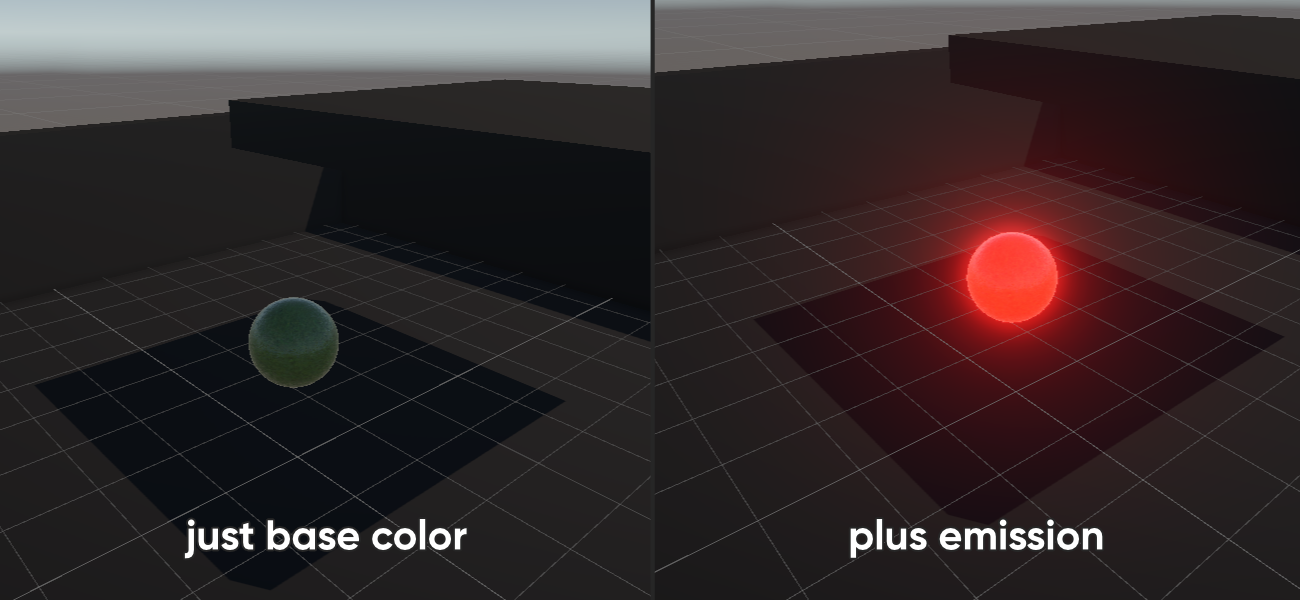
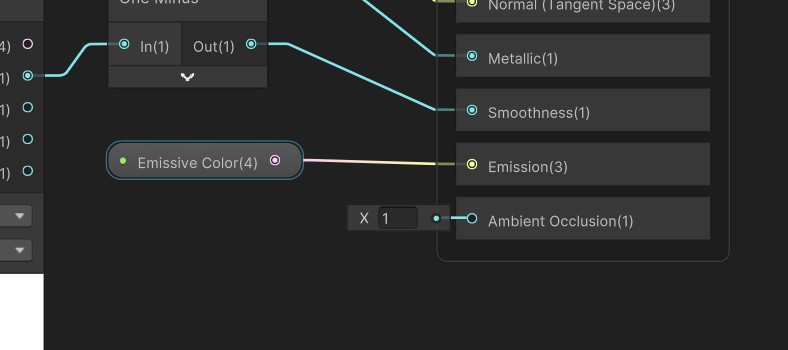
I’ll add another Color property called Emissive Color, and this time, I will set its Mode to HDR. This allows us to use high-intensity colors beyond the normal range - and as we will see, when used in the Emission output, we can create glowing materials.

I’ll wire the Emissive Color directly to the Emission graph output - but as I mentioned with the Metallic output, sometimes you might have access to an Emission texture.
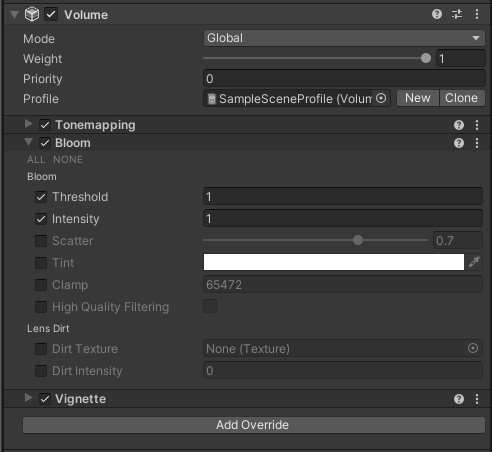
At this point, it’s worth noting that you need a Bloom post processing filter to see any glowing. A fresh URP project will automatically include one in your scene, but if it’s missing you can create a new post processing volume via GameObject -> Volume -> Global Volume, then create a new Volume Profile via the Inspector, save it wherever you want, and select Add Override -> Post-processing -> Bloom. You might have to change the Intensity setting to 1 and you should see your glow.
Ambient Occlusion
The final Lit output is Ambient Occlusion. We’ve talked about objects that have imperfections on their surface, but sometimes, those imperfections are a bit more pronounced, like holes or hard edges on the surface. In the real world, light has a harder time getting into those gaps so they appear darker, and we can approximate this effect using an ambient occlusion texture.
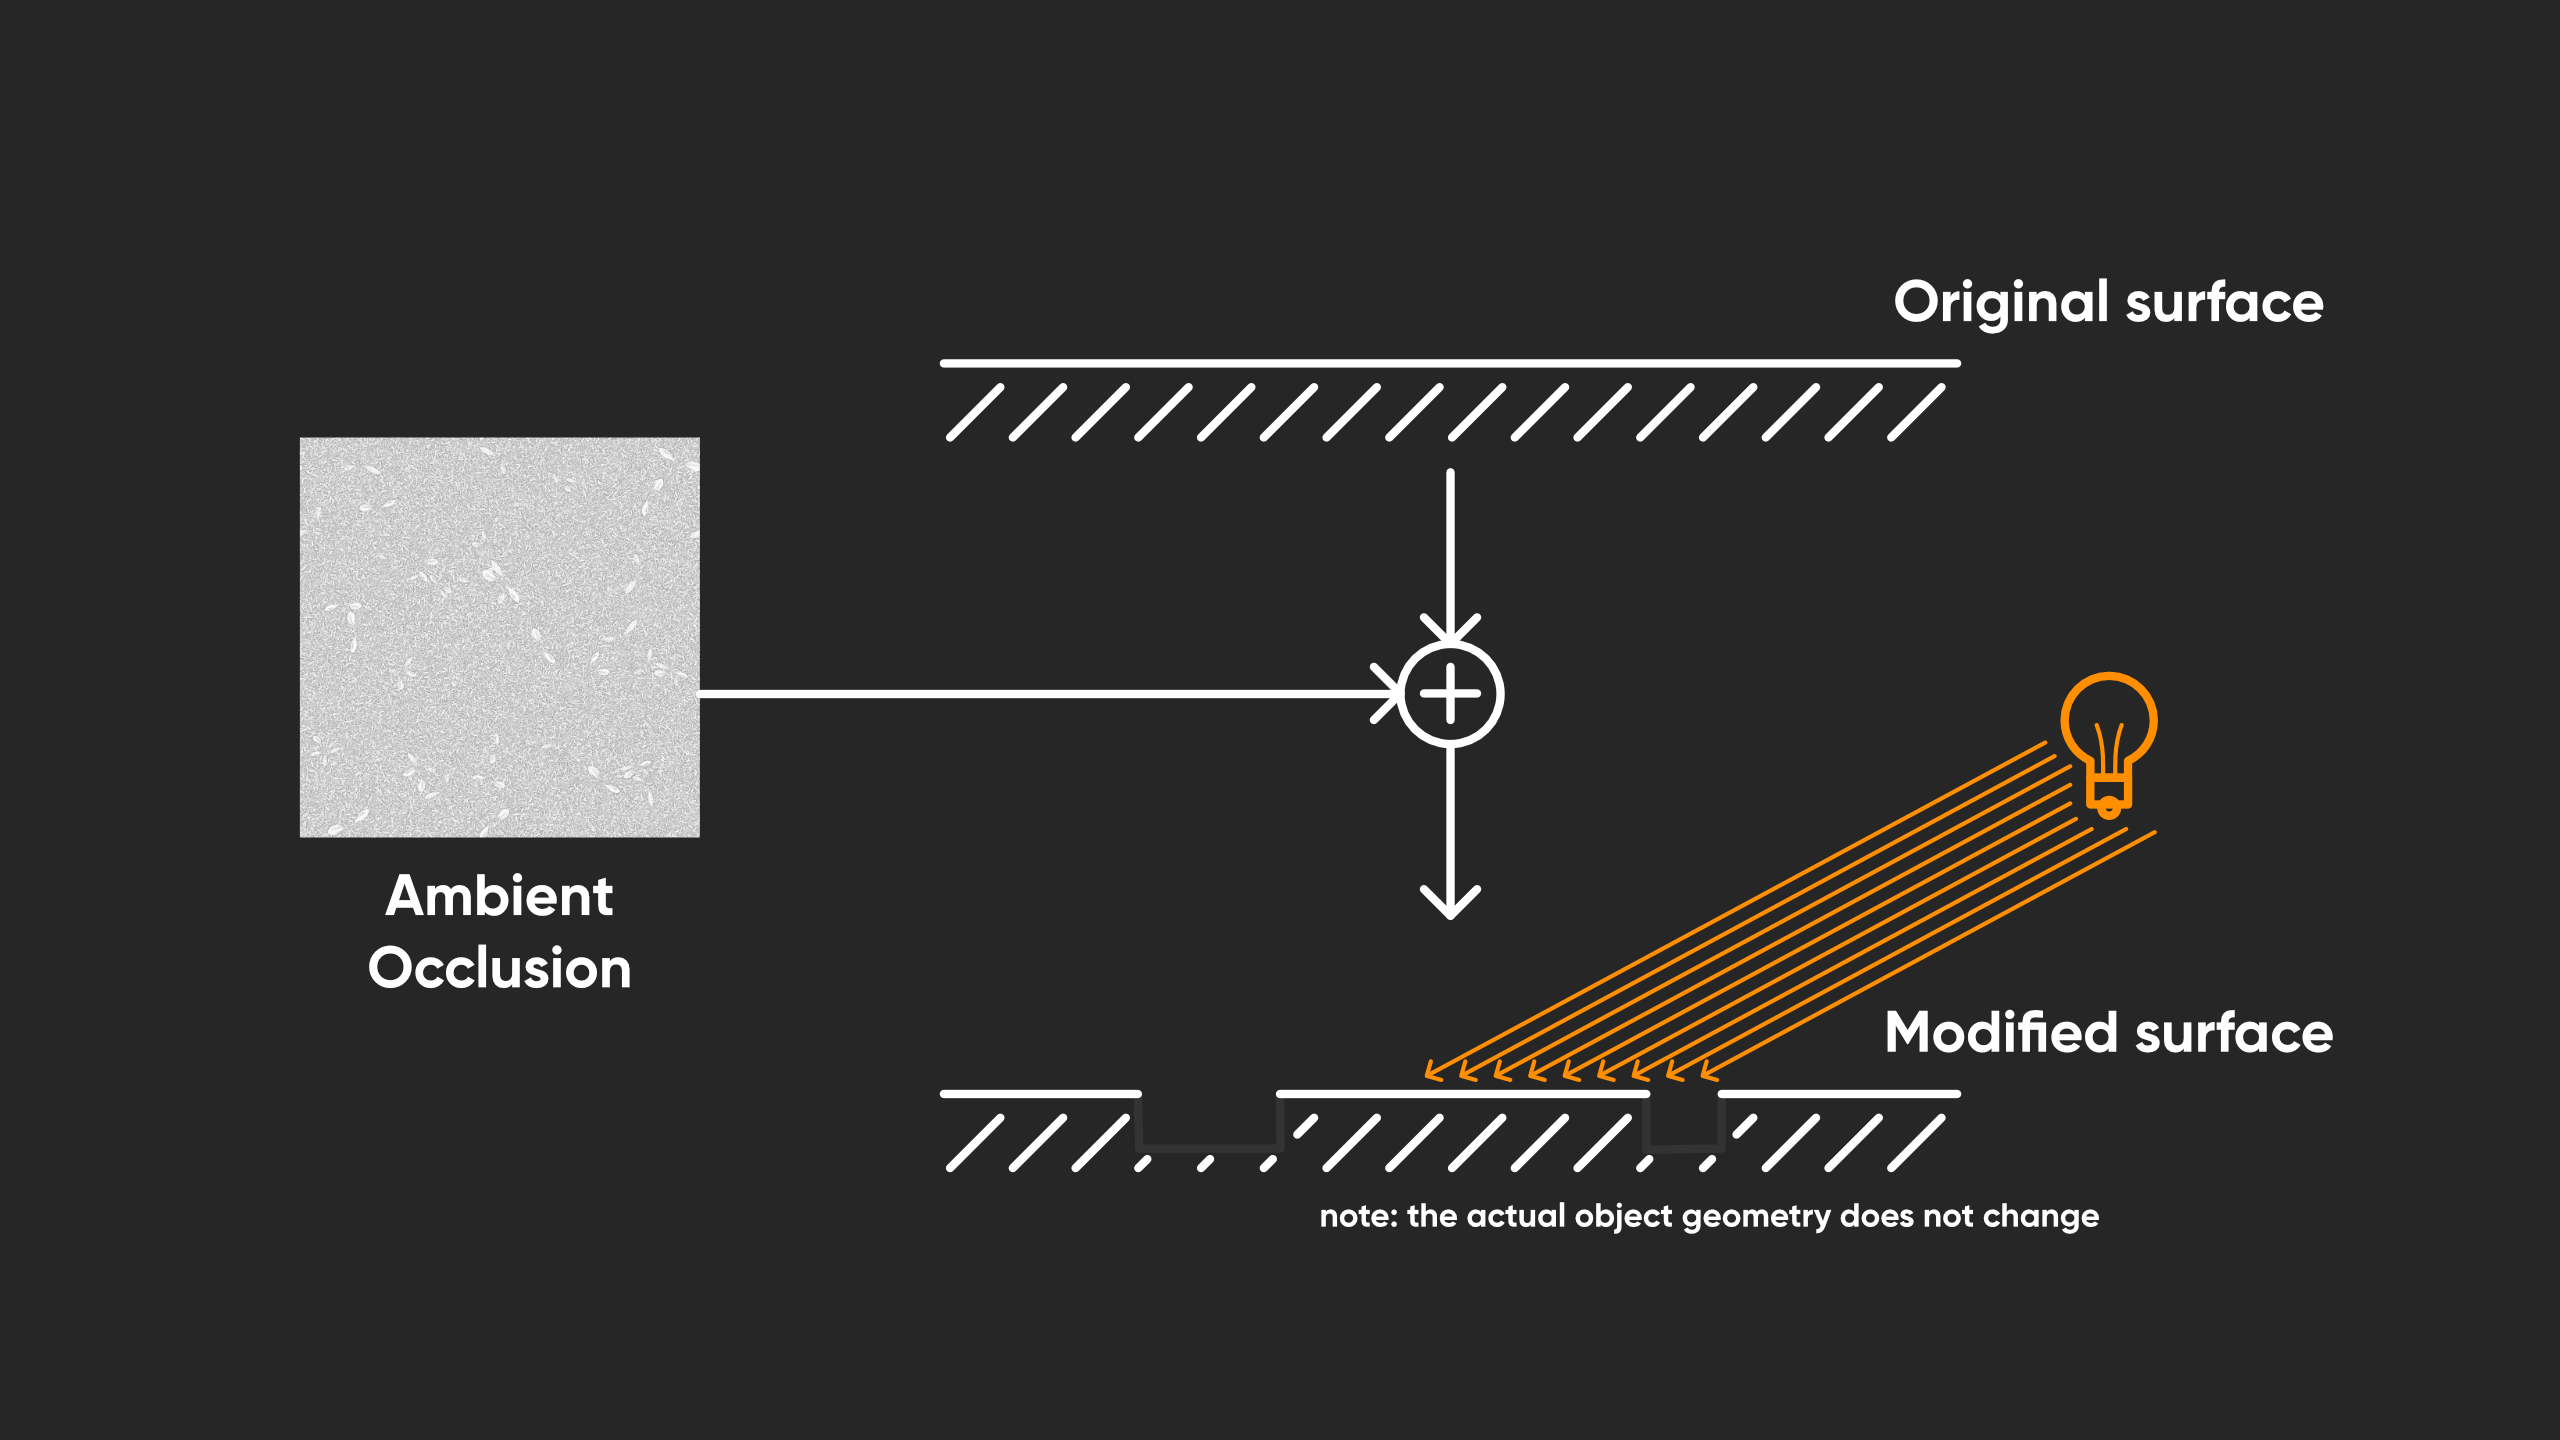
It describes how much each part of the surface is occluded - hidden, basically - from the ambient scene light. In the grass texture, the occluded parts of the surface would be the lowest down blades of grass, and the most visible would be the large leaf-like parts that lie on the upper surface.
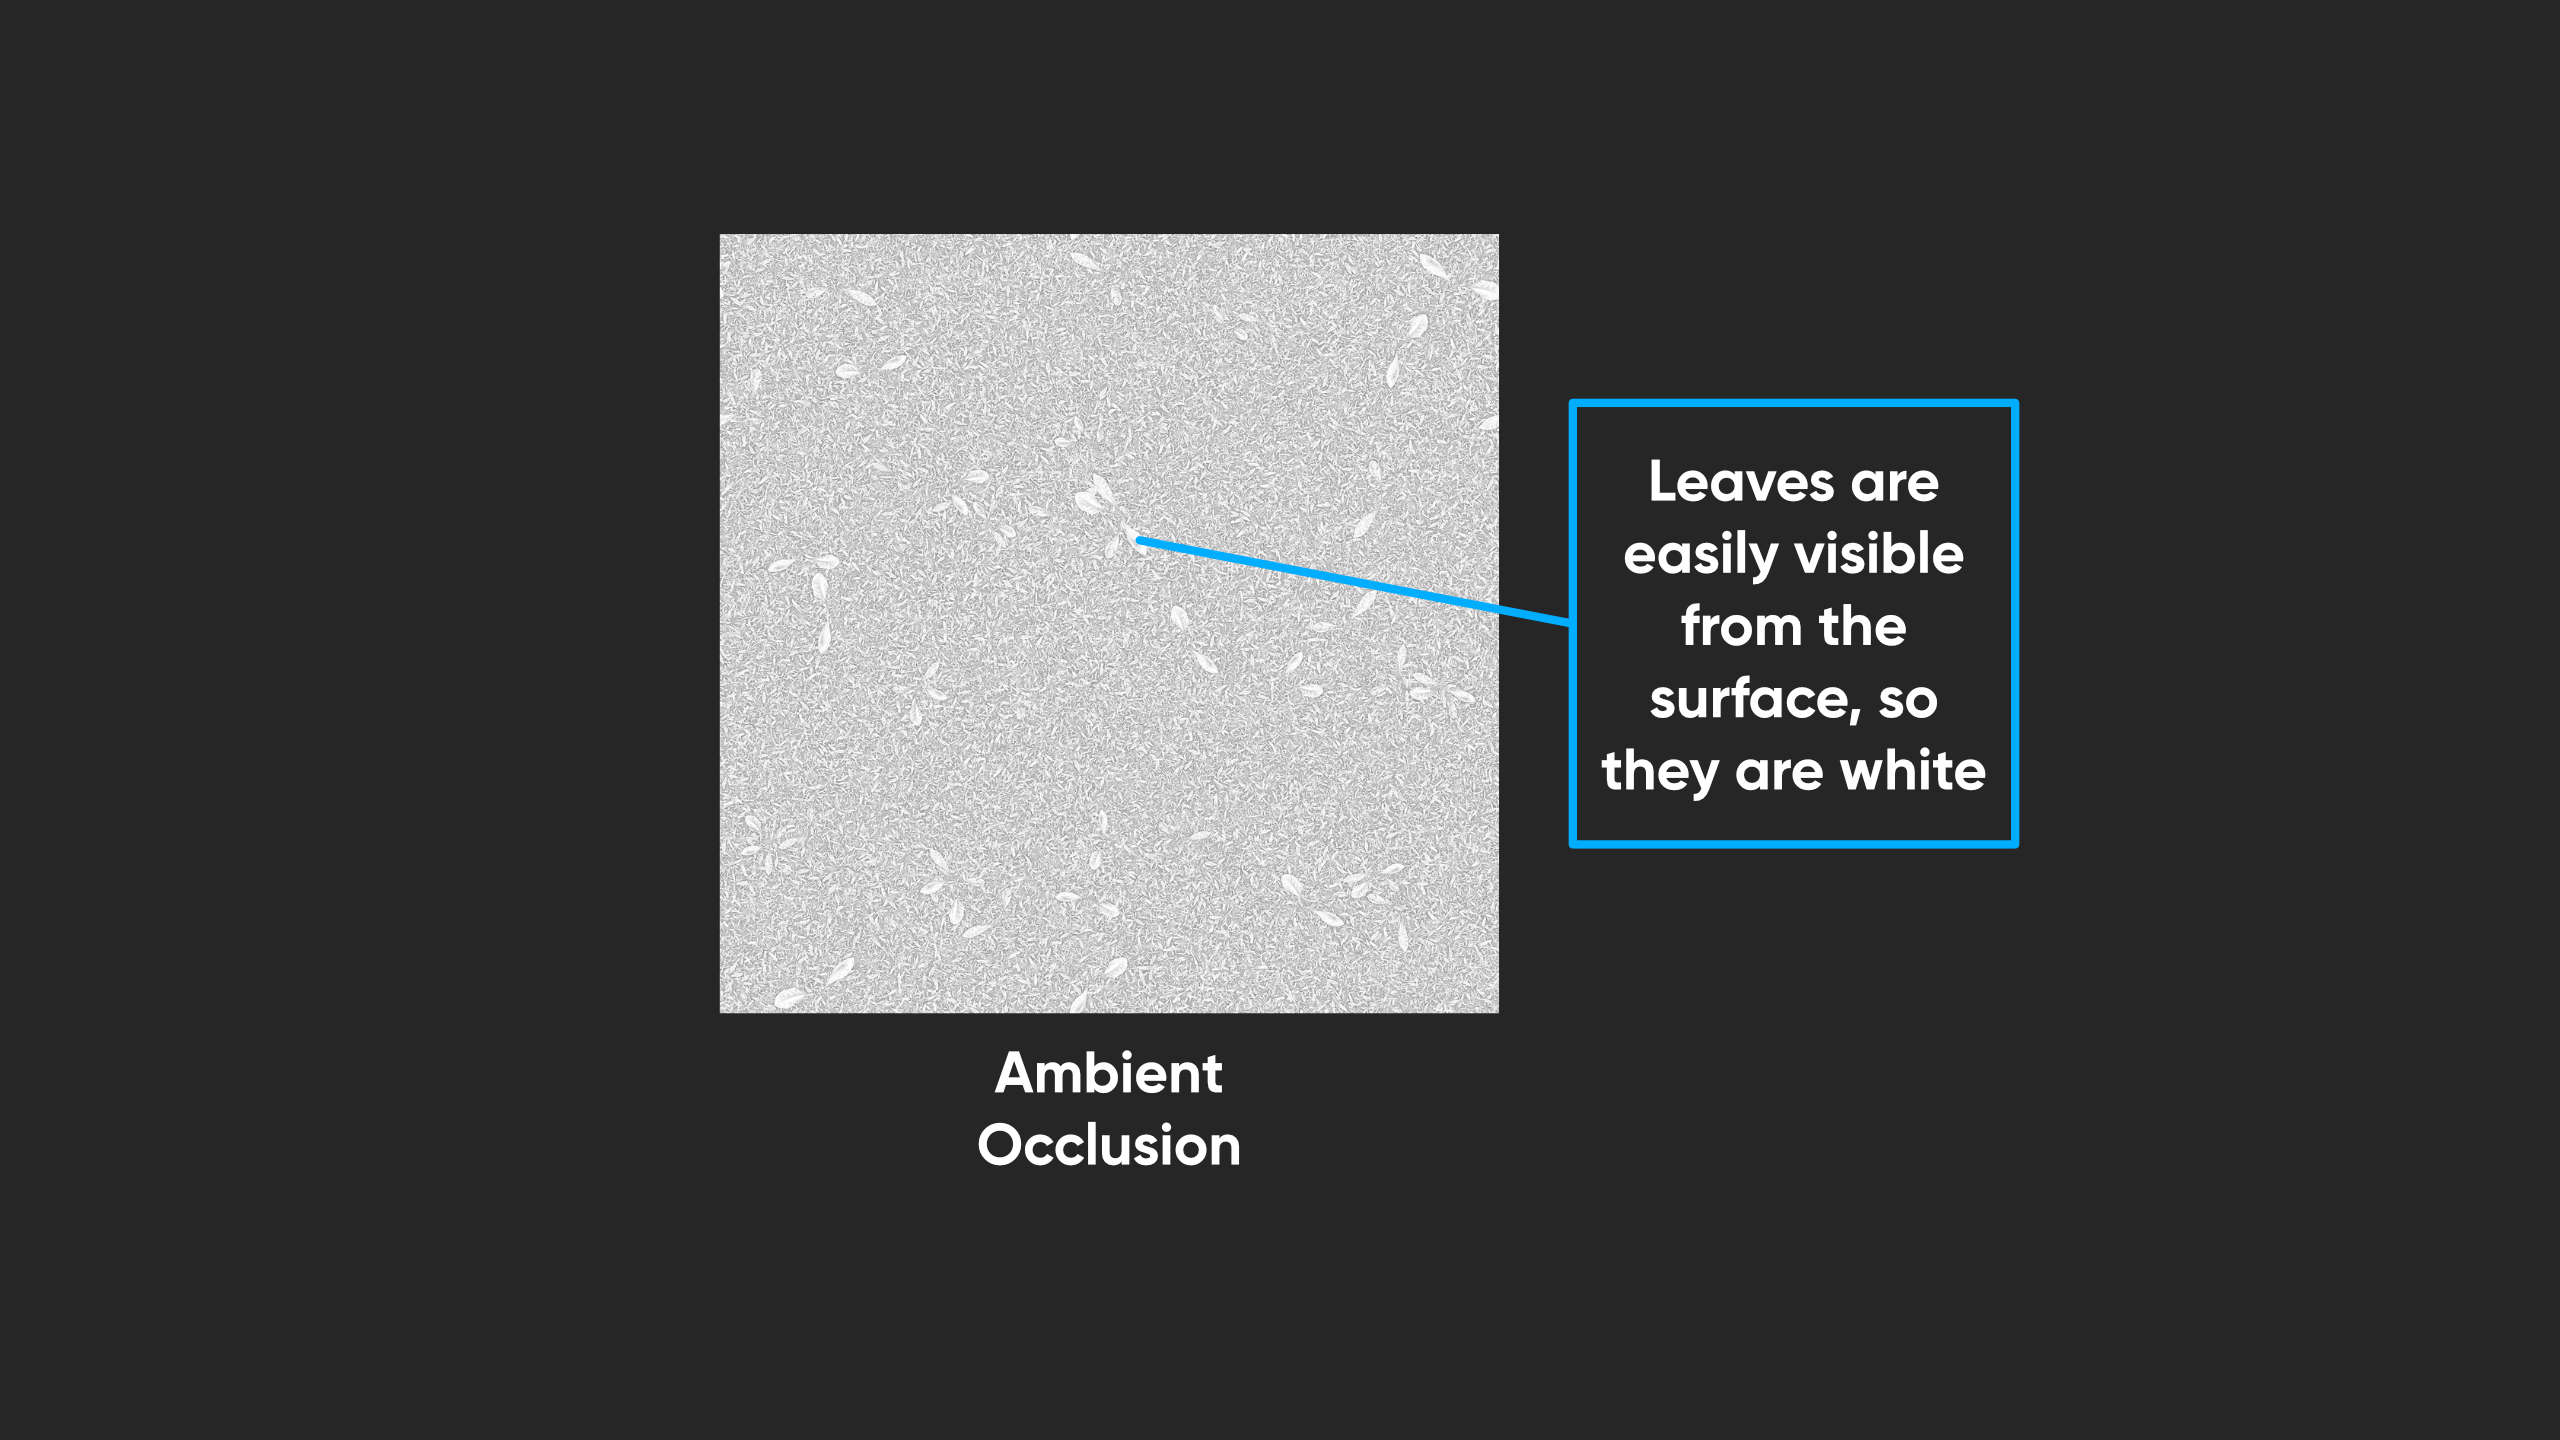
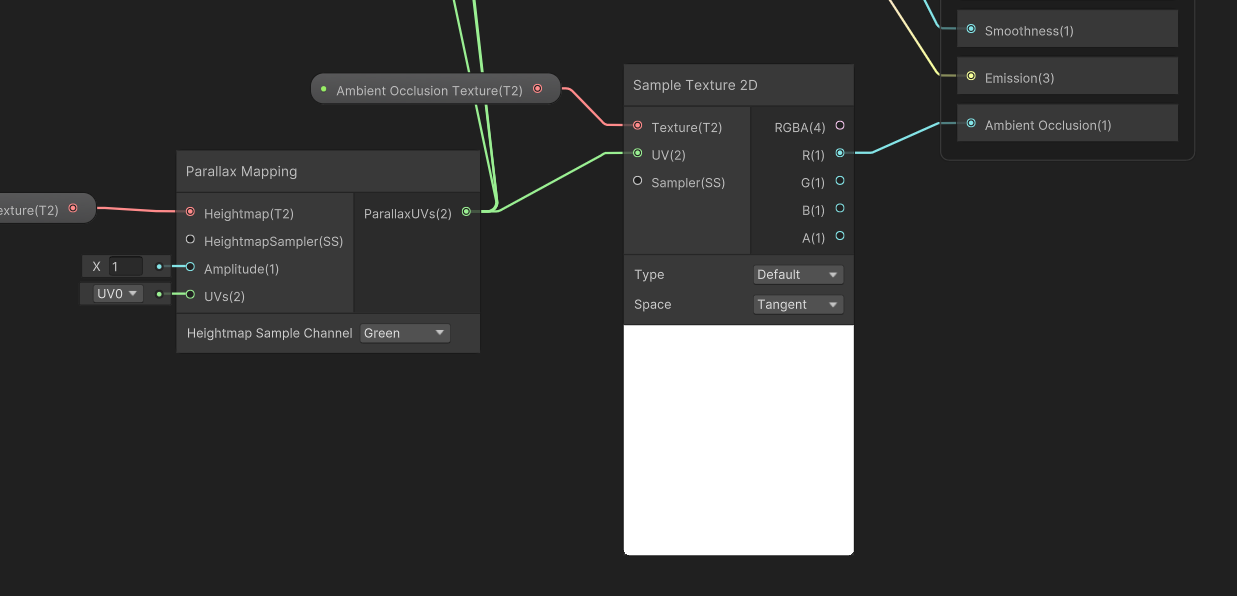
Values of 0 mean the object is totally occluded, and 1 means it is totally visible. I’ll add a Texture2D property called Ambient Occlusion Texture, drag it onto the graph, sample it with a Sample Texture 2D node, and connect any of the red, green, or blue outputs to the Ambient Occlusion graph output.
Conclusion
And with that, we have essentially recreated the functionality of Unity’s default Lit shader, the one you see whenever you create a primitive mesh.

There’s a surprising amount that goes into a shader like this! This Part is getting a bit long, so in Part 7, I will cover a few use cases related to the Lit shader. Until next time, have fun making shaders!
