Accurate refraction is difficult to calculate, but we can make a decent approximation using extremely fast techniques. We just need to supply a refraction texture and we can distort the screen’s image slightly to mimic for some efficient refractions.
Bytesize Gamedev is a series of shorter game development tutorials.
Hang out with me and other shader enthusiasts over on Discord and share what you’re working on!
For this effect to work, we’ll need to enable a couple extra settings in URP. Find your URP renderer settings and enable the Opaque Texture.
 This will enable the Scene Color node.
Then we go to Create -> Shader -> Universal Render Pipeline -> Lit Shader Graph and name the new graph Refraction. Once we’ve created it, you’ll need to add these properties:
- A
Texture2DcalledRefraction Map; - A
FloatcalledStrength; - A
ColorcalledTint Color; - A
Vector2calledTiling; - And finally, a
Vector2calledOffset.
The only one you need to worry about setting a default value for is Tiling - give it (1, 1) by default.
 Not too many properties on this one!
 This is the refraction map, by the way.
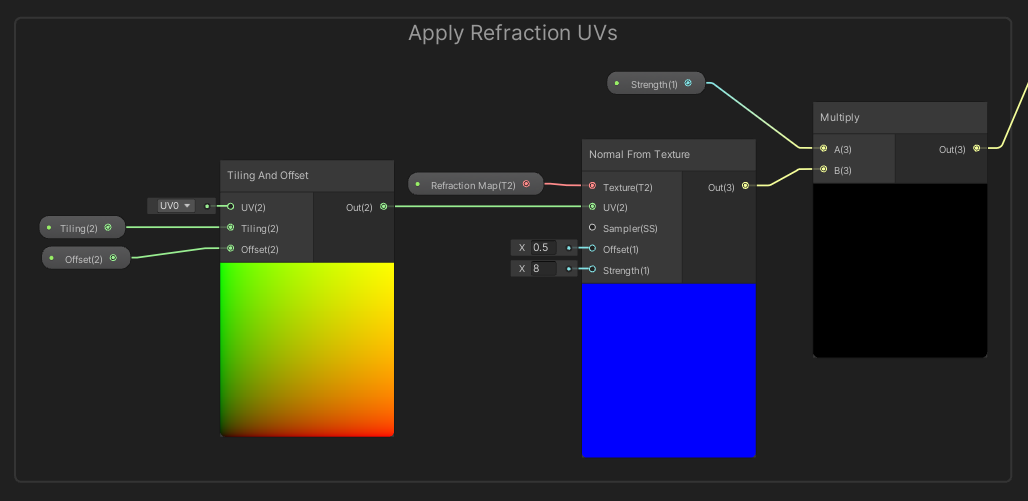
On the graph, we’ll start by reading the Refraction Map using a Normal From Texture node, using the Tiling and Offset properties in a Tiling And Offset node. Then we’ll multiply by Strength - I found this to be more effective than plugging Strength directly into the Strength option on Normal From Texture.
 The result of this will be used as an offset.
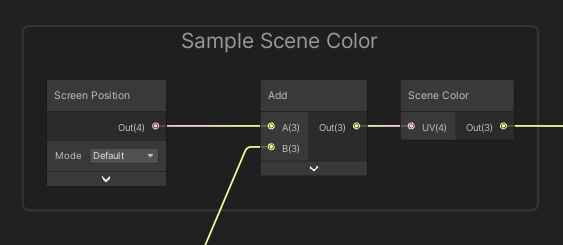
The next step is to sample the scene texture. Between rendering opaque and transparent objects, Unity keeps the result in a special texture that we can access using the Scene Color node - that’s why we needed to enable the Opaque Texture. We use the Screen Position for sampling the texture, but first, we’ll add the stuff we calculated in the last step.
 This texture gives you the scene after opaque objects have been rendered.
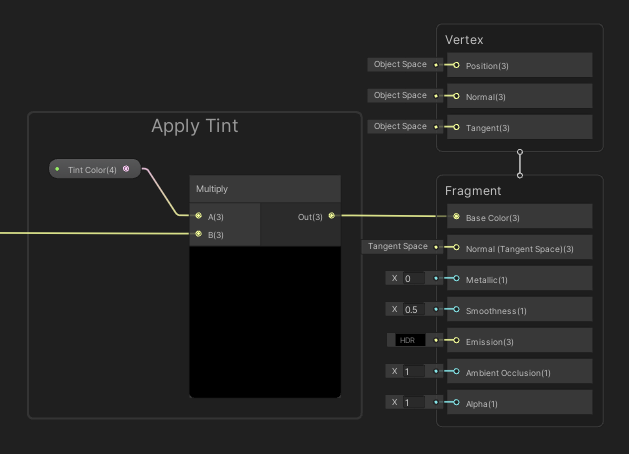
We can multiply this by a Tint Color so that it looks more like glass or ice. Then output to Base Color.
 I usually add a blue tint for ice, or maybe slightly grey for glass.
And the last step is to make sure our material uses transparent rendering - if we don’t, the Scene Color is just black. We can change this in the Graph Settings.
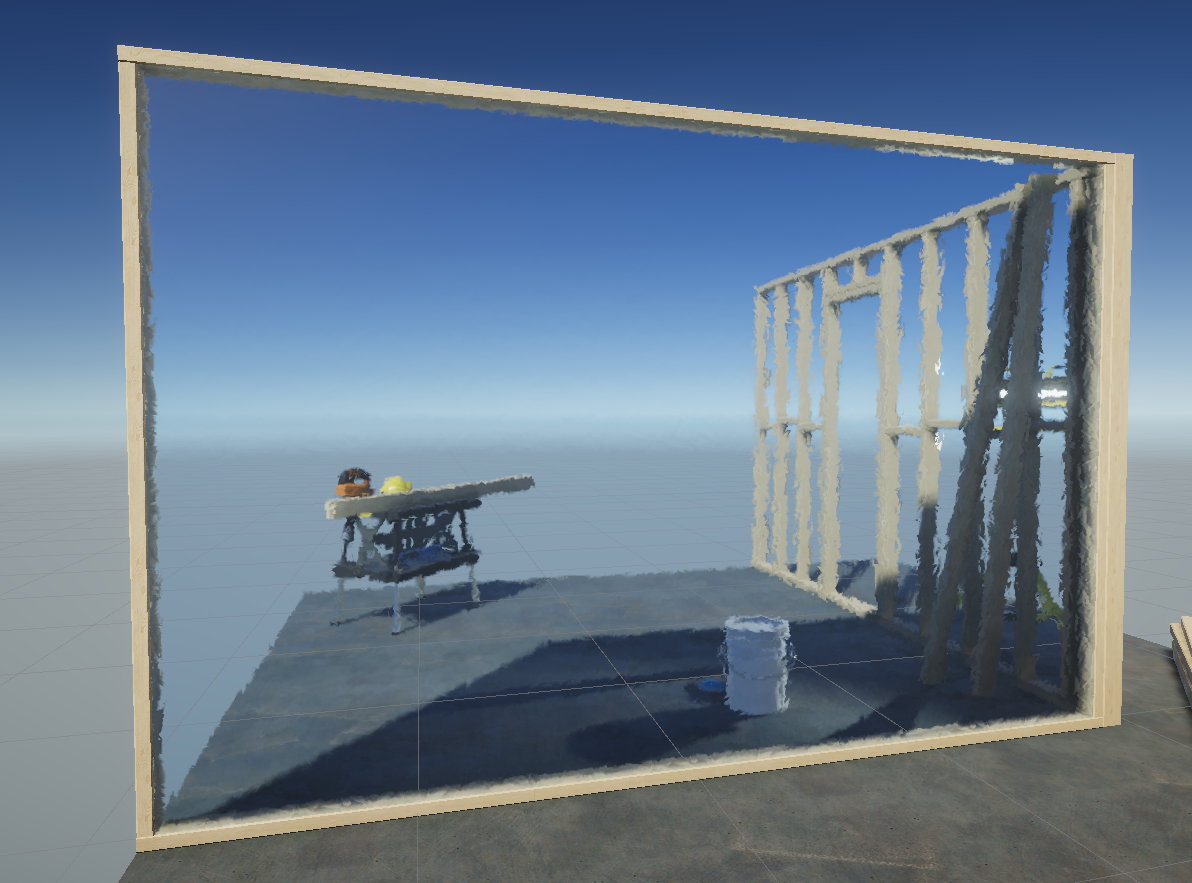
 After doing this, we’re clearly done.
I’d recommend not overdoing it with the effect. Just a little bit of distortion looks great - I set the strength to 0.002.
 If you distort much more than this, it’ll look too strong.
Thanks for reading Bytesize Gamedev, your one-stop shop for shorter game development tips, tricks and tutorials!