Today we’ll build on the effect we’ve built so far and add more detail to our lighting calculations using so-called ‘bump mapping’. Then, we’ll add a subtle lighting effect on the edges of objects called fresnel lighting.
For this tutorial, I’ll only be using surface shaders, but it should be relatively simple to implement a vertex and fragment shader variant using the information contained in this tutorial article.
Bump Mapping
Increasingly, artists want to include very high levels of detail on the meshes they create. It would become impractical to encapsulate every wrinkle, every crease and every scratch in solid geometry, as this would push the vertex count of models to the point that it’s impossible to render them in realtime. Instead, we can use a trick to keep the object’s geometry simple and use a texture to encode those details. The texture is known as a ‘normal map’ or ‘bump map’, as they are used within the lighting system to subtly change the surface normals - the final render manifests those changes as small differences in lighting that imitate the details.

So far, we’ve looked mainly at simple objects like spheres to demonstrate our lighting and shading, but now we’re going to break out Ethan, who currently looks like an extravagant gummy person.
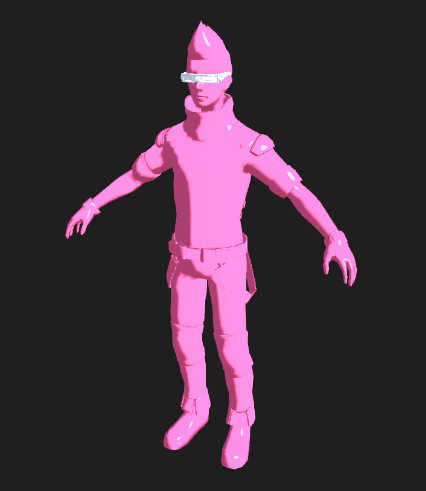
The Ethan model is available in the Unity Standard Assets, downloadable from the Asset Store. Diffuse and specular lighting give us enough to discern the shape of Ethan’s clothing, but his model comes with a normal map - we’d like to get the extra details not available on the base geometry.
For this tutorial, we’ll be using Shaders/RimCelShaded.shader as our template - it’s based on Shaders/Complete/CelShadedSurf from the previous tutorial. Let’s dive right in and add the bump map as a property. I like to put it immediately after the _MainTex declaration so the two textures appear together in the Inspector. We’ll also add it as a variable in the usual spot.
// In Properties.
_BumpMap("Normal/Bump Map", 2D) = "bump" {}

// Declared alongside other variables.
sampler2D _BumpMap;
To use the bump map in our lighting calculations, we’ll first need to pass it to the surf function. This involves passing the UVs for this texture - remember that we can do that by specifying uv plus the name of the texture. In this case, we need to pass uv_BumpMap in the Input struct.
struct Input
{
    float2 uv_MainTex;
    float2 uv_BumpMap;
};
To pass these normals from the surface function, surf, to our lighting model function, LightingCel, we will set the Normal property of the SurfaceOutput object. We need to retrieve the normals from the bump map texture by sampling it using tex2D, then we’ll pass the sample into a new function called UnpackNormal. This function is provided by Unity and will translate the regular RBG vector returned by the sample into a normal vector that Unity can understand and use. The first thing that LightingCel does is normalise the normal vector provided to it, so we don’t need to worry about any further processing within surf.
// In surf(), below setting o.Albedo.
o.Normal = UnpackNormal(tex2D(_BumpMap, IN.uv_BumpMap));
That’s all we need to do to add the normal map to our shader. The UnpackNormal function does much of the work for us, and we already use the normals in our lighting calculations - all we’ve done is slightly tweak the normals used in those functions. Ethan has a bit more life to him now.

Fresnel Lighting
Fresnel lighting (pronounced “fruh-nell”, with a silent ‘s’) arises when the viewer is looking at an object at a very shallow angle. When looking at a steep angle, the lighting will be as normal - but at shallower angles, a much higher proportion of the light is reflected off the surface; this is especially true of transparent materials, which tend to reflect a higher proportion of light at shallow viewing angles than they transmit through their surfaces. That’s why you might primarily see the bright reflection of the sky in the surface of a swimming pool when approaching it, but up close you’ll see the floor through the water.
For us, it’ll let us light the edges of objects as they curve away from us - imagine a ball; we’ll light the ‘edges’ of the ball. It’s also known as ‘rim lighting’ in computer graphics because we commonly use it to light the rim of objects. It’s also called ‘back lighting’ in photography, because you put a light source behind the object.
As established, the fresnel lighting depends on the normal vector of the object and the view vector of the camera to the object - the lighting direction doesn’t matter. We’ll use the one trick we have up our sleeve when it comes to lighting - the dot product - to determine to what degree the viewing vector and normal vector match up, then subtract the result from 1 to invert it because we want to light areas where the normal faces perpendicular to the viewing direction. Let’s return to Shaders/RimCelShader.shader and add this line after the specularSmooth calculation in the LightingCel function.
float rim = 1 - dot(normal, viewDir);
This is the basic fresnel calculation, complete. But we’ve been stylising our lighting calculations so far, so we’ll modify it to fit with the cel-shaded style we’ve developed so far. Before we perform a two-tone cut and smooth (and before we sound too much like a hairdresser), we’ll multiply the rim value by the existing basic diffuse lighting value - we don’t want to light objects that aren’t hit by the directional light.
// Don't apply rim lighting in shaded areas.
rim = rim * diffuse;
We’ll also introduce a property to control where we make our cut. It’ll be nice to have control over how big the fresnel effect is; some values look better on some objects.
// In Properties.
_Fresnel("Fresnel/Rim Amount", Range(0, 1)) = 0.5

// With variable declarations.
float _Fresnel;

// Calculate fresnel value in LightingCel.
float fresnelSize = 1 - _Fresnel;
Finally, we’ll apply our cutting and smoothing step. We’ll use smoothstep with the fresnelSize we just calculated.
float rimSmooth = smoothstep(fresnelSize, fresnelSize * 1.1, rim);

// Add rim lighting to final colour calculation.
float3 col = s.Albedo * ((diffuseSmooth + specularSmooth + rimSmooth) * _LightColor0 + unity_AmbientSky);
Our lighting calculation is looking more complex now! Luckily for us, we’re done here. Let’s look at Ethan now.

He still looks like a gummy bear, but now he’s an even higher quality gummy bear.
Conclusion
We’ve looked at a couple of tricks to add slightly more fidelity to our lighting. Of course, adding a normal map was the biggest visual change, but this requires an artist to produce a high-quality normal map texture in the first place. The fresnel effect adds just a little more to the overall cel-shading effect without extra textures. In the next tutorial, we’re going to add some outlines to the model using the stencil buffer - something we’ve not considered yet.