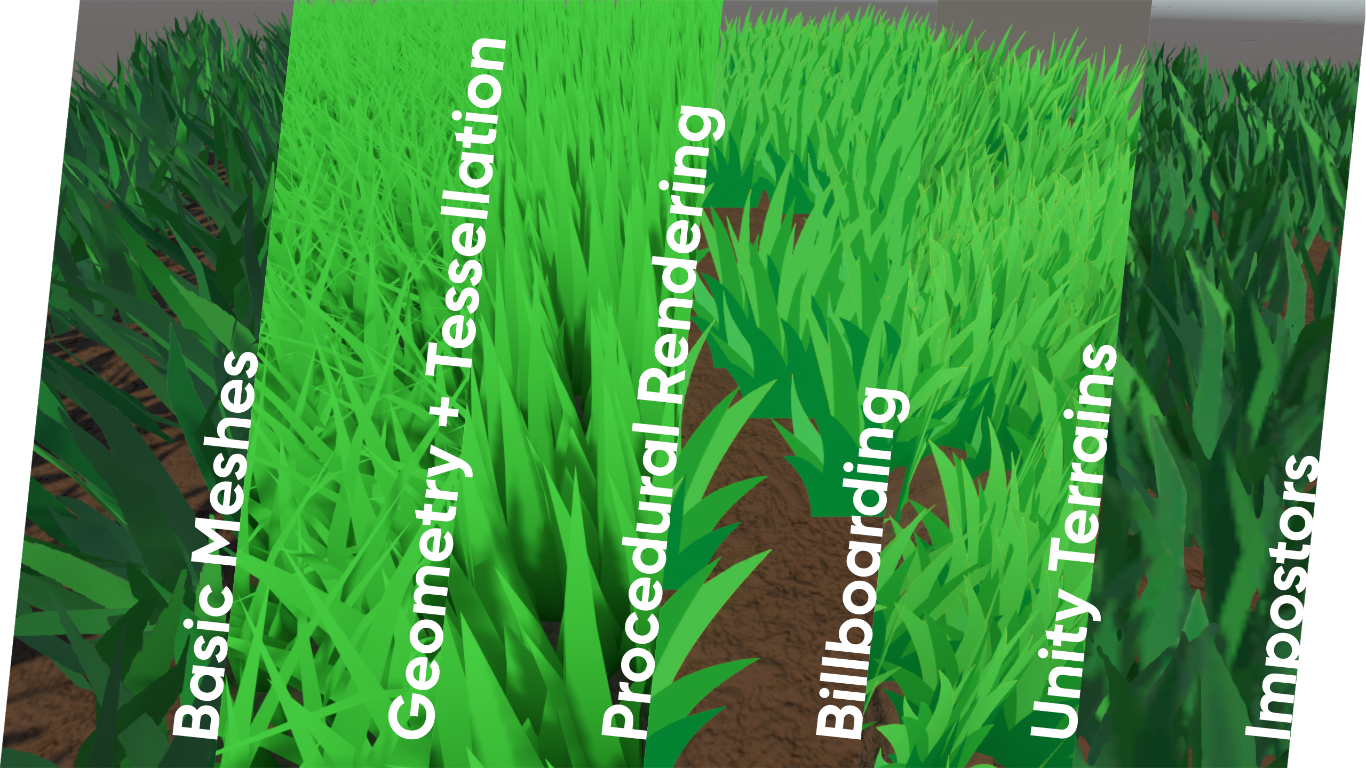
Grass is the defining feature of many a hill in gaming. I’ve always been a sucker for a good-quality grass effect that ties together a spawling open-world scene together, and in this article, I’m going to explore six different grass rendering techniques in Unity and see which situations they work best in. There’s a mix of shader and non-shader methods, so strap yourselves in and get ready to learn about the best grass for you! I’ll be skipping over a lot of the code, so check out the full project files on GitHub.
For this tutorial, we are using Unity 2021.3.0f1 (LTS) and URP 12.1.6.
Check out this tutorial over on YouTube too!
By the way, I just released a shader book covering all sorts of shader topics: vertex and fragment shaders, Shader Graph, all three pipelines, lighting, post processing, optimization, transparency, depth effects, textures, and all the maths you’ll ever need! If you like my tutorials, then you’ll love it - here’s an affiliate link (it gets me a tiny cut on top of my tiny cut of the profits)!
Method 1: Mesh Grass
The first method is dead simple: just copy and paste a grass mesh across the scene. Look, I know it’s not the kind of sophisticated technique you expected when you clicked on this article, but bear with me - even the stupid-simple methods have strong benefits! First and foremost, this method is easy to understand. If you want grass somewhere, you put some grass there. You have lots of individual control over your grass, so you can spend a lot of time tweaking the look of your scene until it’s perfect.
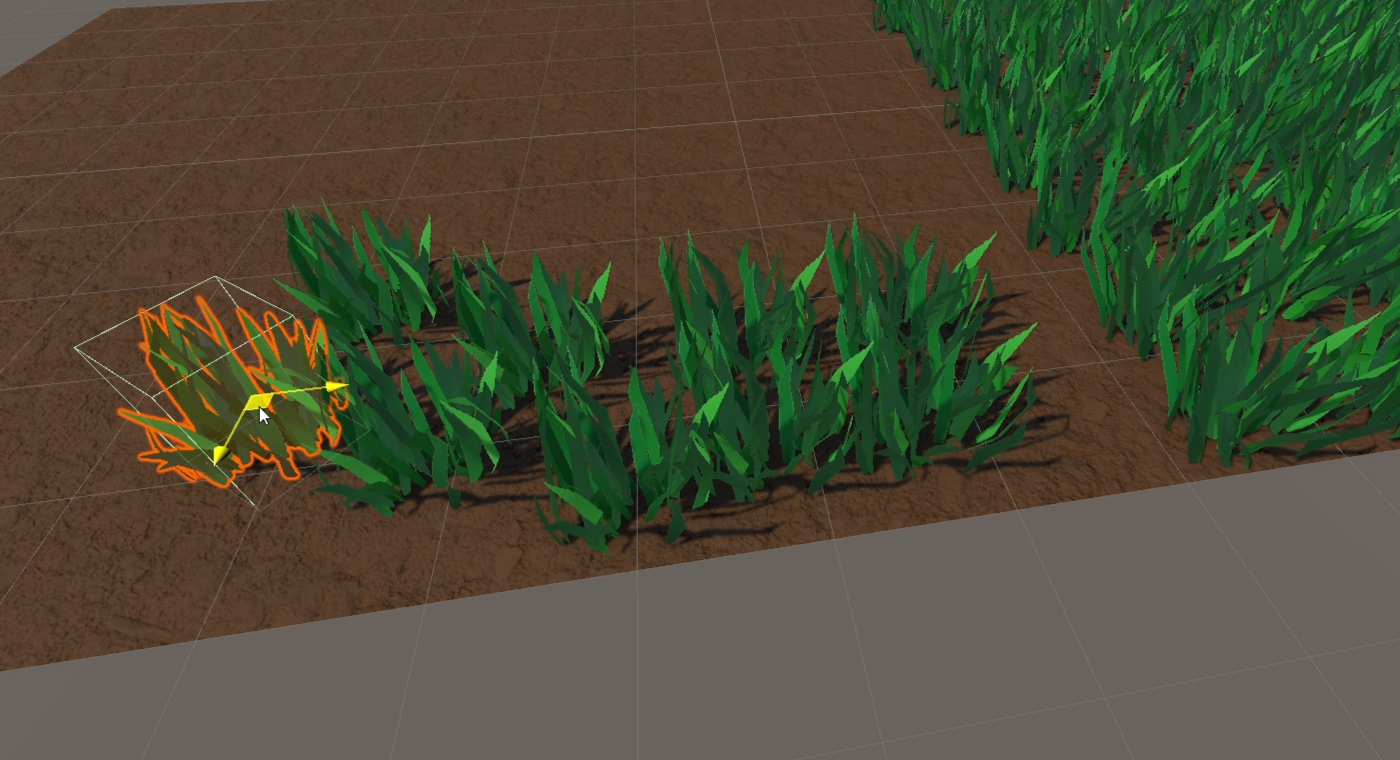
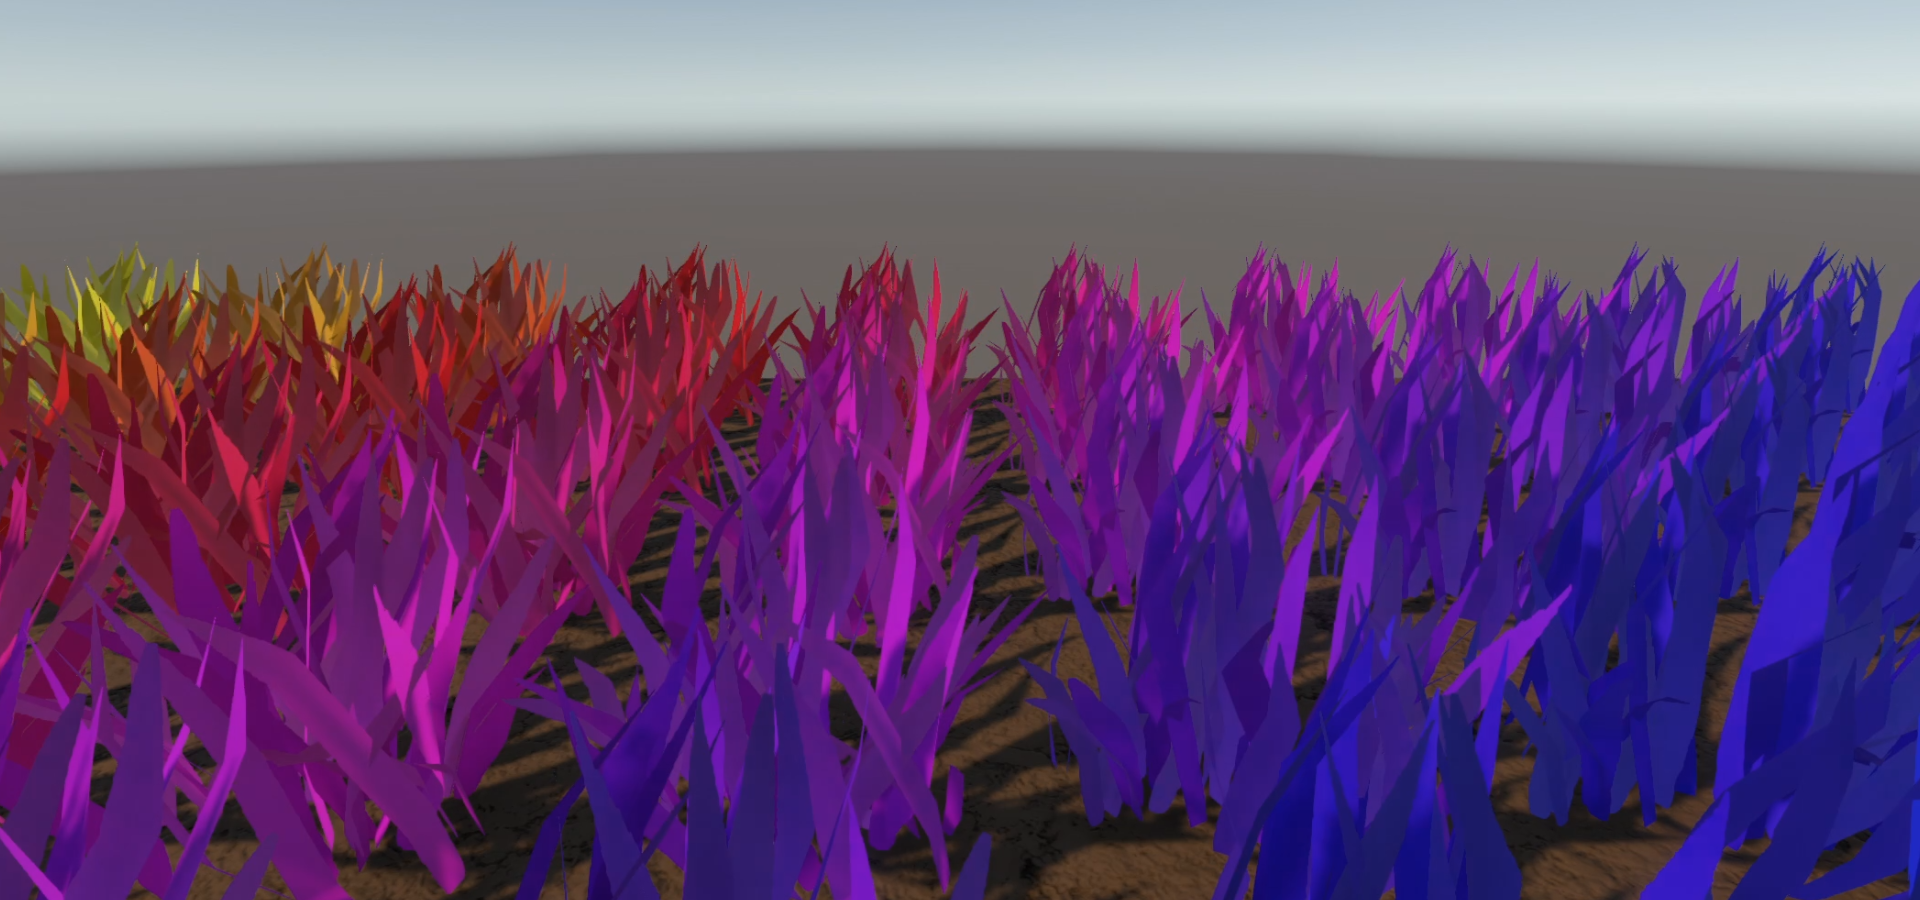
It is also relatively easy to add custom behaviour to each bit of grass in a way that’s difficult to do with other techniques. For example, we can add a trigger collider to each grass mesh and play a shake animation whenever the player walks through the grass. On top of that, it’s easy to apply custom colours or vertex-based grass sway via shaders. That’s true of most custom shaders, but we’ll see later that those types of customisations become borderline impossible with certain techniques.
For this grass, I use alpha clipping, because I ran into sorting issues when I tried using transparent rendering.
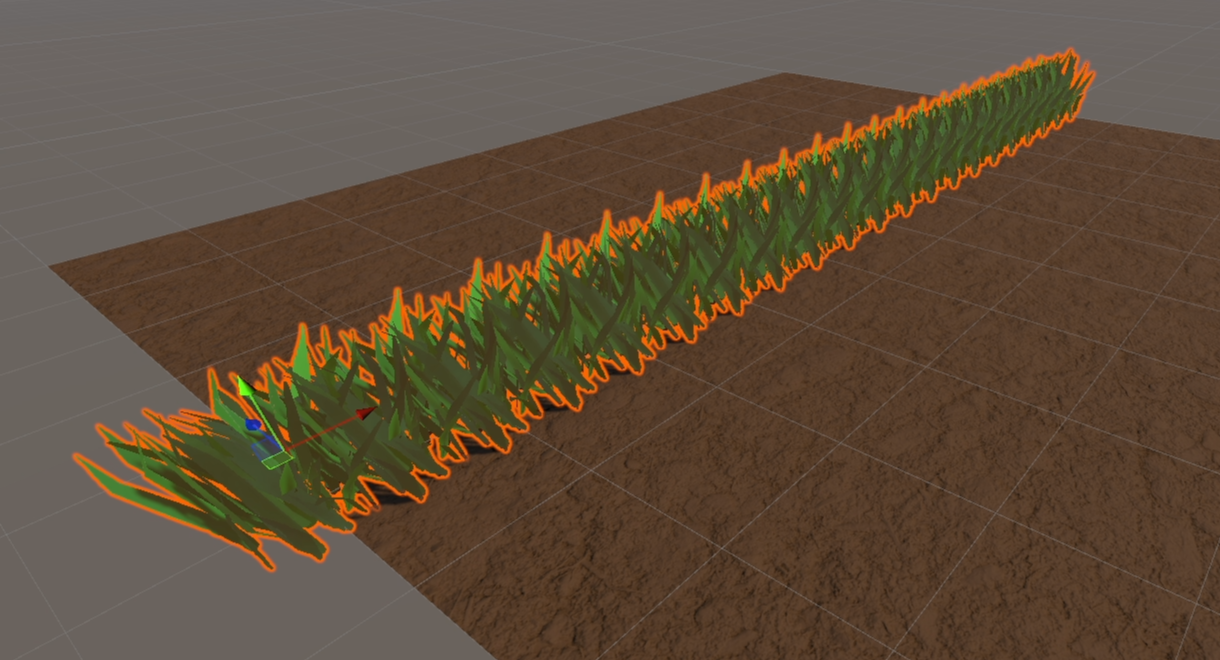
It feels as if plastering meshes around the scene like this would be inefficient, but Unity can optimise the rendering slightly via batching. Batching happens largely behind the scenes, and briefly, it attempts to reduce the amount of repeated data sent from the CPU to the GPU. If many objects use the same mesh and the same material, with the same shader, then there’s no point in sending all that data every time you render an object! You can just send it all once then reuse it on the GPU side. One day I’ll go into more detail about batching and the SRP Batcher, but that’s all you need to know for now.
On the flipside, if you want a large scene with lots of grass, then you’re going to be here for a very long time giving yourself repetitive strain injury. You might want a couple of backup Ctrl, C, and V keys on your keyboard. Thankfully, there are a couple of editor tricks that will help you here. If you multi-select some objects and type L(a, b) into any of the fields on the Transform component, where a and b represent numerical values, then Unity will equally space the objects between a and b on whichever axis you modified. Or, if you want to randomly space the objects, use R(a, b) instead. I like to spread out objects in two dimensions with this trick by using L on one axis, then R on another axis. They are documented in the Unity Manual here.
When you have thousands of meshes in your scene, even batching won’t save you, so I would reserve this method for when you have a fairly limited amount of grass, or you want each bit of grass to react to the player. Sometimes you don’t need to over-engineer things and the simplest approach is the best, or at least good enough. But if you want a large field full of grass and you don’t mind sacrificing customisability for performance, then you’ll need a different approach.
Method 2: Geometry and Tessellation Shaders
This looks familiar! Although I already wrote an article on this approach, I still want to compare it with the other techniques and clear things up from the previous article. Namely, that geometry shaders are pretty bad.
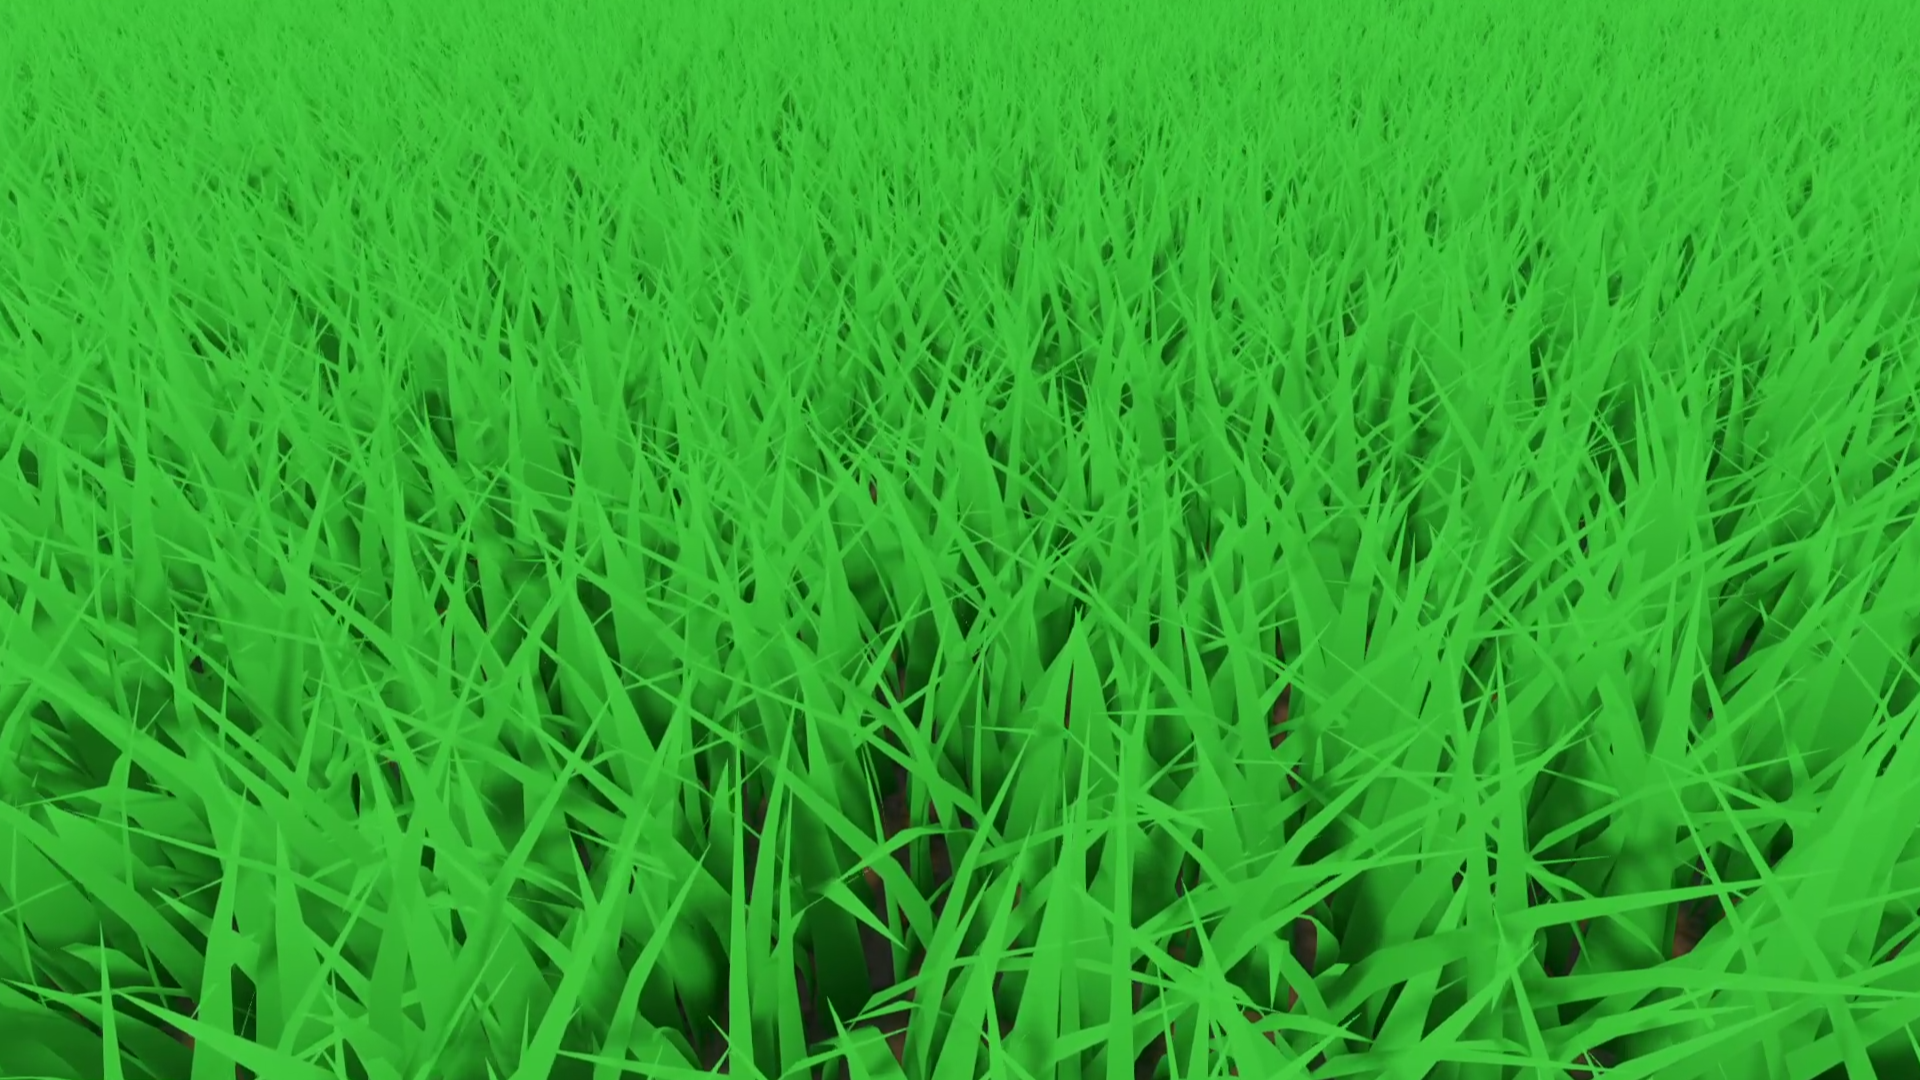
Geometry and tessellation shaders are two optional shader stages that slot in between the vertex shader and the fragment shader. After the vertex shader has run, the tessellation shader is then able to subdivide your mesh into smaller and smaller triangles, giving you more vertices to work with but preserving the overall silhouette of the mesh. With an increased number of vertices, you can obtain higher fidelity effects like wave displacement than if you hadn’t used tessellation.
The geometry shader, which runs next, can create entirely new geometry on the fly. Putting all these pieces together, we can start off with a terrain mesh, use tessellation to subdivide the mesh and give ourselves lots of vertices to work with, then use a geometry shader to generate grass blades at each vertex on the terrain. With this approach, you can still customise the grass quite a lot, so adding colour changes is easy. Adding wind is a bit less easy, but you have very fine-tuned control over the exact position of every vertex of every grass blade, so it’s at least possible. Not as elegant as animating in Blender, but possible.

This approach starts to fall apart when you consider how rigid the process is. We’re hard-coding the logic for the grass blades inside the geometry shader, so we can only ever generate that type of grass using this shader. If we wanted different shapes of grass or if we wanted to generalise this technique to work with other detail meshes like rocks or flowers, we’d have to make a whole new shader for the new object shape. It’s quite a lot of code to change in the geometry shader:
// This is the geometry shader. For each vertex on the mesh, a grass
// blade is created by generating additional vertices.
[maxvertexcount(BLADE_SEGMENTS * 2 + 1)]
void geom(triangle v2g input[3], inout TriangleStream<g2f> triStream)
{
#if VISIBILITY_ON
	float grassVisibility = tex2Dlod(_GrassMap, float4(input[0].uv, 0, 0)).r;
#else
	float grassVisibility = 1.0f;
#endif
	if (grassVisibility >= _GrassThreshold)
	{
		float3 pos = (input[0].positionWS + input[1].positionWS + input[2].positionWS) / 3.0f;

		float3 normal = (input[0].normalWS + input[1].normalWS + input[2].normalWS) / 3.0f;
		float4 tangent = (input[0].tangentWS + input[1].tangentWS + input[2].tangentWS) / 3.0f;
		float3 bitangent = cross(normal, tangent.xyz) * tangent.w;

		float3x3 tangentToLocal = float3x3
		(
			tangent.x, bitangent.x, normal.x,
			tangent.y, bitangent.y, normal.y,
			tangent.z, bitangent.z, normal.z
		);

		// Rotate around the y-axis a random amount.
		float3x3 randRotMatrix = angleAxis3x3(rand(pos) * UNITY_TWO_PI, float3(0, 0, 1.0f));

		// Create a matrix that rotates the base of the blade.
		float3x3 baseTransformationMatrix = mul(tangentToLocal, randRotMatrix);

		// The rest of the grass blade rotates slightly around the base.
		float3x3 randBendMatrix = angleAxis3x3(rand(pos.zzx) * _BladeBendDelta * UNITY_PI * 0.5f, float3(-1.0f, 0, 0));

#if WIND_ON
		float2 windUV = pos.xz * _WindMap_ST.xy + _WindMap_ST.zw + normalize(_WindVelocity.xz) * _WindFrequency * _Time.y;
		float2 windSample = (tex2Dlod(_WindMap, float4(windUV, 0, 0)).xy * 2.0f - 0.5f) * length(_WindVelocity);

		float3 windAxis = normalize(float3(windSample.x, windSample.y, 0));
		float3x3 windMatrix = angleAxis3x3(UNITY_PI * windSample, windAxis);

		// Create a matrix for the non-base vertices of the grass blade, incorporating wind.
		float3x3 tipTransformationMatrix = mul(mul(mul(tangentToLocal, windMatrix), randBendMatrix), randRotMatrix);
#else
		// Create a matrix for the non-base vertices of the grass blade.
		float3x3 tipTransformationMatrix = mul(mul(tangentToLocal, randBendMatrix), randRotMatrix);
#endif

#if VISIBILITY_ON
		float falloff = smoothstep(_GrassThreshold, _GrassThreshold + _GrassFalloff, grassVisibility);
#else
		float falloff = 1.0f;
#endif

		float width  = lerp(_BladeWidthMin, _BladeWidthMax, rand(pos.xzy) * falloff);
		float height = lerp(_BladeHeightMin, _BladeHeightMax, rand(pos.zyx) * falloff);
		float forward = rand(pos.yyz) * _BladeBendDistance;

		// Create blade segments by adding two vertices at once.
		for (int i = 0; i < BLADE_SEGMENTS; ++i)
		{
			float t = i / (float)BLADE_SEGMENTS;
			float3 offset = float3(width * (1 - t), pow(t, _BladeBendCurve) * forward, height * t);

			float3x3 transformationMatrix = (i == 0) ? baseTransformationMatrix : tipTransformationMatrix;

			triStream.Append(worldToClip(pos, float3( offset.x, offset.y, offset.z), transformationMatrix, float2(0, t)));
			triStream.Append(worldToClip(pos, float3(-offset.x, offset.y, offset.z), transformationMatrix, float2(1, t)));
		}

		// Add the final vertex at the tip of the grass blade.
		triStream.Append(worldToClip(pos, float3(0, forward, height), tipTransformationMatrix, float2(0.5, 1)));

		triStream.RestartStrip();
	}
}
This method is a lot more complex due to the optional shader functions we’re using. Tessellation is actually made up of two separate shader functions and a lot of options, and while I think tessellation is powerful and worth learning about, it’s more code you have to write. Geometry shaders, on the other hand, have been largely left in the past by some developers and vendors because they are unevenly supported across platforms and hardware. Some devices like the Oculus Quest don’t support them at all, and many mobile devices emulate their behaviour in software which is terribly slow.
With geometry shaders, we build the full grass mesh during one frame, then discard all that work and compute the entire grass mesh again the following frame, and every subsequent frame. It’s extremely wasteful, so there has to be a better way to draw masses of grass!
Method 3: Procedural Rendering and Compute Shaders
Procedural Rendering is a technique which lets us render many instances of the same mesh in different positions, all in one draw call. Although I briefly mentioned batching earlier as an optimisation, it’s a one-size-fits-all solution which still has to account for possible material changes and variable numbers of objects, but procedural rendering takes the concept of batching to the extreme by essentially promising that a set number of objects can use the same material. This makes procedural rendering savagely efficient.
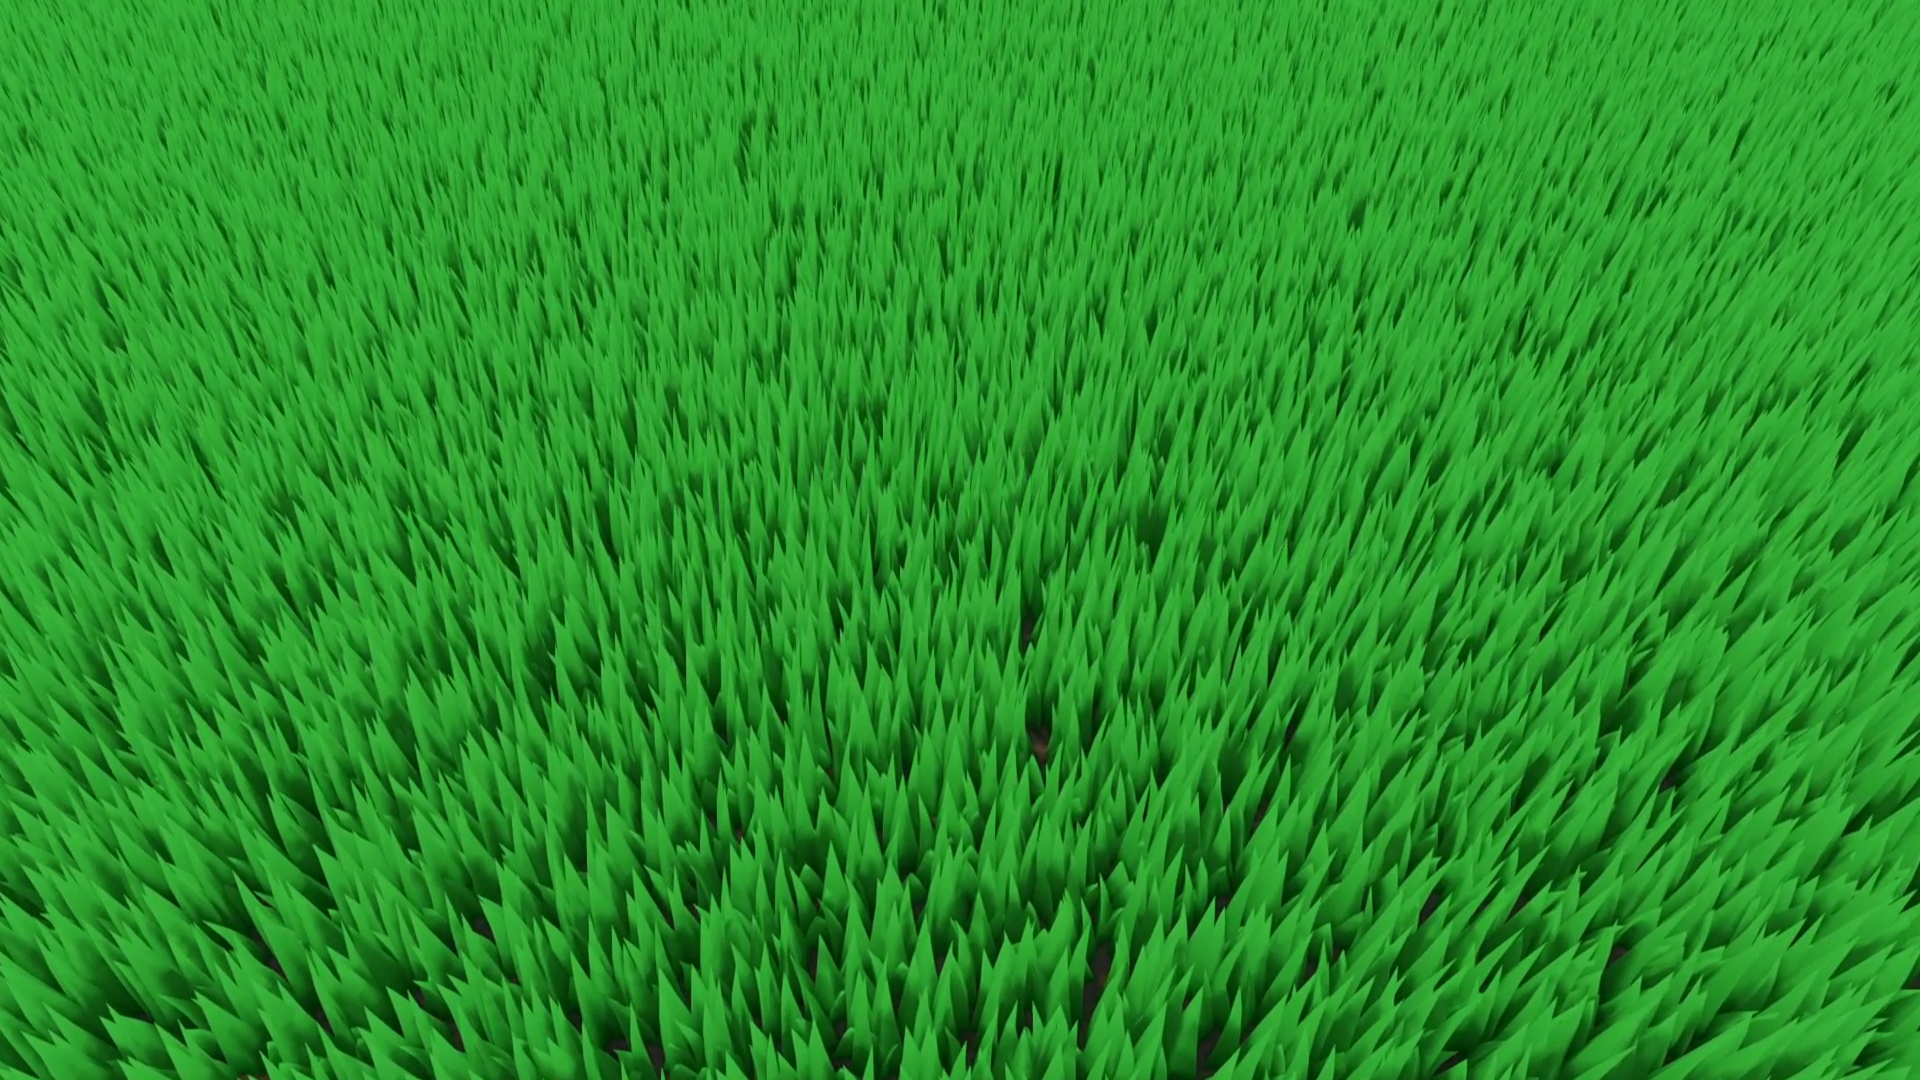
The workflow for our grass is to first work out where each grass blade should be placed and how it should be rotated, then use that information to create a model matrix per grass blade representing those transformations. Then, we can upload the grass blade mesh and a material once to the GPU alongside the list of transformation matrices, and the shader can render each grass blade by reading the mesh data and using a single entry from the matrix list to position the grass.

The first step is working out where the grass blades should go. I’ll be using a terrain mesh, and I’ll place a grass blade at every vertex of the terrain mesh. You need to enable read/write on the mesh for this technique to work, and since you can’t toggle that option on Unity’s built-in mesh primitives, I’ll use a terrain mesh I created in Blender.

I’ve attached a script called ProceduralGrass.cs to the terrain, and in Start, I access the vertex array and the triangles array of the terrain mesh and convert both into GraphicsBuffer objects. This is a GPU-friendly data structure that can contain whatever data we want.
terrainMesh = GetComponent<MeshFilter>().sharedMesh;

// Terrain data for the compute shader.
Vector3[] terrainVertices = terrainMesh.vertices;
terrainVertexBuffer = new GraphicsBuffer(GraphicsBuffer.Target.Structured, terrainVertices.Length, sizeof(float) * 3);
terrainVertexBuffer.SetData(terrainVertices);

int[] terrainTriangles = terrainMesh.triangles;
terrainTriangleBuffer = new GraphicsBuffer(GraphicsBuffer.Target.Structured, terrainTriangles.Length, sizeof(int));
terrainTriangleBuffer.SetData(terrainTriangles);

terrainTriangleCount = terrainTriangles.Length / 3;

computeShader.SetBuffer(kernel, "_TerrainPositions", terrainVertexBuffer);
computeShader.SetBuffer(kernel, "_TerrainTriangles", terrainTriangleBuffer);
Together, these two buffers give us enough data to start building those transformation matrices. I’ll store those matrices inside a third GraphicsBuffer.
// Set up buffer for the grass blade transformation matrices.
transformMatrixBuffer = new GraphicsBuffer(GraphicsBuffer.Target.Structured, terrainTriangleCount, sizeof(float) * 16);
computeShader.SetBuffer(kernel, "_TransformMatrices", transformMatrixBuffer);
To create the transformation matrices, I’ll use a compute shader. This is the first time I’ll be talking about them in an article on this site! Brifly, a compute shader exists outside the usual ‘vertex-to-fragment’ pipeline you’re used to. They allow you to run arbitrary computation on the GPU, and although they don’t draw to the screen, that certainly doesn’t mean they’re not useful for graphics-related programs. We want to build thousands of transformation matrices, and GPUs happens to excel at matrix calculations in parallel.
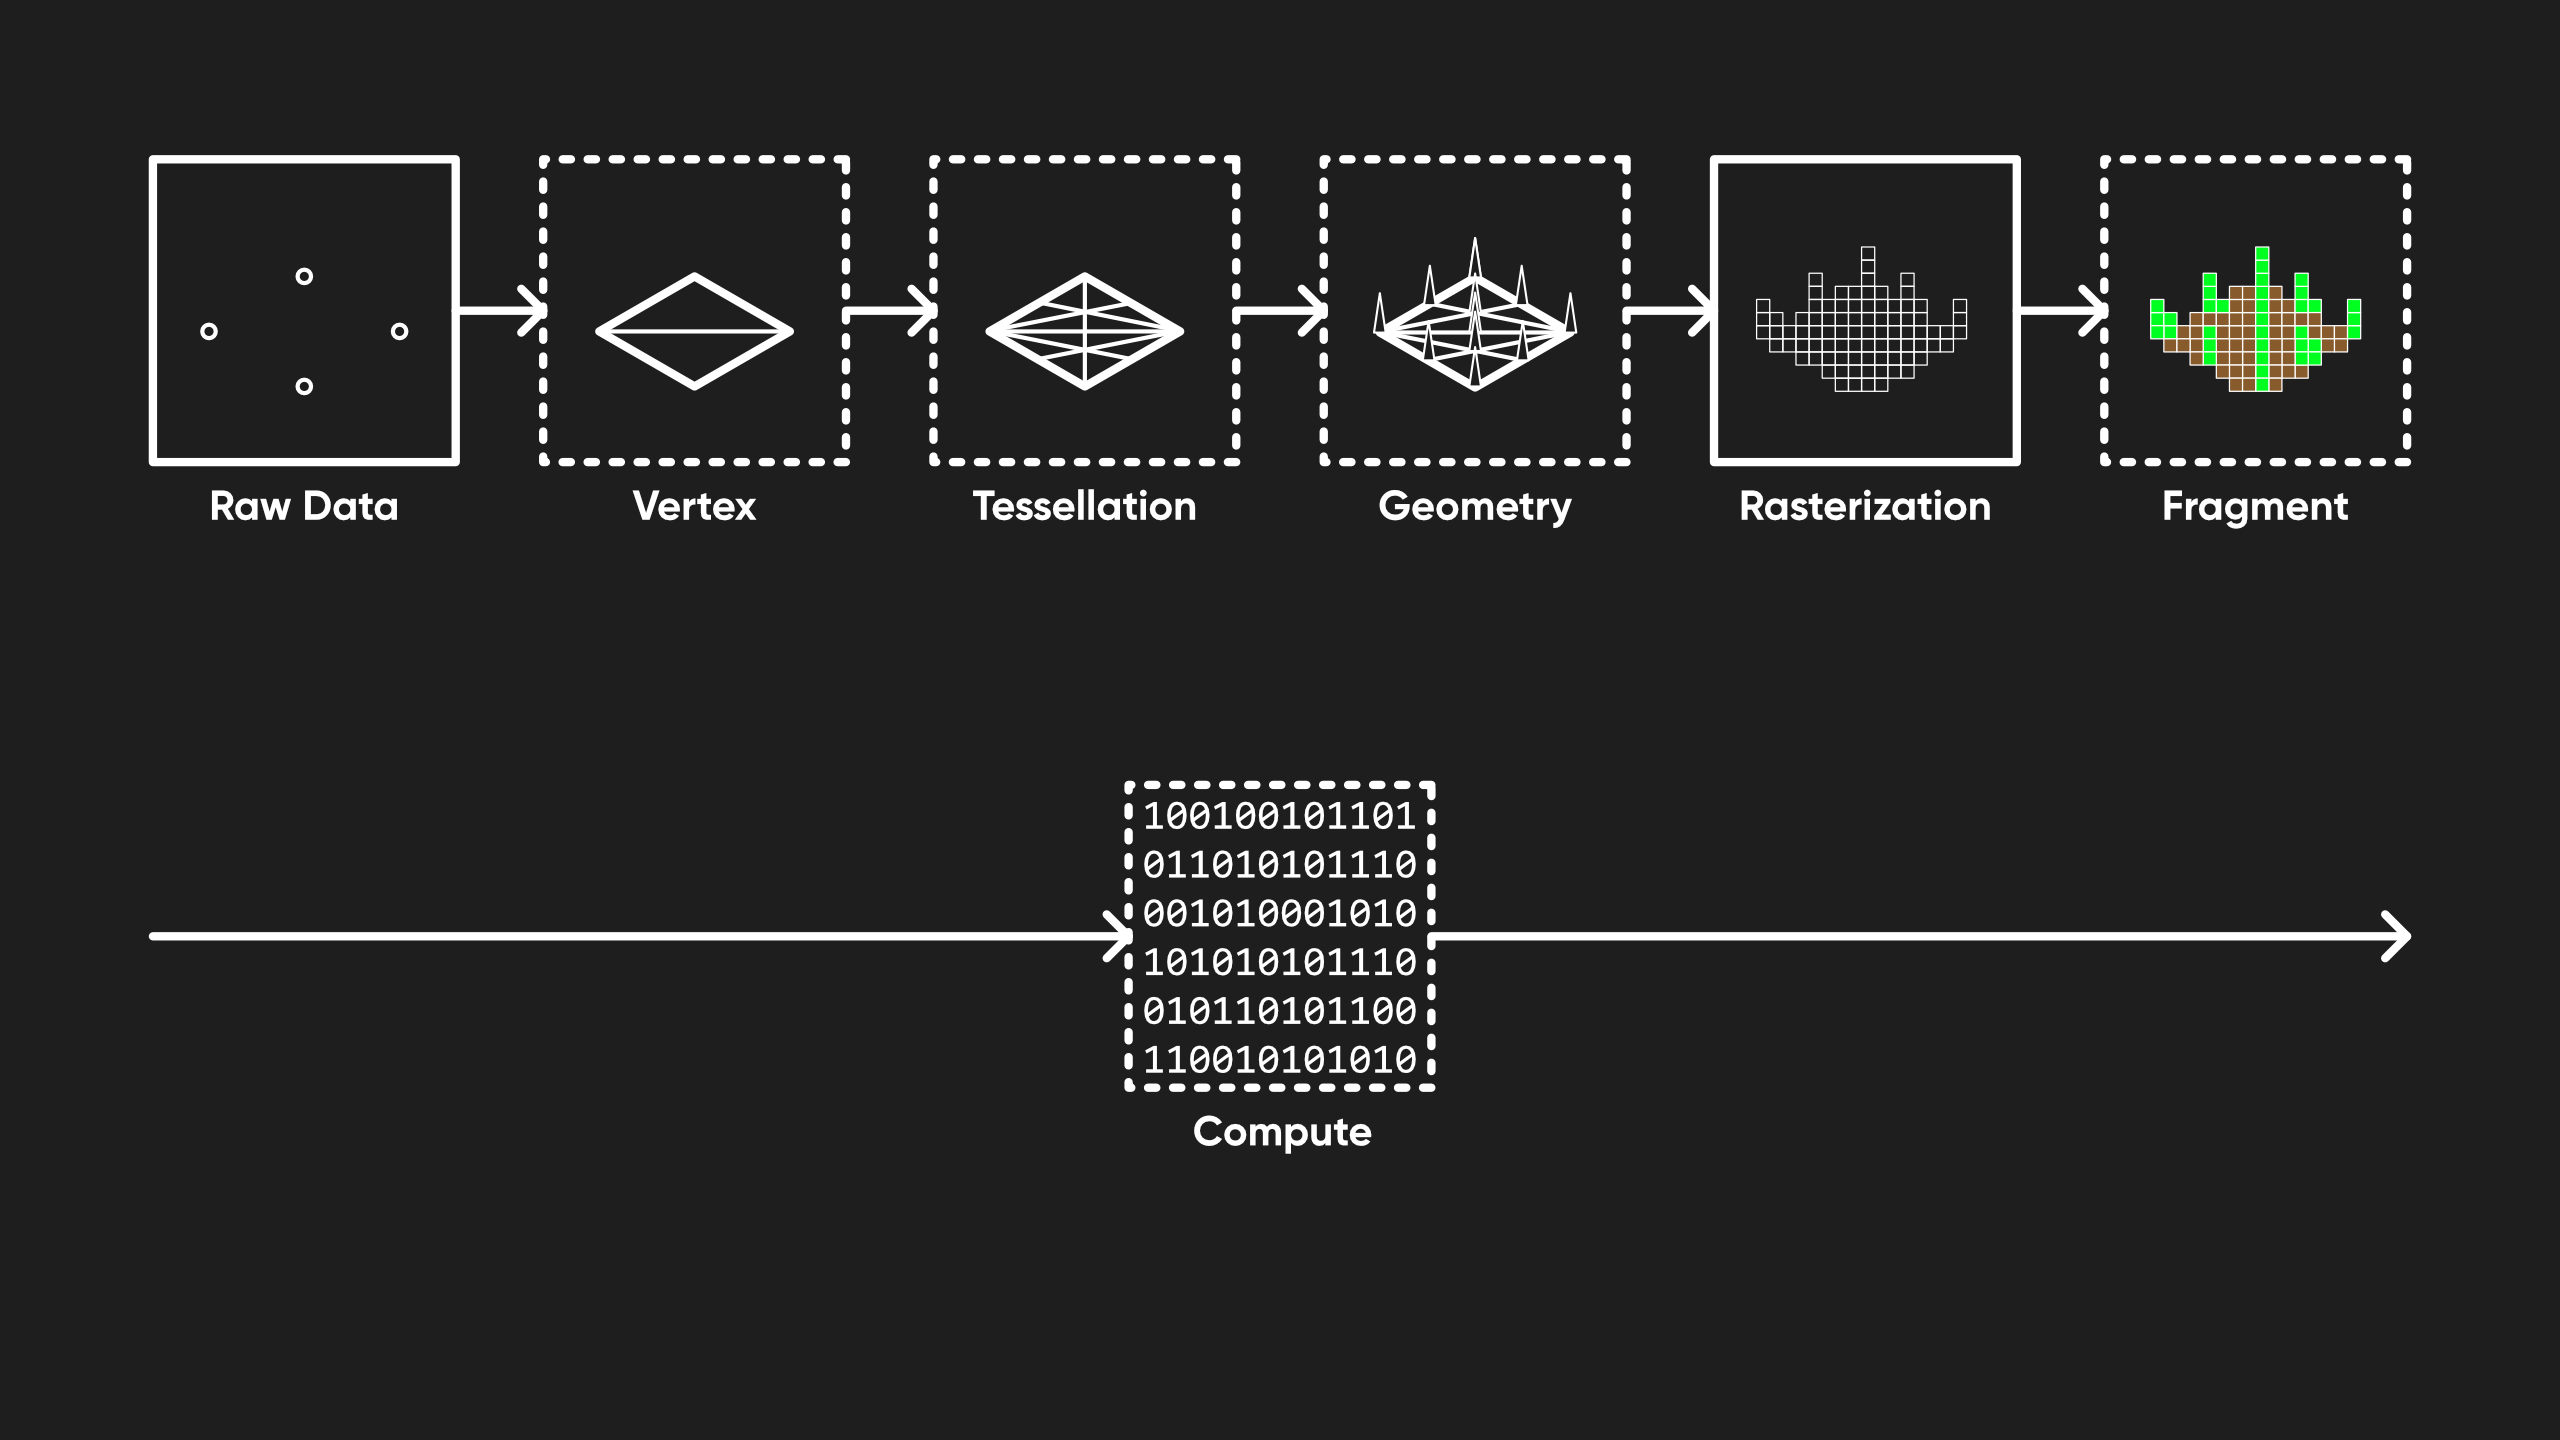
Compute shaders use HLSL syntax, without a trace of Unity’s proprietary ShaderLab syntax, and are made up of a list of variables and functions. For the ProceduralGrass.compute file, those variables include two StructuredBuffers to match the GraphicsBuffers we saw in the C# script. For the transformation matric buffer, the type we use is slightly different - since we need to write into this buffer from within the compute shader, we use an RWStructuredBuffer instead. There are a handful of other variables for grass options, including the terrain mesh object-to-world matrix, plus a couple of helper functions.
#pragma kernel CalculateBladePositions

StructuredBuffer<int> _TerrainTriangles;
StructuredBuffer<float3> _TerrainPositions;

RWStructuredBuffer<float4x4> _TransformMatrices;
uniform int _TerrainTriangleCount;
uniform float _Scale;
uniform float _MinBladeHeight;
uniform float _MaxBladeHeight;
uniform float _MinOffset;
uniform float _MaxOffset;
uniform float4x4 _TerrainObjectToWorld;

#define TWO_PI 6.28318530718f

// Function that takes a 2-element seed and returns a random value
// between the min and max bounds.
float randomRange(float2 seed, float min, float max)
{
	float randnum = frac(sin(dot(seed, float2(12.9898, 78.233)))*43758.5453);
	return lerp(min, max, randnum);
}

// Function to rotate around the y-axis by a specified angle.
float4x4 rotationMatrixY(float angle)
{
	float s, c;
	sincos(angle, s, c);

	return float4x4
	(
		 c, 0, s, 0,
		 0, 1, 0, 0,
		-s, 0, c, 0,
		 0, 0, 0, 1
	);
}
The #pragma kernel CalculateBladePositions is an important line that identifies the kernel functions in this file. A kernel function is run by the many GPU threads at a time. This is how the GPU processes large volumes of data so efficiently; the total workload is divided into small tasks that can be run simultaneously, on the basis that those tasks do not require data from each other. In our case, each grass blade just needs to know about itself for us to built its transformation matrix - we do this work inside the CalculateBladePositions function.
// This kernel calculates transformation matrices for each grass blade
// to place them in different positions on the terrain mesh.
[numthreads(64, 1, 1)]
void CalculateBladePositions(uint3 id : SV_DispatchThreadID)
{
	// Avoid running 'overflow' tasks when the number of tasks
	// wasn't divisible by the number of threads.
	if (id.x > _TerrainTriangleCount)
	{
		return;
	}

	int triStart = id.x * 3;
	float3 posA = _TerrainPositions[_TerrainTriangles[triStart]];
	float3 posB = _TerrainPositions[_TerrainTriangles[triStart + 1]];
	float3 posC = _TerrainPositions[_TerrainTriangles[triStart + 2]];

	float3 triangleCenterPos = (posA + posB + posC) / 3.0f;

	float2 randomSeed1 = float2(id.x, id.y);
	float2 randomSeed2 = float2(id.y, id.x);

	float scaleY = _Scale * randomRange(randomSeed1, _MinBladeHeight, _MaxBladeHeight);

	float offsetX = randomRange(randomSeed1, _MinOffset, _MaxOffset);
	float offsetZ = randomRange(randomSeed2, _MinOffset, _MaxOffset);

	float4x4 grassTransformMatrix = float4x4
	(
		_Scale,	0,		0,		triangleCenterPos.x + offsetX,
		0,		scaleY,	0,		triangleCenterPos.y,
		0,		0,		_Scale,	triangleCenterPos.z + offsetZ,
		0,		0,		0,		1
	);

	float4x4 randomRotationMatrix = rotationMatrixY(randomRange(randomSeed1, 0.0f, TWO_PI));

	_TransformMatrices[id.x] = mul(_TerrainObjectToWorld, mul(grassTransformMatrix, randomRotationMatrix));
}
The [numthreads(x,y,z)] attribute lets us choose how many threads to run at once. To oversimplfy, when we multiply the three values together, that’s the number of simultaneous threads we’ll use, so our compute shader uses 64 * 1 * 1 = 64. The code inside the function first has a fail-safe in case we have fewer than 64 triangles to process, then the rest of the code generates the transformation matrices using random offset and rotation amounts and places them inside the buffer.
Back on the scripting side, I set up a few other variables the compute shader needs and the use the Dispatch method to run it. We need to determine how many thread groups to run - each one uses 64 threads, so if we had exactly 640 triangles on the terrain mesh, we’d need ten thread groups. 641 triangles would need an eleventh thread group. We can call the RunComputeShader method once from Start.
private void RunComputeShader()
{
     // Bind variables to the compute shader.
     computeShader.SetMatrix("_TerrainObjectToWorld", transform.localToWorldMatrix);
     computeShader.SetInt("_TerrainTriangleCount", terrainTriangleCount);
     computeShader.SetFloat("_MinBladeHeight", minBladeHeight);
     computeShader.SetFloat("_MaxBladeHeight", maxBladeHeight);
     computeShader.SetFloat("_MinOffset", minOffset);
     computeShader.SetFloat("_MaxOffset", maxOffset);
     computeShader.SetFloat("_Scale", scale);

     // Run the compute shader's kernel function.
     computeShader.GetKernelThreadGroupSizes(kernel, out threadGroupSize, out _, out _);
     int threadGroups = Mathf.CeilToInt(terrainTriangleCount / threadGroupSize);
     computeShader.Dispatch(kernel, threadGroups, 1, 1);
}
The best thing about this approach is that if you will never move or remove any of the grass blades, you can run the compute shader once at the start of the game and hold the transformation matrices in memory forever. This is an obvious speed-up over the geometry shader approach, which did all of the work every frame.
We now need to use the matrices to render some grass blades. In Start, I read the vertex data and triangles data for the grass blade mesh into new GraphicsBuffers, plus this time I also read UV data into a third GraphicsBuffer. To prepare for drawing the grass, we also create a MaterialPropertyBlock in Start to bind these buffers to the material.
// Grass data for RenderPrimitives.
Vector3[] grassVertices = grassMesh.vertices;
grassVertexBuffer = new GraphicsBuffer(GraphicsBuffer.Target.Structured, grassVertices.Length, sizeof(float) * 3);
grassVertexBuffer.SetData(grassVertices);

int[] grassTriangles = grassMesh.triangles;
grassTriangleBuffer = new GraphicsBuffer(GraphicsBuffer.Target.Structured, grassTriangles.Length, sizeof(int));
grassTriangleBuffer.SetData(grassTriangles);

Vector2[] grassUVs = grassMesh.uv;
grassUVBuffer = new GraphicsBuffer(GraphicsBuffer.Target.Structured, grassUVs.Length, sizeof(float) * 2);
grassUVBuffer.SetData(grassUVs);

...

// Bind buffers to a MaterialPropertyBlock which will get used for the draw call.
properties = new MaterialPropertyBlock();
properties.SetBuffer("_TransformMatrices", transformMatrixBuffer);
properties.SetBuffer("_Positions", grassVertexBuffer);
properties.SetBuffer("_UVs", grassUVBuffer);
In Update, we call a method to do the rendering. There are many similar methods in the Graphics class such as RenderPrimitives and DrawMesh, but the one I went with is called DrawProcedural. It takes in many parameters, such as the material, mesh topology, triangle buffer (and its size), the number of instances, the MaterialPropertyBlock, and shadowing options.
// Run a single draw call to render all the grass blade meshes each frame.
private void Update()
{
     Graphics.DrawProcedural(material, bounds, MeshTopology.Triangles, grassTriangleBuffer, grassTriangleBuffer.count,
          instanceCount: terrainTriangleCount,
          properties: properties,
          castShadows: castShadows,
          receiveShadows: receiveShadows);
}
Inside the ProceduralGrass.shader, which is attached to that material, we need to do things differently to your typical mesh shader. Instead of putting the vertex positions, UVs, normals and so on inside the appdata struct, we’ll only pass a vertexID and an instanceID through the struct. Then, the shader must access that position and UV data through StructuredBuffers. They’re not just for compute shaders!
struct appdata
{
	uint vertexID : SV_VertexID;
	uint instanceID : SV_InstanceID;
};

struct v2f
{
	float4 positionCS : SV_Position;
	float4 positionWS : TEXCOORD0;
	float2 uv : TEXCOORD1;
};

StructuredBuffer<float3> _Positions;
StructuredBuffer<float3> _Normals;
StructuredBuffer<float2> _UVs;
StructuredBuffer<float4x4> _TransformMatrices;
In the vertex shader, we use the vertexID to access the vertex position from the vertex buffer and UVs from the UV buffer, then use the instanceID to grab the correct transformation matrix from the transformation matrix buffer. The fragment shader just performs basic colouring and shadowing.
v2f vert(appdata v)
{
	v2f o;

	float4 positionOS = float4(_Positions[v.vertexID], 1.0f);
	float4x4 objectToWorld = _TransformMatrices[v.instanceID];

	o.positionWS = mul(objectToWorld, positionOS);
	o.positionCS = mul(UNITY_MATRIX_VP, o.positionWS);
	o.uv = _UVs[v.vertexID];

	return o;
}
Procedural rendering is very fast, and on top of that, it’s very easy to swap out the grass mesh for any other detail mesh. If you want to distribute rocks or flowers, this technique can do that without modifications - just plug in a different mesh. However, it might not be as great if you want to add animations to the grass mesh, since we have a bit less direct control over the positions of each vertex. This approach also requires a lot of setup spread across several files, and while I think it’s worth it for the payoff, it’s something you should consider.
Compute shaders are not supported on all platforms, although it’s possible to move everything we did in the compute shader to a C# script instead - I just wanted an excuse to try out compute shaders! I love to use this approach for large scenes where you still want to use high quality meshes, even relatively far away.
Method 4: Billboarding
So far, we’ve been using each technique to render high-fidelity grass up close. However, you won’t always need to render grass close to the camera, and in cases like those, it’s okay to use low fidelity grass far away. Here, billboarding is your friend. With billboarding, we render a quad mesh with a grass texture applied to it, then orient the mesh towards the camera.
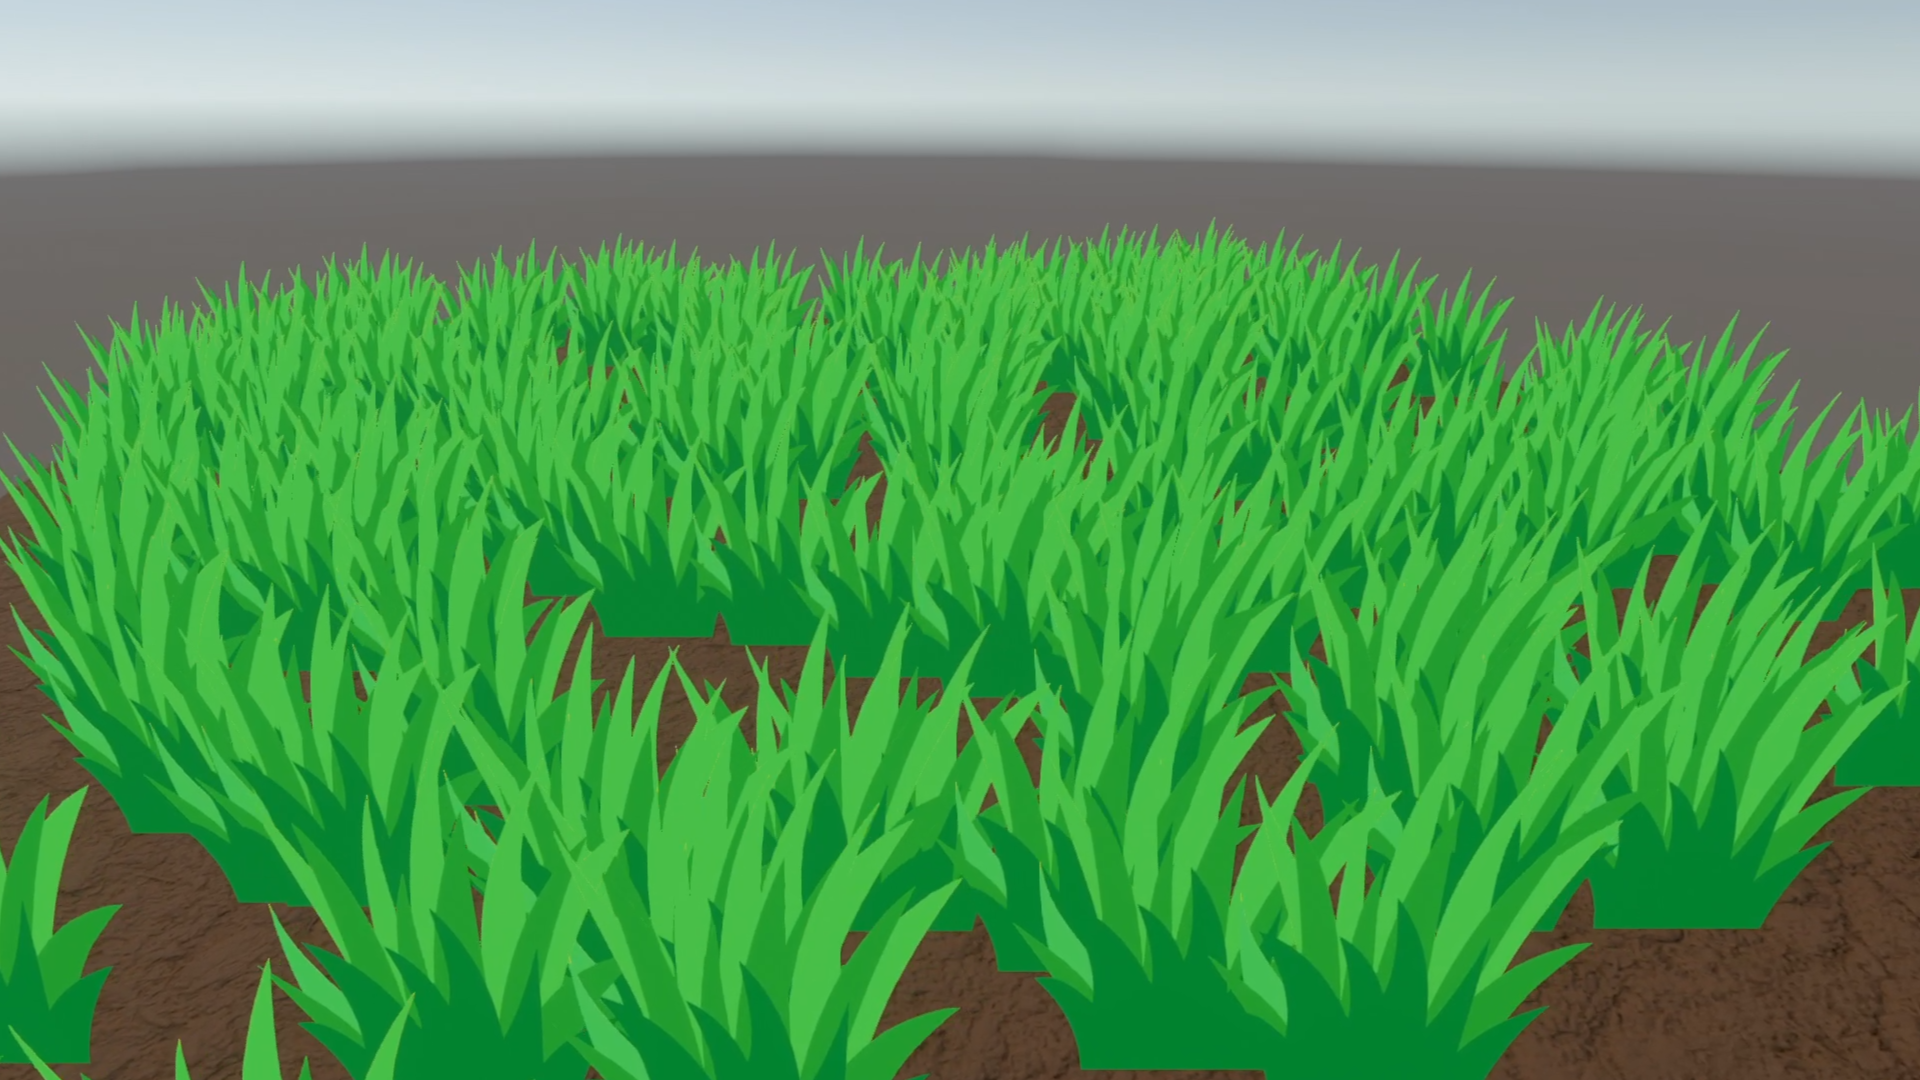
The advantage to this approach is that we can use a texture that contains several grass blades, so what would otherwise be perhaps several dozen or even hundreds of vertices for all those grass blades gets condensed down into four vertices for the quad. That means you can render more grass overall, or render grass further away, without decimating your frame budget.
The shader for this effect is comparatively simple, as the fragment shader just needs to sample the texture (and do a bit of alpha clipping if you so choose). The vertex shader is the most basic kind of vertex shader that transforms vertex positions to clip space.
v2f vert(appdata v)
{
	v2f o;

	o.positionCS = TransformObjectToHClip(v.positionOS);
	o.uv = v.uv;

	return o;
}

float4 frag(v2f i) : SV_Target
{
	float4 color = tex2D(_BaseTex, i.uv);
	clip(color.a - 0.5f);

	return color * _BaseColor;
}
It’s possible to do all the camera-orienting logic inside the shader, but I just do it in scripting because I found it easier.
// In BillboardGrass.cs.
private void Update()
{
     // Billboards that align with camera plane, without rotating around X.
     Vector3 targetForward = Camera.main.transform.forward;
     targetForward.y = 0.01f;   // Not zero to avoid issues.
     transform.rotation = Quaternion.LookRotation(targetForward.normalized, Vector3.up);
}
That’s all billboards are - just quads that orient themselves to the screen. However, there’s nothing stopping you from combining this technique with procedural rendering for maximum optimisation - to do that, generate a buffer of transformation matrices that place the grass quads where you want and orient them towards the camera, then use DrawProcedural. I’ll leave that as homework.
Billboards fall down (figuratively) when you try to place them close to the camera and it becomes fairly obvious they are being used. It’s especially noticeable if the billboard meshes clip through each other while rotating. You can avoid it by always placing the billboards far enough away so they don’t overlap, but that means the grass is never thick enough. Billboards are always just a trade-off between performance and fidelity, so I would recommend keeping them to scenes where your grass can be seen very far away, so that you don’t waste resources drawing better quality grass when you don’t need to.
The next two techniques are extensions of billboarding that you might find useful.
Method 5: Unity Terrains
You know it, you love it, it’s the Unity terrain system. It might not be the most revered part of the engine, but it’s got some tricks up its sleeves, like support for details such as grass. It’s pretty easy to set up via the Paint Details tab and the Edit Details button, where you can choose a grass texture and tick the billboard option. You get access to some very good painting tools that let you quickly place grass anywhere on your terrain, and since Unity uses instancing to render this grass, you can get away with using lots of grass pretty far away before your game starts to slow down.
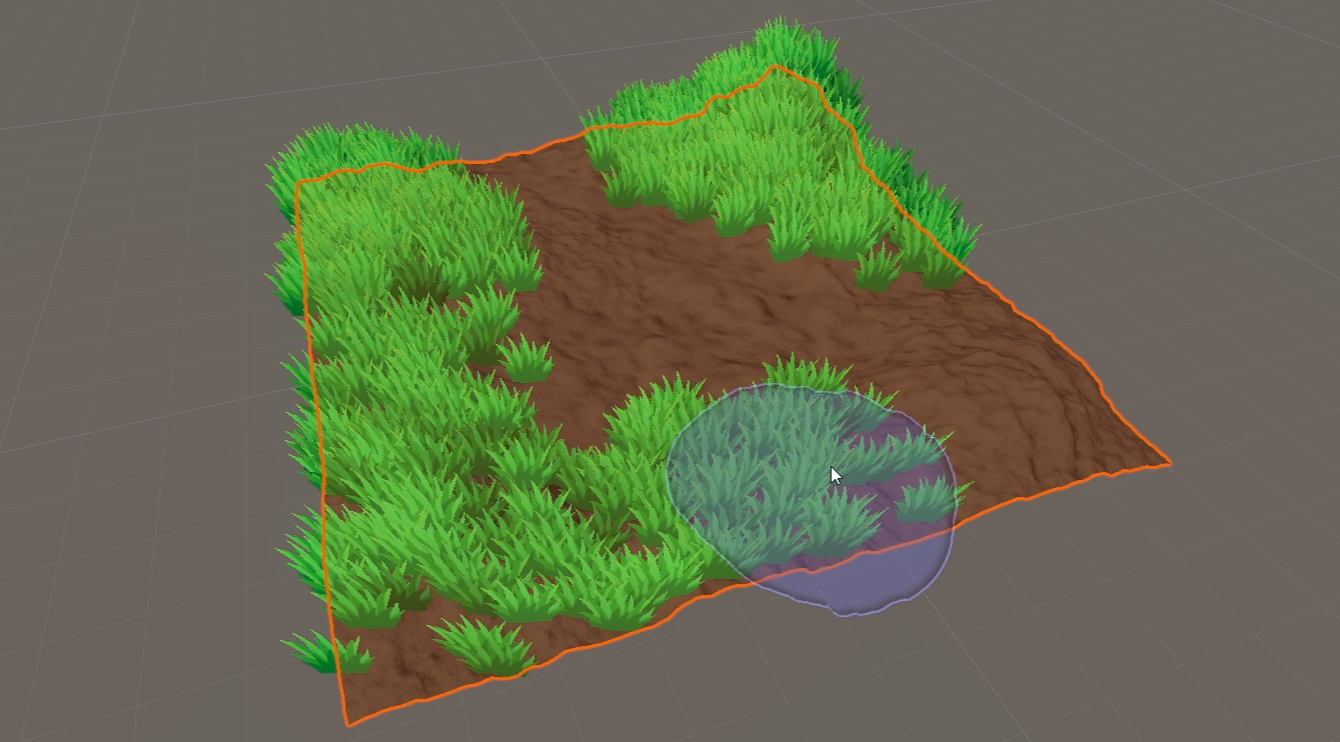
The painting tools are the best thing about Unity terrains. You could probably incorporate some elements of the painting system into one of the other techniques, or at least copy the functionality, so if you’ve got a tools programmer on your team, I’d get them on that asap. The main drawback is that, and the end of the day, this is just billboarding with streamlined steps. If you’re not a fan of Unity terrains then you won’t find much of a use for this type of grass, although I’d bet that third-party terrain tools have similar solutions for grass that you can use.
That leaves just one method for this article, and it’s one of my favourites.
Method 6: Impostors
One of the drawbacks of billboarding is that you only ever see a representation of grass from one angle. Rotate the camera around the billboard, and the grass turns to face you. Obviously this is efficient, but it would be great if there was an approach that combines the vertex-saving benefits of billboarding with the ability to faithfully recreate an object as seen from more than one angle. That’s where impostors come in.
With impostors, we capture screenshots of a mesh ahead of time from many camera angles and store them in a 2D texture atlas, then at runtime, we figure out which texture to read from the atlas based on the current viewing direction of the camera. I made a generator script called ImpostorGenerator.cs that moves a virtual camera into different positions on a hemisphere around the mesh, taking a screenshot from each position while using layers to cull every other object in the scene. Once you’ve generated the texture atlas, you can delete the generator and the base mesh, because they’re no longer needed.

// Generate textures.
for (int x = 0; x < captureResolution; ++x)
{
     for(int z = 0; z < captureResolution; ++z)
     {
     // Code for mapping 2D grid => 3D "hemi-octahedron" here:
     // https://gamedev.stackexchange.com/questions/169508/octahedral-impostors-octahedral-mapping
     float divisor = captureResolution - 1.0f;
     Vector3 pos = new Vector3(x / divisor, 0.0f, z / divisor);
     pos = new Vector3(pos.x - pos.z, 0.0f, -1.0f + pos.x + pos.z);
     pos.y = 1.0f - Mathf.Abs(pos.x) - Mathf.Abs(pos.z);

     pos = pos.normalized * distance;

     // Move camera to positions and capture render texture.
     impostorCamera.transform.position = targetObject.position + pos;
     impostorCamera.transform.LookAt(targetObject, Vector3.up);

     // Render into texture atlas.
     var tileSize = 1.0f / captureResolution;
     impostorCamera.rect = new Rect(tileSize * x, tileSize * z, tileSize, tileSize);
     impostorCamera.targetTexture = compositeTexture;
     impostorCamera.Render();

     impostorCamera.targetTexture = null;
     }
}
To view the impostors, we can add quad meshes to the scene like we did with Method 4, except the billboard script is slightly tweaked so that it send the camera view vector to the shader.
public new Renderer renderer;

private void Update()
{
     // Billboards that look at camera, with X-rotation.
     Quaternion newRotation = Quaternion.LookRotation(-Camera.main.transform.forward, Vector3.up);
     transform.rotation = newRotation;

     // Send view vector to shader for calculations there.
     Vector3 viewVector = (transform.position - Camera.main.transform.position).normalized;
     renderer.material.SetVector("_ViewVector", viewVector);
}
In the vertex shader, we run some code that converts from the view vector to a position in 2D space, which we then use to pick the correct sub-texture from the texture atlas. This gets combined with the quad mesh’s base UVs to give us a set of UVs we can sample the texture with. The fragment shader uses those UVs to sample the texture.
float2 directionToUV(float3 direction)
{
	float3 octant = sign(direction);
	float sum = dot(direction, octant);
	float3 octahedron = direction / sum;

	return 0.5f * float2(
		1.0f + octahedron.x + octahedron.z,
		1.0f + octahedron.z - octahedron.x
		);
}

v2f vert(appdata v)
{
	v2f o;

	o.positionCS = TransformObjectToHClip(v.positionOS);

	float2 uv = directionToUV(_ViewVector);
	o.uv = (floor(uv * _CaptureResolution) + v.uv) / _CaptureResolution;

	return o;
}

float4 frag(v2f i) : SV_Target
{
	float4 color = tex2D(_BaseTex, i.uv);
	clip(color.a - 0.5f);

	return color * _BaseColor;
}
In motion, when the camera rotates around an impostor, its texture will change to one taken from that camera angle. There are ways to improve on my approach to reduce the ‘pop-in’ effect when the texture snaps, but this tutorial was already taking long enough to come out so I’ve left that for later work. Sorry.

So, what’s the benefit? Maybe for this grass, it’s a bit overkill. However, you can use this approach on any object, so I found a tree on Sketchfab that uses an astronomical 400,000 vertices to help me make my point. Using a few of these in your scene will probably have a non-negligible effect on your game’s frame budget. With impostors, we can crunch that down into four vertices. Four! That’s a vertex shader saving by a magnitude of 100,000! The trade-off is that you require a lot more texture memory, so you’ll need to consider the impact of expensive vertex shaders against high texture memory usage to decide if impostors are right for you.
Since impostors also break down if you try to use them too close to the camera, I’d propose the following setup for your scenes. Up close, you’re best off using a mesh-based method, i.e., any of the first three from this article. At a middle distance, you can get away with impostors, especially if it’s something that’s large but a player could feasibly walk around it and view it from many angles. And far away, just use billboards for most small to medium details because a player won’t notice the difference.
Conclusion
I could never properly cover every grass rendering technique in one article, because that would make it a seminal work in the field of computer graphics and I don’t think I’m quite there yet. I hope you’ll settle for just six of them instead! Even with these six techniques, there is a wide range of use cases and a lot of space for combining the best bits of multiple of them or tweaking them for your specific requirements. If there’s a grass technique you love that I didn’t cover, I’d love to hear from you, so maybe tweet at me about it while Twitter’s still alive!
If you’re looking for a production-ready grass asset you can use in your game, then you can’t go wrong with Brute Force’s grass shader:
Acknowledgements
Supporters
Support me on Patreon or buy me a coffee on Ko-fi for PDF versions of each article and to access certain articles early! Some tiers also get early access to my YouTube videos or even copies of my asset packs!
Special thanks to my Patreon backers for August-December 2022!
Alister
Jack Dixon JP Lee Morrie Mr.FoxQC Pisit Praiwattana Phillip Baxley Underwater SUN 川东 唐
FonzoUA Josh Swanson Moishi Rand
Alexis Lessard Brocktoon Harshad Hann Heikki V JP kai Mikel Bulnes Ming Lei mooli Muhammad Azman Nathan Nie nicolo Olly J Paul Froggatt Will Poillion Ying Mo Zachary Alstadt 源 刘
